If you’re using any of the WP Sheet Editor spreadsheets, this post is for you. We’ll show you how to optimize the spreadsheet speed.
Our spreadsheet editors are designed for large websites; they are optimized to be fast, and they work with all the servers.
However, sometimes the spreadsheet might seem a little slow, depending on the settings or server capacity of your site.
Therefore, in this tutorial, we share some tips to make the spreadsheet editor work fast for all sites.
Video Guide
Text Guide
1- Disable unnecessary columns
WP Sheet Editor allows you to load only the columns you want to see/edit. For this, you need to go to Settings > Hide/Display/Sort columns.

Once there, you need to select the columns you’ll hide and drag them to the right side.
That change will apply only for this session, but you have the option to Save these settings for future sessions. Just tick the checkbox if you want.

Finally, click on Apply settings.
2- Search for the rows you want to see/edit
When you open the spreadsheet, all your rows will be loaded. However, you can use the Search tool to search for the rows you want to see/edit. That way, you won’t be dealing with all your content, but only with the specific content you need at that moment.

Once you open the Search tool, you can search for your rows by keyword, status, category, attribute, tag, etc.

Important: This is for WooCommerce. Of course, the search parameters will vary from spreadsheet to spreadsheet. If you’re using the Users spreadsheet, then you’ll be able to search rows by role, and so on.
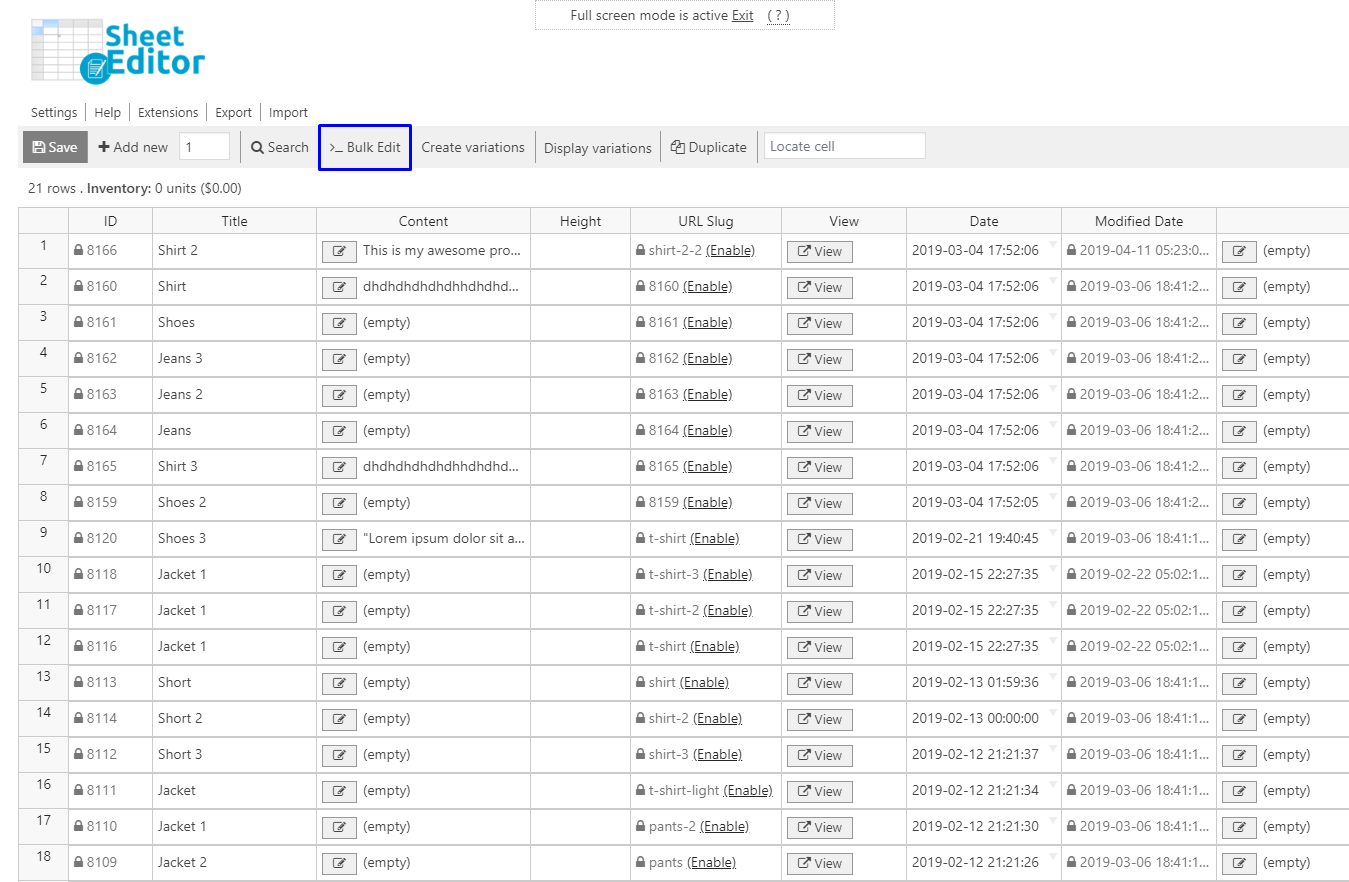
3- Apply changes in bulk instead of individually
This is something that allows you to save time and process changes on hundreds of products in seconds. You can use the Bulk Edit tool to apply changes to hundreds of rows instead editing them one by one.
Here’s an example. These values should be used to decrease the sale prices of hundreds of products by 20%:

- Select the rows that you want to update: I want to search rows to update.
- What field do you want to edit: Sale Price
- Sale type of edit: Decrease by percentage
- Decrease by: 20
- Click on Execute now.
4- Use the Export tool instead of copying your data from the spreadsheet
Imagine you want to copy 5,000 rows with all your WC products or your WP users’ info. It will be difficult to select those 5,000 rows in order to copy them.
Instead, you can use the Export tool, located on the top toolbar.

Once you open it, just select the columns that you want to export and click on Start export, which will generate a CSV file with all your data. Simple as that.

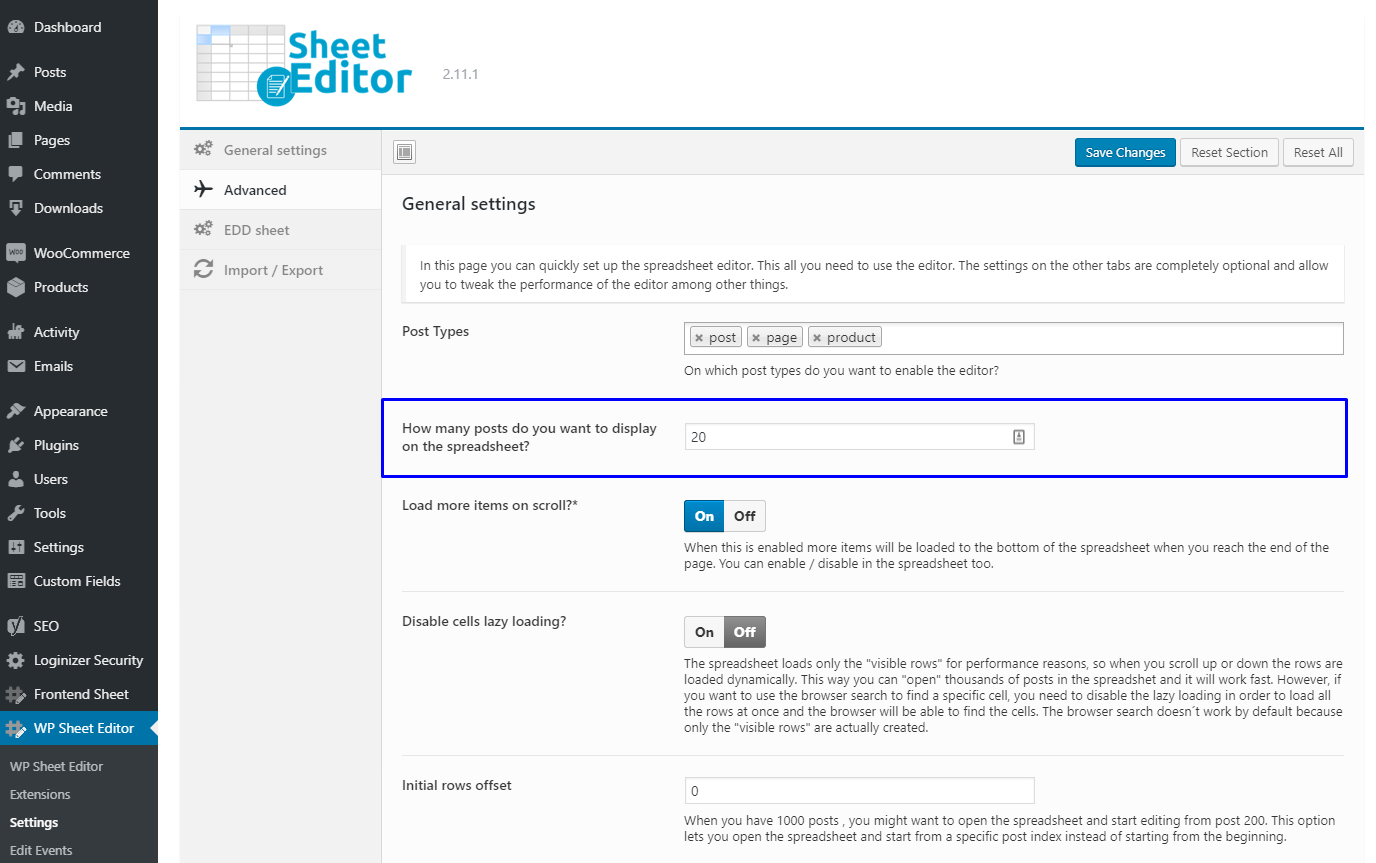
5- Load fewer rows per page
ou can configure how many rows you want to load per page. For example, you may load 20 or just 10. You decide. Just go to Settings > Advanced > How many posts do you want to display on the spreadsheet and enter the number of rows you want to load. Finally, click on Save changes.
6- Wait longer between batches
Sometimes, your server can give errors when trying to save thousands of changes. Therefore, we’ve designed the spreadsheets to give your server a 6-second break between batches.
However, if your server still needs some more time, you can increase the number of seconds it waits between batches. Just go to Settings > Advanced > How long do you want to wait between batches and enter the number of seconds you want your server to wait. Finally, click on Save changes.

7- Disable serialized columns support
Serialized columns could take lots of CPU usage. Therefore, you may want to disable them from the spreadsheet. For this, go to Settings > Advanced > Disable serialized columns support and select the On option. Finally, click on Save changes.

8- Disable product inventory stats
If you’re using the WooCommerce products spreadsheet, the plugin automatically calculates your inventory stats every time you load your rows. However, it can be a process you don’t always need, and you may want to disable it in order to release some CPU and server usage.
For this, go to Settings > Advanced > Disable product inventory stats and select the On option. Finally, click on Save changes.

9- Disable the automatic loading of rows
When you open the spreadsheet, it loads all the rows automatically, but sometimes you may want it to load only the rows you want. Therefore, you can disable the automatic loading of roads by going to Settings > Advanced > Disable the automatic loading of rows and select the On option. Finally, click on Save changes.

Now, every time you open the spreadsheet, it won’t load any row, but you can use the Search tool to load the rows you want to see/edit.

These options will help you optimize the spreadsheet speed so that you can have a better experience with WP Sheet Editor spreadsheets.