Let’s see how to import and export custom checkout fields created by WooCommerce Checkout Manager.
This plugin allows you to create custom fields to be displayed on the checkout page; these fields are saved in the order details. We have created the following four custom fields:
- Birthday
- Delivery Date
- Delivery Time
- Occupation

With these custom checkout fields, we want to do several analyses and prepare some tables in Excel. For example, we want to know the age ranges of our customers and how many of them are students, employees, or retirees.
We could check the orders one by one to see all these data and copy them one by one to an Excel sheet.
However, that would take too long.
That’s why we will use the WooCommerce Orders Spreadsheet plugin.
WooCommerce Orders Spreadsheet
Use an intuitive spreadsheet inside WordPress to:
- View and edit WC orders, subscriptions, memberships, etc.
- Use any field as an advanced search parameter with a few clicks
- Edit hundreds of subscriptions, orders, membership plans, etc.
- Generate reports by exporting subscriptions, orders, or membership plans
- Import order, subscription or membership plan updates
- Bulk edit fields generated by other plugins
- And a lot of things!
You can download the plugin here:
Download WooCommerce Orders Spreadsheet Plugin – or – Check the features
Video Guide
Text Guide
After installing and activating WooCommerce Orders Spreadsheet, you just need to follow a few steps to export and import custom checkout fields to a CSV file.
1- Open the orders’ spreadsheet
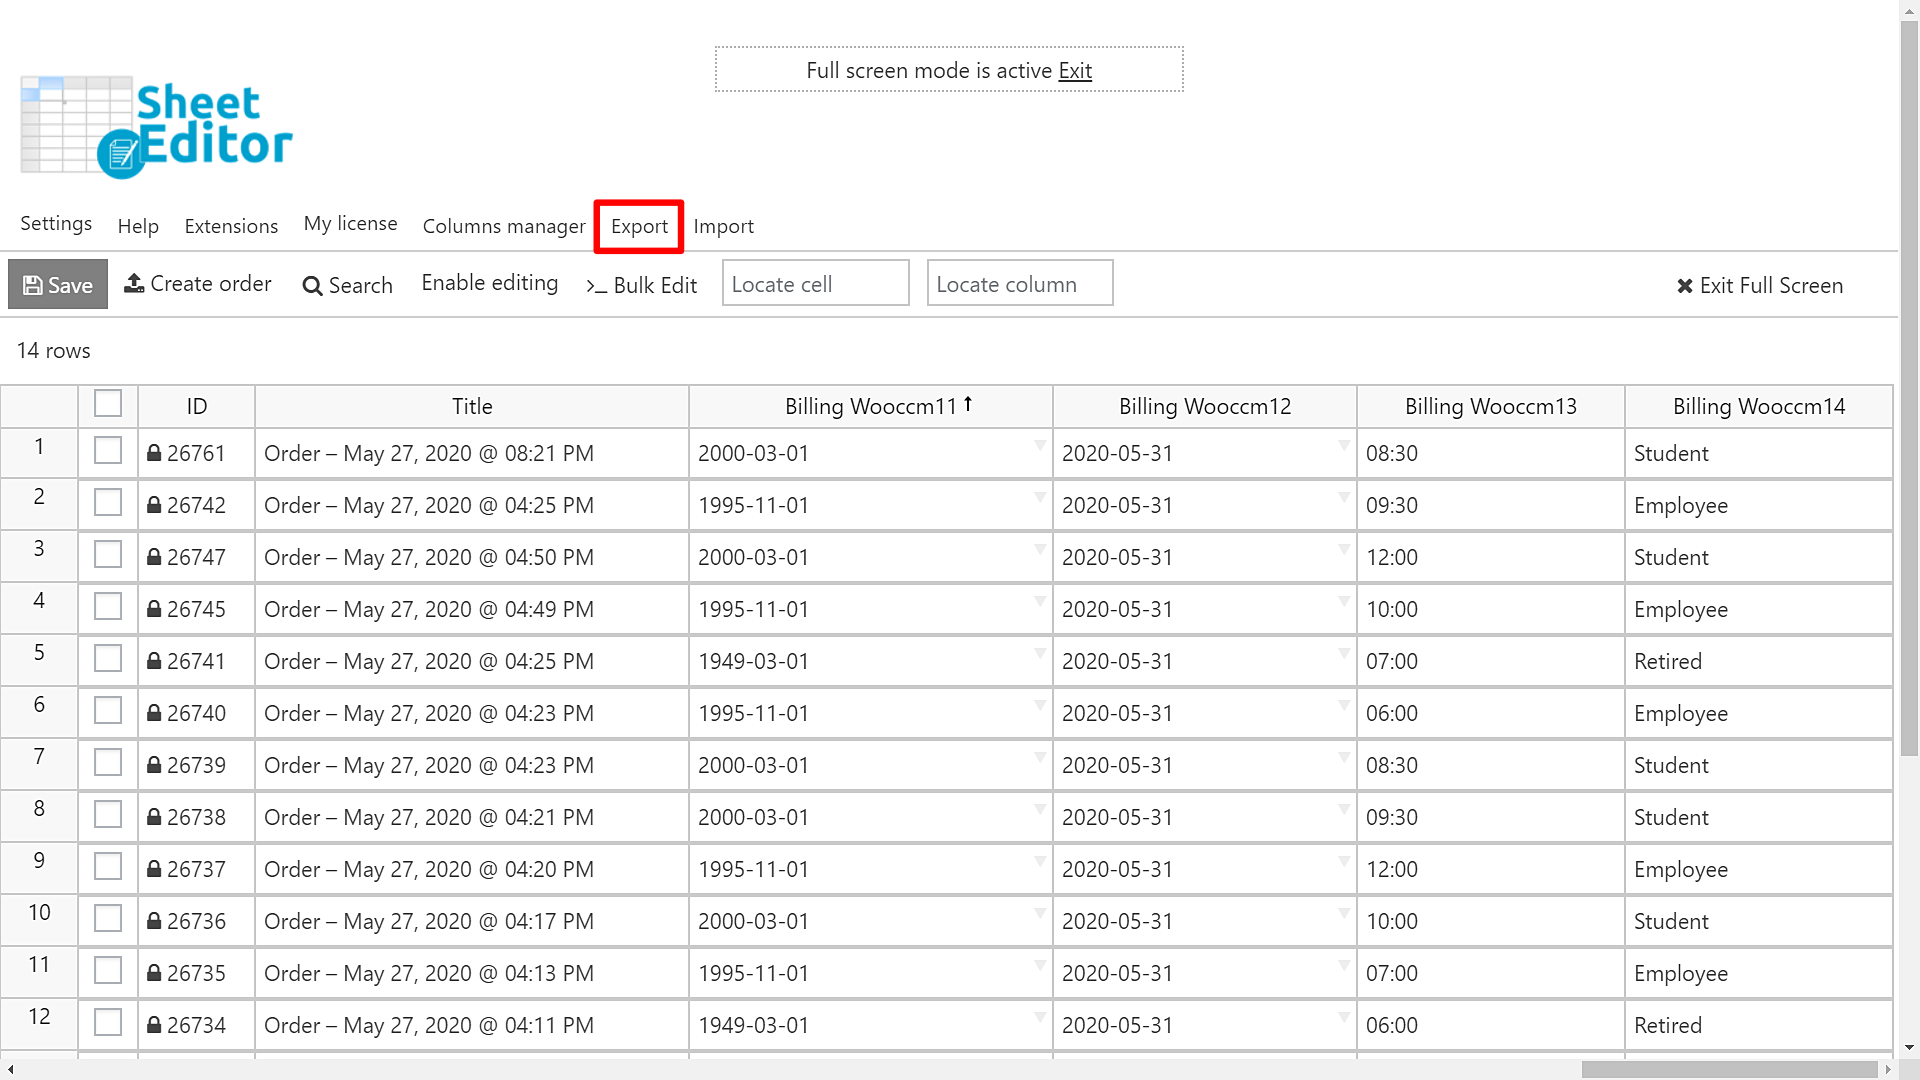
Go to WP Sheet Editor > Edit Orders.
You’ll see all your orders displayed in the spreadsheet as rows and their complete fields displayed as columns.

If you right scroll, you’ll see the WooCommerce Checkout Manager‘s fields displayed in the spreadsheet.
Tip
You can rename the columns to use a friendly name. You can right-click on the Column and select Rename.

2- Export the custom checkout fields to Excel or Google Sheets
To export the custom checkout fields generated by WooCommerce Checkout Manager, you just need to do this:
Click Export on the top toolbar.
The Export tool contains compatibility options for Microsoft Excel 360, Google Sheets, other versions of Excel, etc. Also, you can save the exports for future sessions.
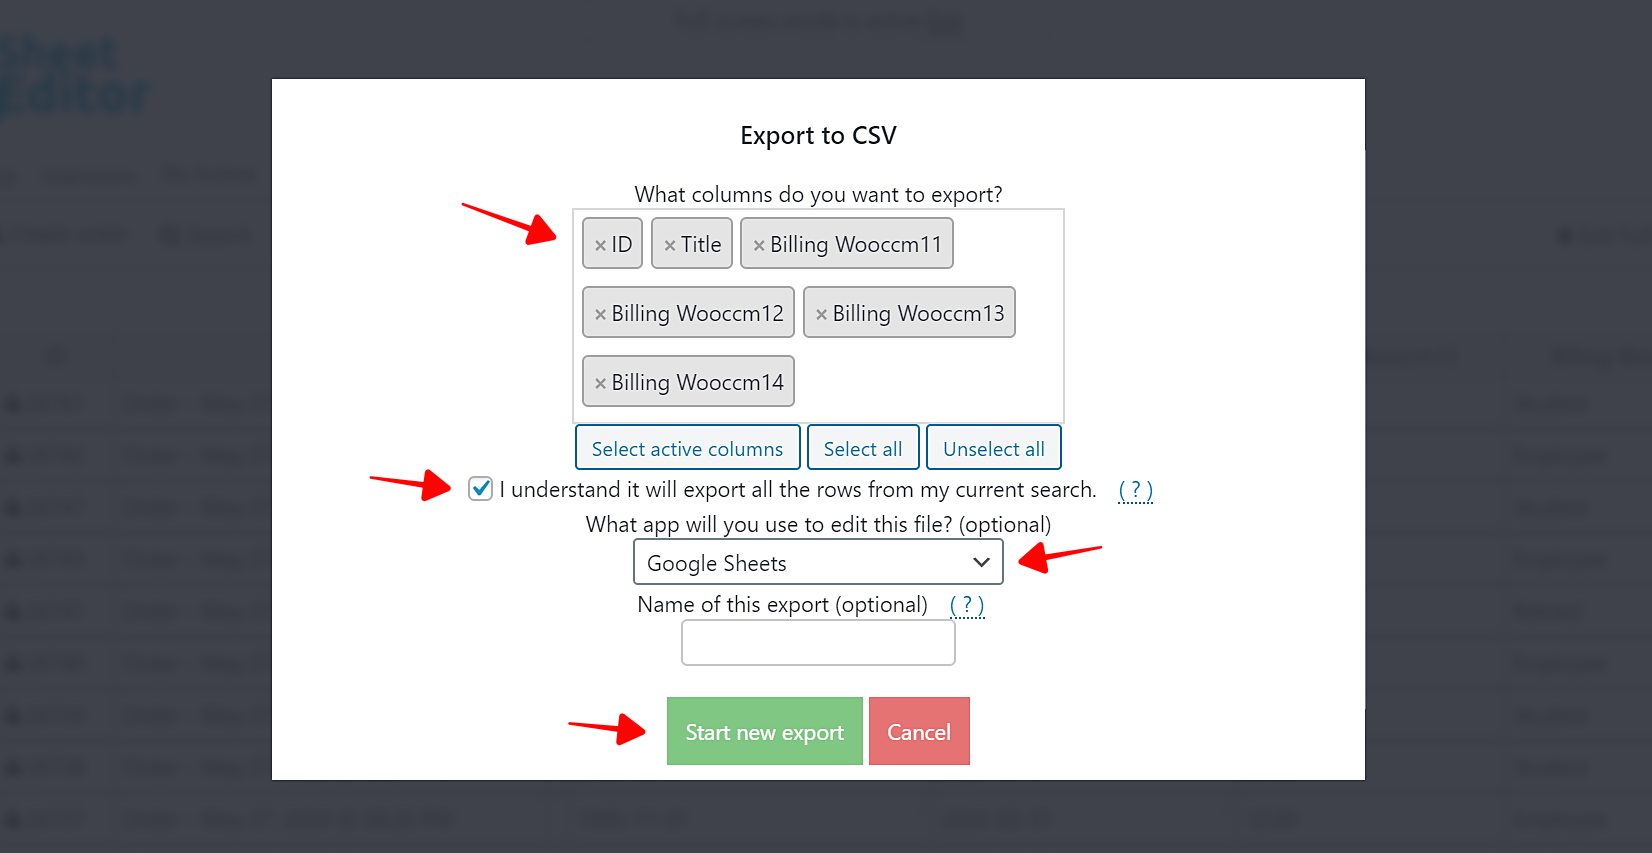
- Select the columns you’ll export in What columns do you want to export. In this case, we’ll select the following columns: ID, Title, Billing Wooccm11, Billing Wooccm12, Billing Wooccm13, Billing Wooccm14.
- Tick the I understand it will export all the rows from my current search checkbox.
- What app will you use to edit this file (optional): Select the app you’ll use to view and edit your CSV file.
- Name of this export (optional): Enter a name for future sessions.
- Click Start New Export to download the CSV file to your computer.
This is how the custom checkout fields look in Excel once they’ve been downloaded in the CSV to our computer.

3- How to Import custom checkout fields from Excel or Google Sheets
Once you export the custom checkout fields in Excel or Google Sheets, you can quickly import them to WooCommerce. You can bulk edit these fields by uploading the information using a CSV field.
a) Open the Import tool with one click.

b) Select the CSV file you’ll upload.
- Source: CSV File from my computer
- CSV file: Click Choose File and select the CSV from your computer.
- Click Next to go on.

c) Click Import all the columns.

d) Select how you’ll import the info and match the CSV files
- Do you want to update or create items: Update existing items, ignore new items
- CSV Field: record_id
- WordPress Field: ID
- Click Next to go on.

e) Finally, click The preview is fine, start import.

After that, all the information will be updated in the spreadsheet.
That was really simple!
As you can see, it only takes a few clicks to generate a CSV with specific fields or all fields as columns. You can easily export the custom checkout fields, edit the information in Excel or Google Sheets, and import it back to WooCommerce.
The WooCommerce Orders Spreadsheet plugin definitely increases your productivity.
You can download the plugin here:
Download WooCommerce Orders Spreadsheet Plugin – or – Check the features