If you manage a WooCommerce store with custom product tabs, you already know how time-consuming it is to update tab content product by product. Opening each item, finding the right tab, editing the content, saving — and then repeating that process hundreds of times — is not a realistic workflow for a growing catalog.
In this guide, you’ll learn how to bulk edit Custom Tabs for WooCommerce fields using a spreadsheet interface, so you can update tab content, replace shortcodes, and rename tab titles across hundreds or thousands of products at once, without opening a single product page.
We’ll use the WP Sheet Editor – WooCommerce Products plugin alongside the Custom Tabs for WooCommerce plugin. The spreadsheet exposes all your custom tab fields as editable columns, making bulk updates straightforward to execute.
You can download the plugin here:
Download WooCommerce Products Spreadsheet Plugin – or – Check the features
What Are Custom Tabs for WooCommerce?
The Custom Tabs for WooCommerce plugin lets you add additional content tabs to your product pages beyond WooCommerce’s default Description and Additional Information tabs. Common use cases include:
- Short Description tab – A concise product summary displayed in a dedicated tab.
- Contact Supplier tab – A contact form connecting customers to specific product suppliers, added via a form shortcode.
- FAQ tab – Frequently asked questions about the product, often inserted using a FAQ plugin shortcode.
- Specifications tab – Detailed technical information, materials, dimensions, or compatibility notes.
- Warranty and Returns tab – Policy information specific to a product group or category.
When you configure these tabs in the plugin, the default content applies to all products. However, if you need different content per product — or per product group — the only native method is to open and edit each product individually. For large catalogs, that approach is not practical.

Why Use WP Sheet Editor to Bulk Edit Custom Tabs?
The WP Sheet Editor – WooCommerce Products plugin displays your entire product catalog as a spreadsheet inside WordPress. Every product is a row, and every field — including your custom tab fields from the Custom Tabs for WooCommerce plugin — is a column you can edit directly.
This means you can:
- Filter products by keyword, category, tag, attribute, price, date, product type, or custom field.
- Apply the same tab content to hundreds of filtered products at once using the Bulk Edit tool.
- Replace shortcodes across an entire product group without touching individual product pages.
- Rename tab titles for specific product types like variable products or products in a particular category.
- Export products to CSV and edit tab fields offline in Excel or Google Sheets, then import changes back.
Once the plugin is installed and activated, open the spreadsheet by going to WP Sheet Editor > Edit Products. All your products will be displayed with their complete data. Scroll to the right to find the Custom Tabs for WooCommerce fields listed as columns — one column per tab title and one per tab content.

The examples below cover the three most common bulk editing scenarios for custom tabs. Each example uses the same core workflow: filter products with the Search tool, then apply changes using the Bulk Edit tool.
Example 1: Edit a Tab’s Content for Products by Keyword
This example shows how to update the Short Description tab content for all shirts in the catalog. The goal is to apply the same description to every product matching the keyword “Shirt” — without opening any individual product.
Step 1: Filter Products by Keyword
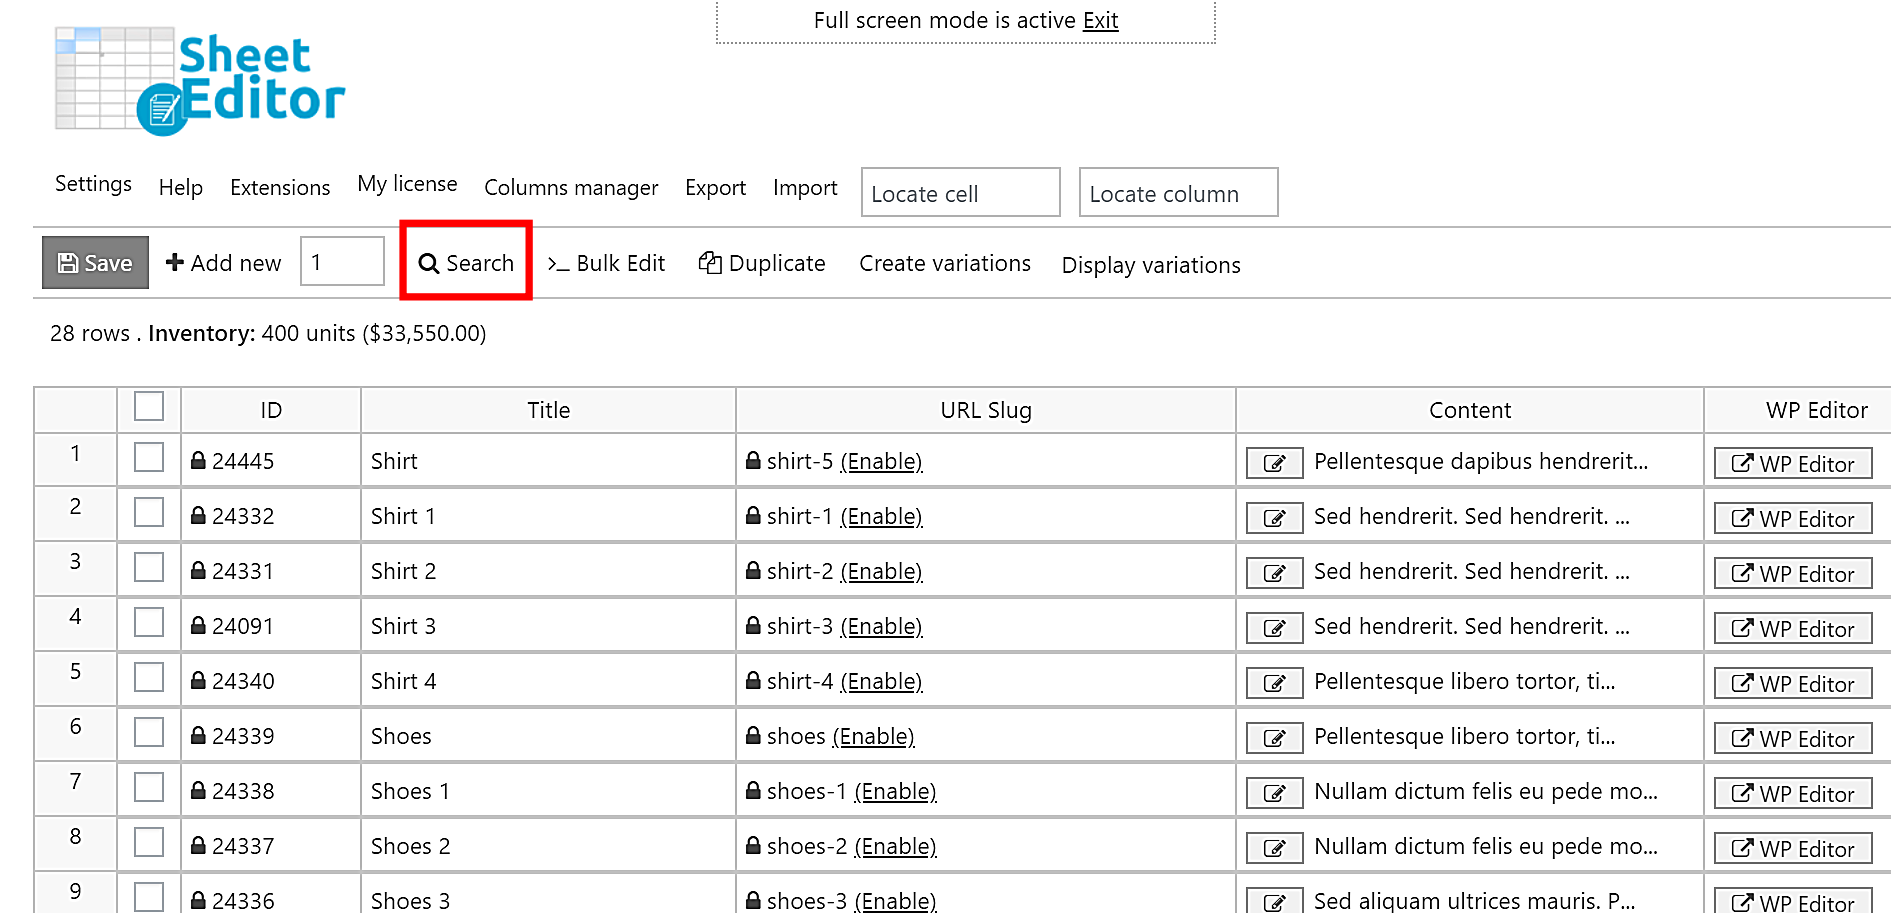
Open the Search tool from the plugin’s top toolbar. This will reveal the Quick Search field. Enter your keyword — in this case, Shirt — and press Enter.

The spreadsheet will reload and display only the products whose titles contain that keyword. This is a quick way to isolate a product group before applying bulk changes.
Step 2: Open the Bulk Edit Tool
Click the Bulk Edit button on the top toolbar. This opens the bulk edit panel where you configure the field you want to change and the value to apply.

Step 3: Configure the Bulk Edit Settings
Set the following values to update the Short Description tab for all filtered products:

- Select the rows that you want to update: Edit all the rows from my current search (including non-visible rows).
- What field do you want to edit: Select Yikes Woo Products Tabs: Content: 1 — this corresponds to the first custom tab’s content field (Short Description tab in this setup).
- Select type of edit: Set value.
- Replace existing value with this value: Enter the new tab content you want to apply to all matching products.
- Click Execute Now.
The plugin will apply the new content to every product from your current search. Once complete, you’ll see the updated value in the spreadsheet. Your customers will immediately see the new tab content on the product pages.

Note about field numbering: The Yikes Woo Products Tabs: Content: 1 field maps to the first tab in your custom tab configuration. If you have multiple custom tabs, Content: 2 is the second, Content: 3 is the third, and so on. The numbering follows the order you set up tabs in the Custom Tabs for WooCommerce plugin settings.
Example 2: Replace a Contact Form Shortcode by Category, Attribute, or Tag
This example shows how to replace the contact form shortcode in the Contact Supplier tab for all products in the Fashion category. This is a common scenario when different product groups need different supplier contact forms — for example, technology products using one form and fashion products using another.
Step 1: Filter Products by Category
Open the Search tool from the top toolbar.

Enter Fashion in the Enter Tags field. This field accepts categories, tags, attributes, and shipping classes — not just tags. Click Run search to load all products in that category into the spreadsheet.

In this example, the spreadsheet shows that the Fashion category products currently have “Technology Supplier” as the contact form shortcode in their Contact Supplier tab. That needs to be replaced with the correct “Fashion Supplier” form.

Step 2: Open the Bulk Edit Tool
Click the Bulk Edit button on the toolbar.

Step 3: Configure the Bulk Edit Settings
Set the following values to replace the Contact Supplier tab’s shortcode for all Fashion category products:

- Select the rows that you want to update: Edit all the rows from my current search (including non-visible rows).
- What field do you want to edit: Select Yikes Woo Products Tabs: Content: 2 — this corresponds to the Contact Supplier tab’s content field in this setup.
- Select type of edit: Set value.
- Replace existing value with this value: Paste in the new contact form shortcode for the Fashion Supplier.
- Click Execute Now.
The plugin replaces the shortcode across all Fashion category products at once. The updated shortcode will appear in the spreadsheet and render the correct contact form on each product’s front-end tab.

This same approach works for any field that contains shortcode content — FAQ tabs, review widgets, embedded content, or custom HTML blocks. Filter your target product group, open the Bulk Edit tool, select the correct Yikes Woo Products Tabs: Content field number, and paste your new shortcode.
Example 3: Rename a Tab’s Title for Variable Products
This example shows how to rename the Short Description tab title to More Info about Variations for all variable products. This is useful when you want to present the tab differently depending on the product type — for example, using more specific language for products that have multiple variations.
Step 1: Filter Variable Products Using Advanced Search
Click the Search tool on the top toolbar.
To filter specifically by product type, you need to use the advanced filters. Set the following values:

- Tick the Enable advanced filters checkbox.
- Field: Type (product_type)
- Operator: =
- Value: variable
- Click Run search.
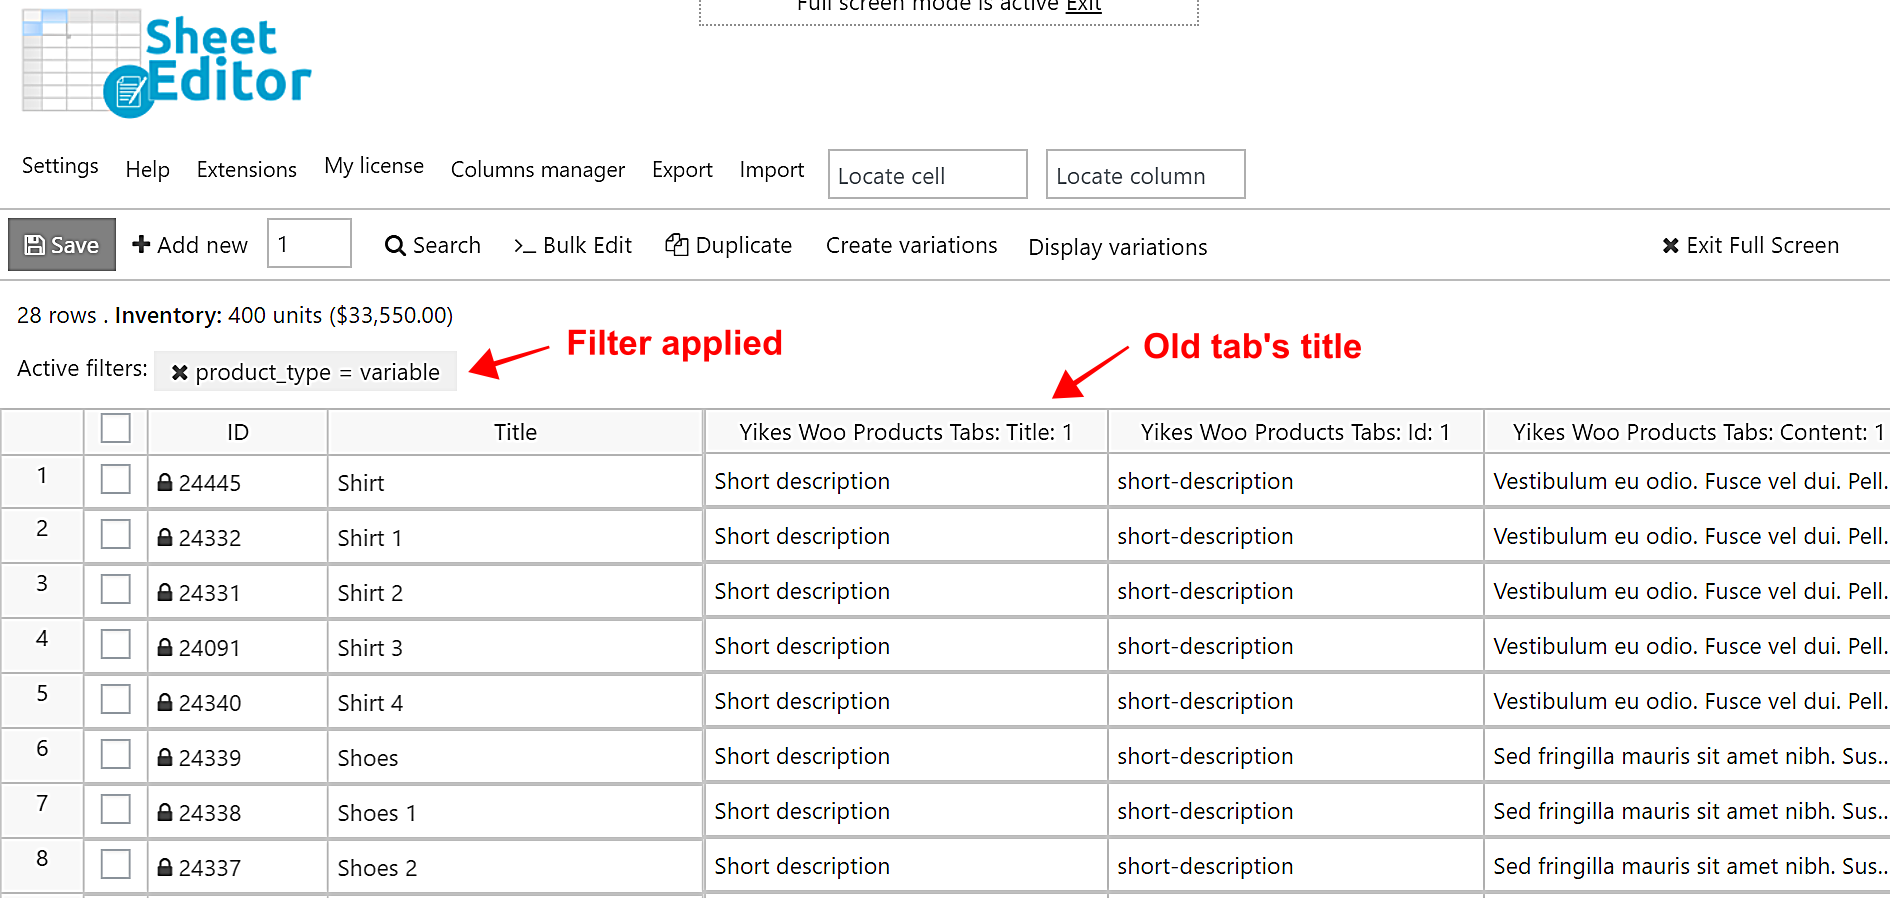
The spreadsheet will reload showing only your variable products. You can confirm that the current tab title is Short description by reviewing the relevant title column.
Step 2: Open the Bulk Edit Tool and Set the New Title
Open the Bulk Edit tool and configure the following values to rename the tab title across all variable products:

- Select the rows that you want to update: Edit all the rows from my current search (including non-visible rows).
- What field do you want to edit: Select Yikes Woo Products Tabs: Title: 1 — this is the title field for the first custom tab (Short Description tab in this setup). To rename a different tab, select the corresponding Title: 2, Title: 3, etc.
- Select type of edit: Set value.
- Replace existing value with this value: Enter the new title — in this case, More Info about Variations.
- Click Execute Now.
The new tab title will be applied to all variable products. Customers browsing those products will see the updated tab label on the product page.

Custom Tab Field Reference: Content vs. Title Fields
When using the Bulk Edit tool with Custom Tabs for WooCommerce, it helps to understand how the field names map to your tab configuration:
- Yikes Woo Products Tabs: Title: 1 — The visible label for your first custom tab.
- Yikes Woo Products Tabs: Content: 1 — The body content or shortcode inside your first custom tab.
- Yikes Woo Products Tabs: Title: 2 — The label for your second custom tab.
- Yikes Woo Products Tabs: Content: 2 — The content inside your second custom tab.
The numbering follows the order of tabs as configured in Custom Tabs for WooCommerce. If you’re unsure which number corresponds to which tab, open the spreadsheet and scroll to the custom tab columns. Look at a few existing products to confirm which field holds which tab’s data before running a bulk edit.
Additional Bulk Editing Scenarios
The same workflow applies to many other scenarios beyond the three examples above. Here are situations where bulk editing custom tab content is particularly useful:
- Updating warranty information: Filter products by category and apply the same warranty policy text to all items in that group.
- Swapping FAQ shortcodes: Replace outdated FAQ plugin shortcodes with a new format across all products at once.
- Adding seasonal messaging: Bulk add a notice (e.g., holiday shipping delays) to a specific tab for all published products, then remove it after the season by setting the value back to empty.
- Correcting import errors: After importing products, tab content may be malformed or empty. Use the Search tool to filter affected products and apply the correct content in bulk.
- Standardizing content across suppliers: If products from different suppliers have inconsistent tab content, filter by tag or attribute and rewrite each group’s tabs to match your store’s standards.
How to Find Products Where Tab Content Is Empty
If you need to identify products that are missing tab content — for example, products that have no Short Description tab entry — you can use the advanced search filters in the Search tool.
- Tick Enable advanced filters.
- Set the Field to the relevant custom tab content column (e.g., Yikes Woo Products Tabs: Content: 1).
- Set the Operator to =
- Leave the Value field empty.
- Click Run search.
The spreadsheet will return only the products where that tab is empty. You can then use the Bulk Edit tool to populate those fields, or review them individually in the spreadsheet cells.
Managing Custom Tab Updates at Scale
For stores with very large catalogs, it’s worth noting that all three examples above work on all matching products simultaneously, including products that aren’t visible on the current spreadsheet page. The option “Edit all the rows from my current search (including non-visible rows)” ensures the bulk edit applies to every product that matches your filter, not just the ones currently visible on screen.
If you prefer to work offline or delegate tab content editing to a team member who doesn’t need WordPress access, you can also export your products to a CSV file, edit the custom tab fields in Excel or Google Sheets, and import the changes back. The Export and Import tools in WP Sheet Editor are fully compatible with custom tab fields.
As the examples above demonstrate, updating Custom Tabs for WooCommerce fields across your entire catalog no longer requires editing products one by one. Whether you’re replacing shortcodes, rewriting tab content for a specific product group, or renaming tab labels by product type, the entire process takes a few clicks in the spreadsheet.
You can download the plugin here:
Download WooCommerce Products Spreadsheet Plugin – or – Check the features