Learn with us how to bulk edit the image captions in a WordPress media library spreadsheet.
This can be useful in different cases
For example, imagine you get an email from a photographer asking you to give him credit for the photos you’ve used on your website.
You have two options: Either you give him credit today, or you’ll have to remove the photos tomorrow.
If not, he’s willing to go to court to fight with you and ask you a good amount of money.
You don’t have any problem giving him credit.
The problem is that you have used nearly a hundred photos by that photographer, and now you need to find them and edit their caption one by one. That sounds really boring!
However, you don’t need to worry, since we want to show you how to bulk edit image captions easily and fast. You just have to follow some simple steps.
Install the Media Library Spreadsheet plugin
This plugin completely simplifies your media library management.
It allows you to filter and edit hundreds of files in seconds with its advanced Search and its Bulk Edit tool.
You can download the plugin here: Download Media Library Spreadsheet Plugin - or - Check the features
Here you have the steps with screenshots for you to follow and edit the image captions in the WordPress Media Library.
1- Open the Media Library Spreadsheet
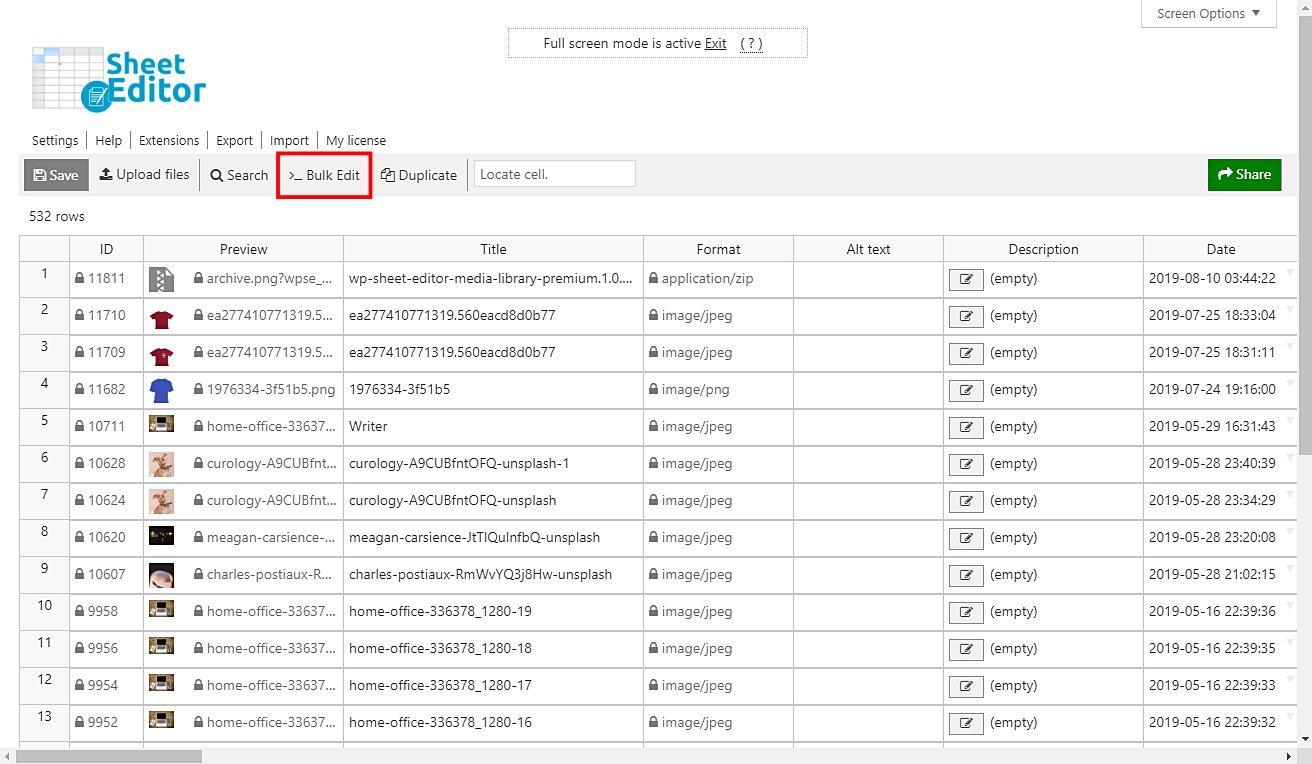
Once you’ve installed the plugin, go to Sheet Editor > Edit Media, and you’ll see a spreadsheet containing all your media files and their complete information.
2- Open the Bulk Edit tool
The Bulk Edit tool helps you apply changes massively to your media library.
Therefore, you need to open it by clicking on Bulk Edit on the plugins’ toolbar.
3- Filter the images you’ll edit
Something great about the Media Library Spreadsheet is that you can filter all your images in several ways.
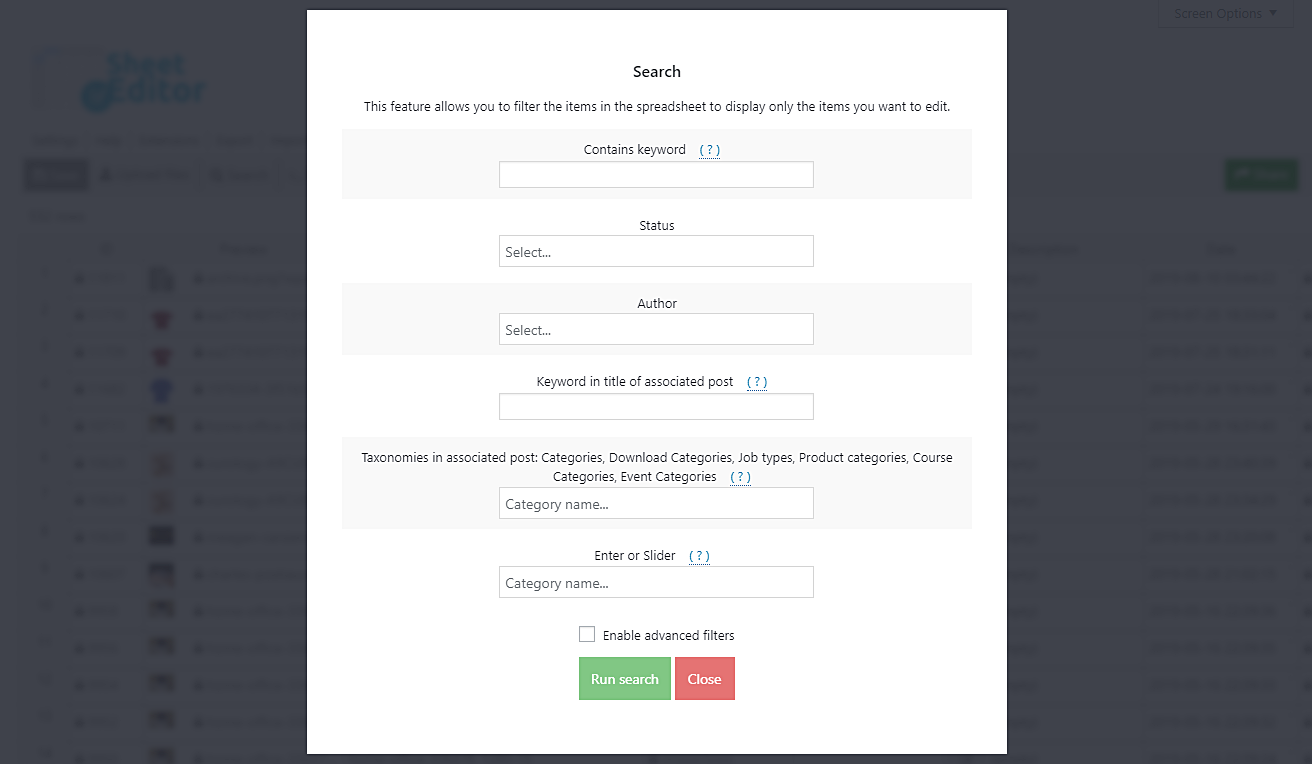
For that, you just need to select the I want to search rows to update option in the Select the rows that you want to update dropdown.
This will open a search tool that contains these search fields.
- Contains keyword: Enter a specific word and the plugin will filter all files containing it.
- Status: Published, Draft, Private, etc.
- Author: Enter any author’s name to filter all the files containing it.
- Keyword in title or associated post: Enter any word and the plugin will filter all files by the post they’re associated with.
You can use any of those search fields combined with the following values.
Remember that you need to edit all the images, but the spreadsheet shows all kinds of media.
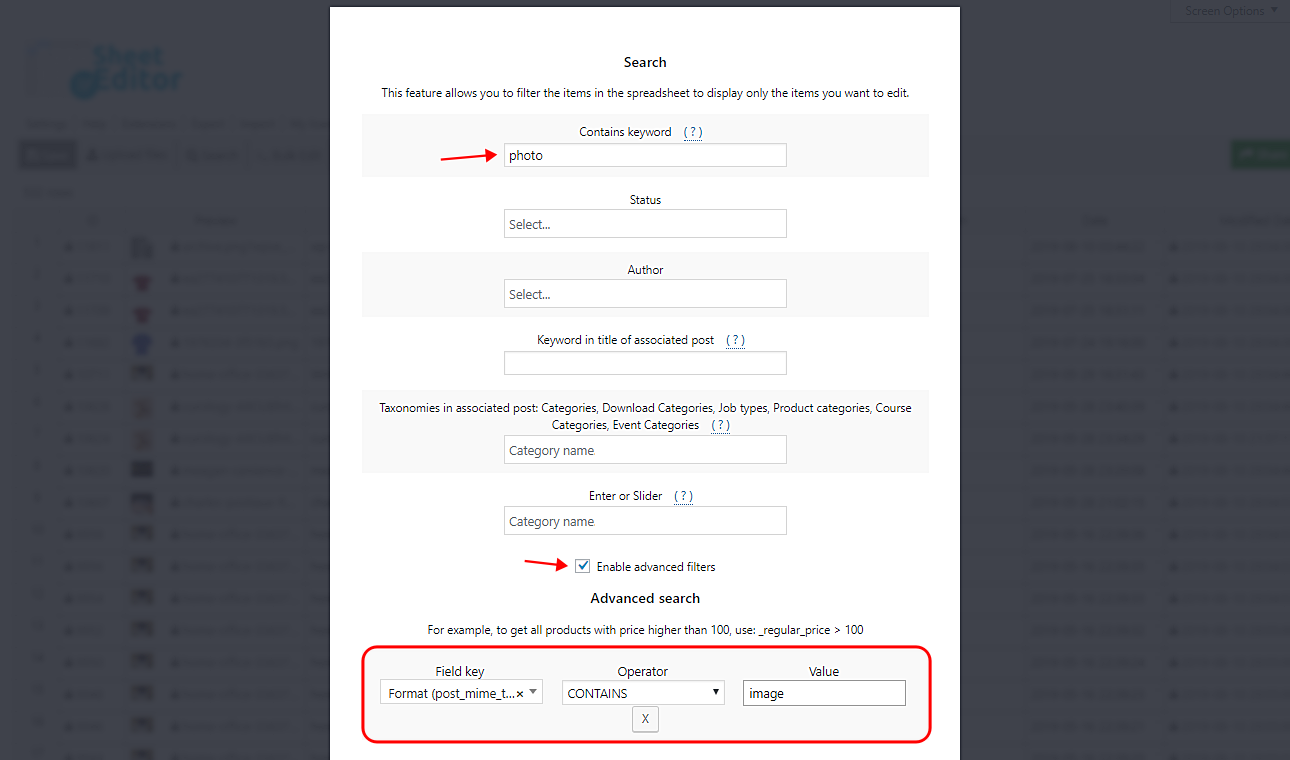
Therefore, tick the Enable advanced filters checkbox and set these values to filter the images only.
- Field key: Format
- Operator: CONTAINS
- Value: image
For example, if you want to search all images by keyword, just enter the keyword in the Contains keyword field and then go to the advanced filters and use the values we just explained to filter the images.
Finally, click on Run search to filter all the images. This will take you back to the Bulk Edit fields.
4- Set the new caption for all filtered images
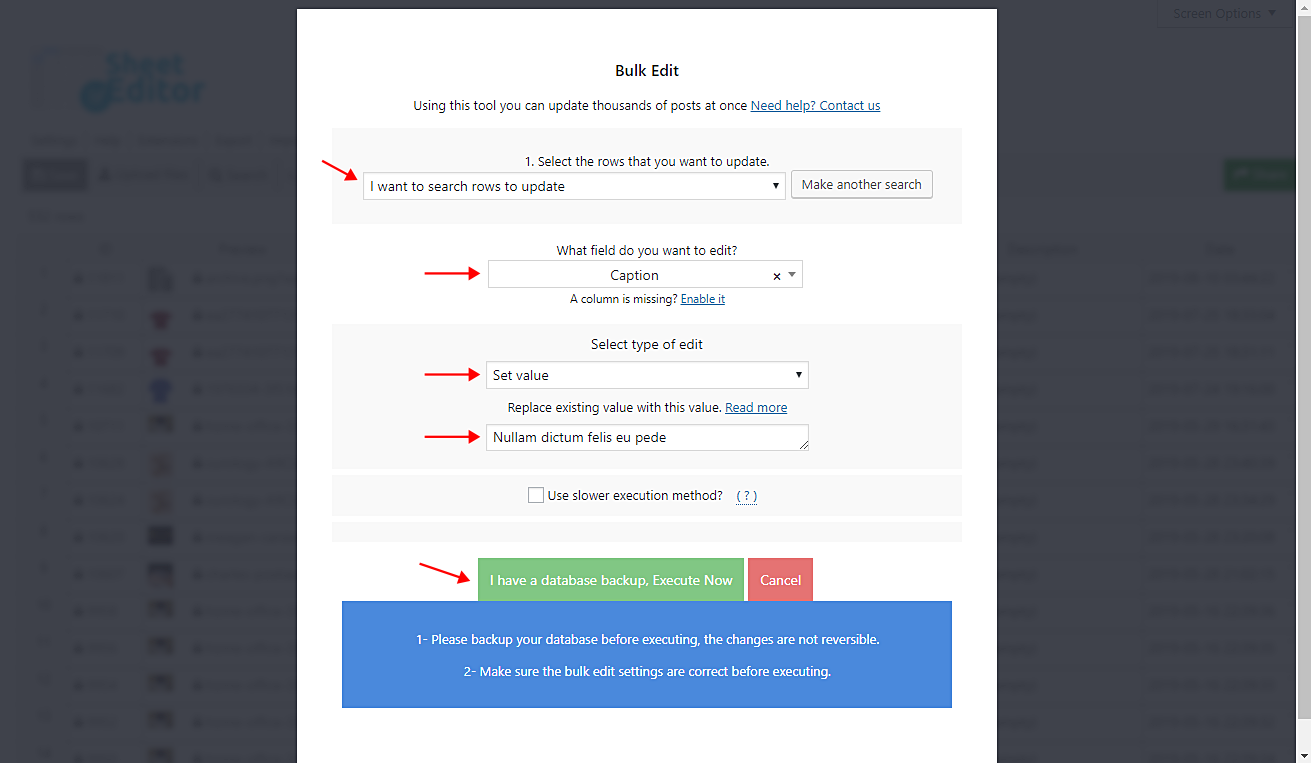
Now that you have filtered your images, you need to set these values to set a new caption for all the filtered images.
- Select the rows that you want to update: I want to select rows to update
- What field do you want to edit: Caption
- Select type of edit: Set value
- Replace existing value with this value: Enter the new caption.
- Click on Execute now
Done!
As you can see, to bulk edit image captions in the WordPress media library spreadsheet is very convenient.
Now you don’t have to get into legal trouble. Your content won’t be affected, and your money is safe.
You didn’t have to spend long hours searching and editing the images one by one.
This is one of the many advantages the Media Library Spreadsheet gives you.
You can download the plugin here: Download Media Library Spreadsheet Plugin - or - Check the features


