Creating or updating an e-learning curriculum in Tutor LMS involves much more than just writing content. You need to create or modify course pages, configure access settings, assign instructors, adjust difficulty levels, and manage student limits. When you are launching a new academy with dozens of courses—or maintaining and improving an existing one—clicking “Add New” or editing each course individually is simply not a viable strategy.
Do you need to migrate course data from another LMS or a CSV file? Or perhaps your instructional design team prefers to draft and refine course structures, descriptions, and settings in a shared Google Sheet before publishing or updating them on the site?
In this tutorial, we will show you how to import Tutor LMS courses directly from Google Sheets. This allows you to bulk create new courses or update existing ones in minutes, ensuring your titles, URLs, and course settings stay consistent and optimized from day one—and over time.
Related tutorial: How to Export Tutor LMS Courses to Google Sheets
Why import Tutor LMS courses from Google Sheets?
Importing your courses from a Google Sheets spreadsheet is the fastest way to populate and maintain your e-learning site. This workflow is perfect for:
- Bulk creation: Create hundreds of course shells (Titles, Descriptions, Status) in seconds so your team can start adding lessons and quizzes immediately.
- Bulk updates: Quickly update existing courses—such as descriptions, instructors, or limits—without editing them one by one.
- Platform migrations: If you are moving from Teachable, LearnDash, or another LMS, you can format your exported data in Google Sheets and map it directly into Tutor LMS.
- Offline preparation: Have your subject matter experts draft and revise course materials in a familiar spreadsheet environment without needing WordPress administrator access.
What you need to import your courses
To bypass the slow default WordPress post creation interface, we will use these WP Sheet Editor tools:
WP Sheet Editor – Courses
This plugin generates spreadsheets for your Tutor LMS courses, lessons, topics and quizzes inside your WordPress dashboard, where you can view, edit, and import Tutor LMS content.
You can purchase the plugin here:
Google Sheets Sync
This service connects your WP Sheet Editor spreadsheets directly to your Google account, allowing you to pull data straight from the cloud without downloading messy CSV files.
You can sign up to the service here:
Sign up to the Google Sheets Sync Service - or - Check the features
Important: Just as you can import courses, you can also import lessons, topics, and quizzes. Simply follow the same steps in the corresponding WP Sheet Editor spreadsheet.
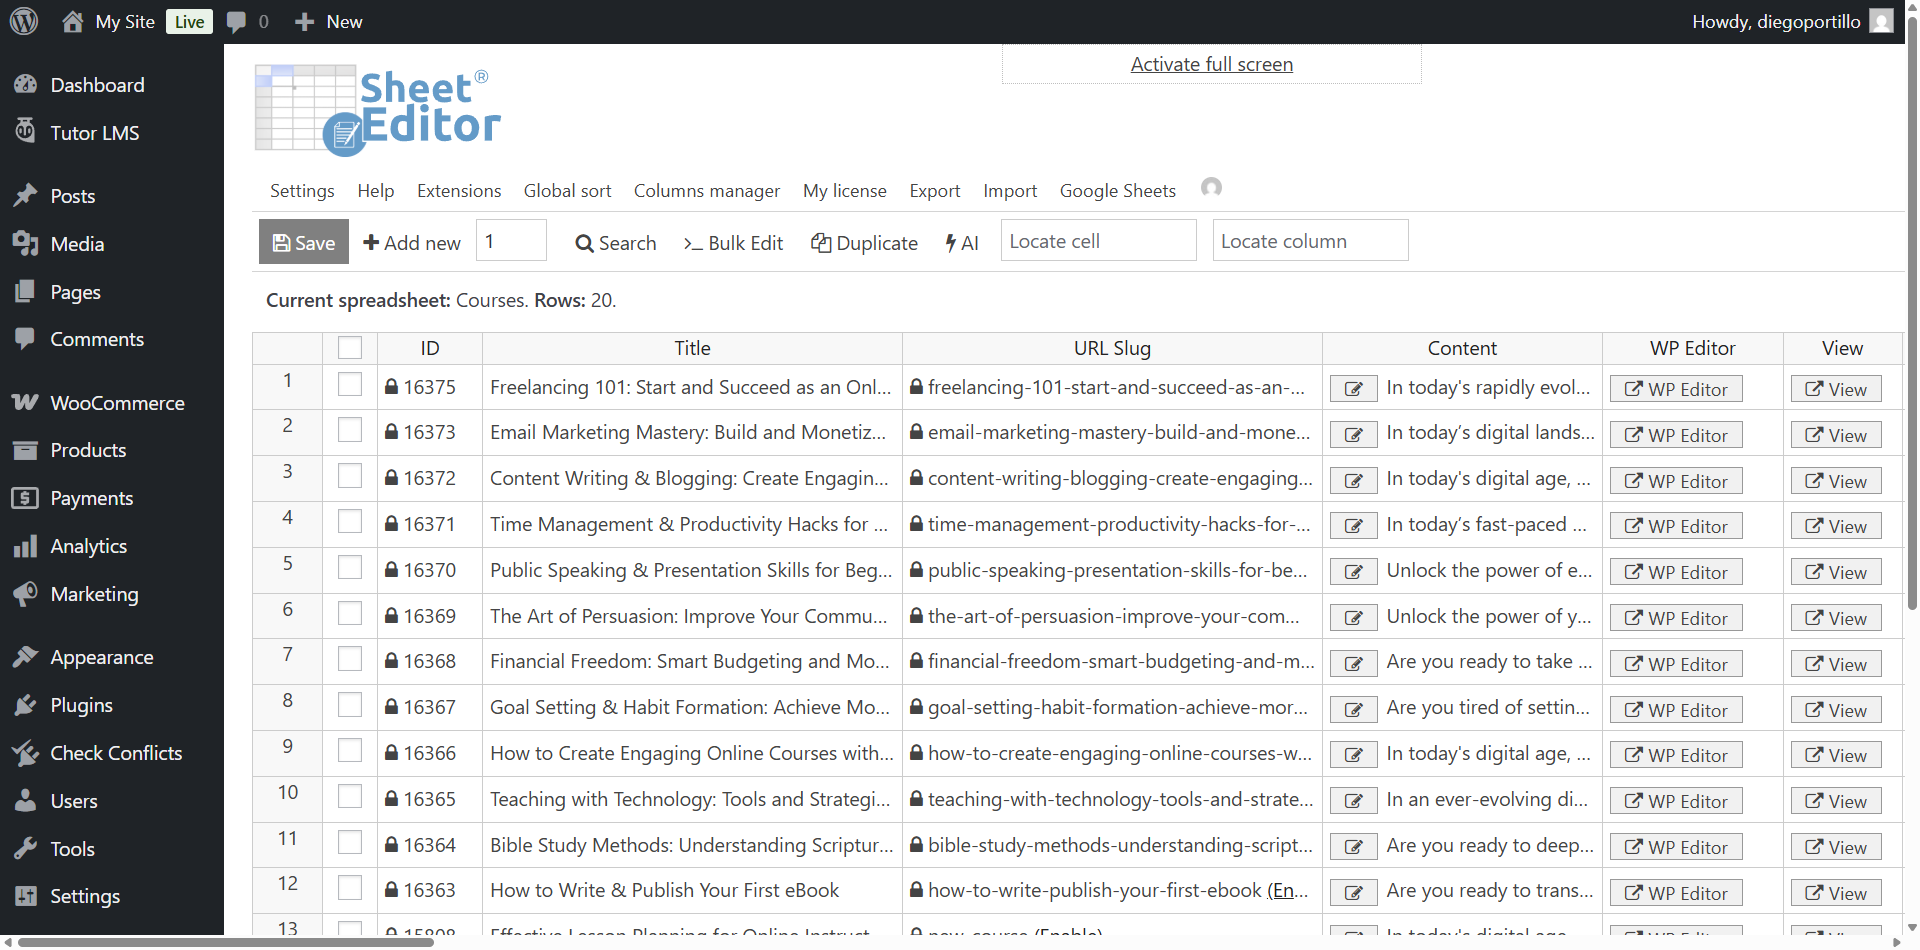
Step 1. Open the courses spreadsheet
Go to WP Sheet Editor > Edit courses to open the courses spreadsheet.
Step 2. Connect WordPress to Google Sheets
When you subscribe to the Google Sheets Sync service, you will receive a helper plugin that securely connects your WordPress site with your Google account.
Follow our installation guide to complete the setup and authorize the Google API connection.
Step 3. Export first and prepare your Google Sheet
Before importing anything, you should export at least one existing course from your site. This step is essential because it gives you a ready-made template with the correct column structure and field names required by Tutor LMS.
Additionally, this step is required because our Google Sheets Sync service can only access and sync spreadsheets that were originally created through the service itself. This means you cannot import data from arbitrary or manually created Google Sheets files—you must first generate the sheet via an export.
Related tutorial: How to Export Tutor LMS Courses to Google Sheets
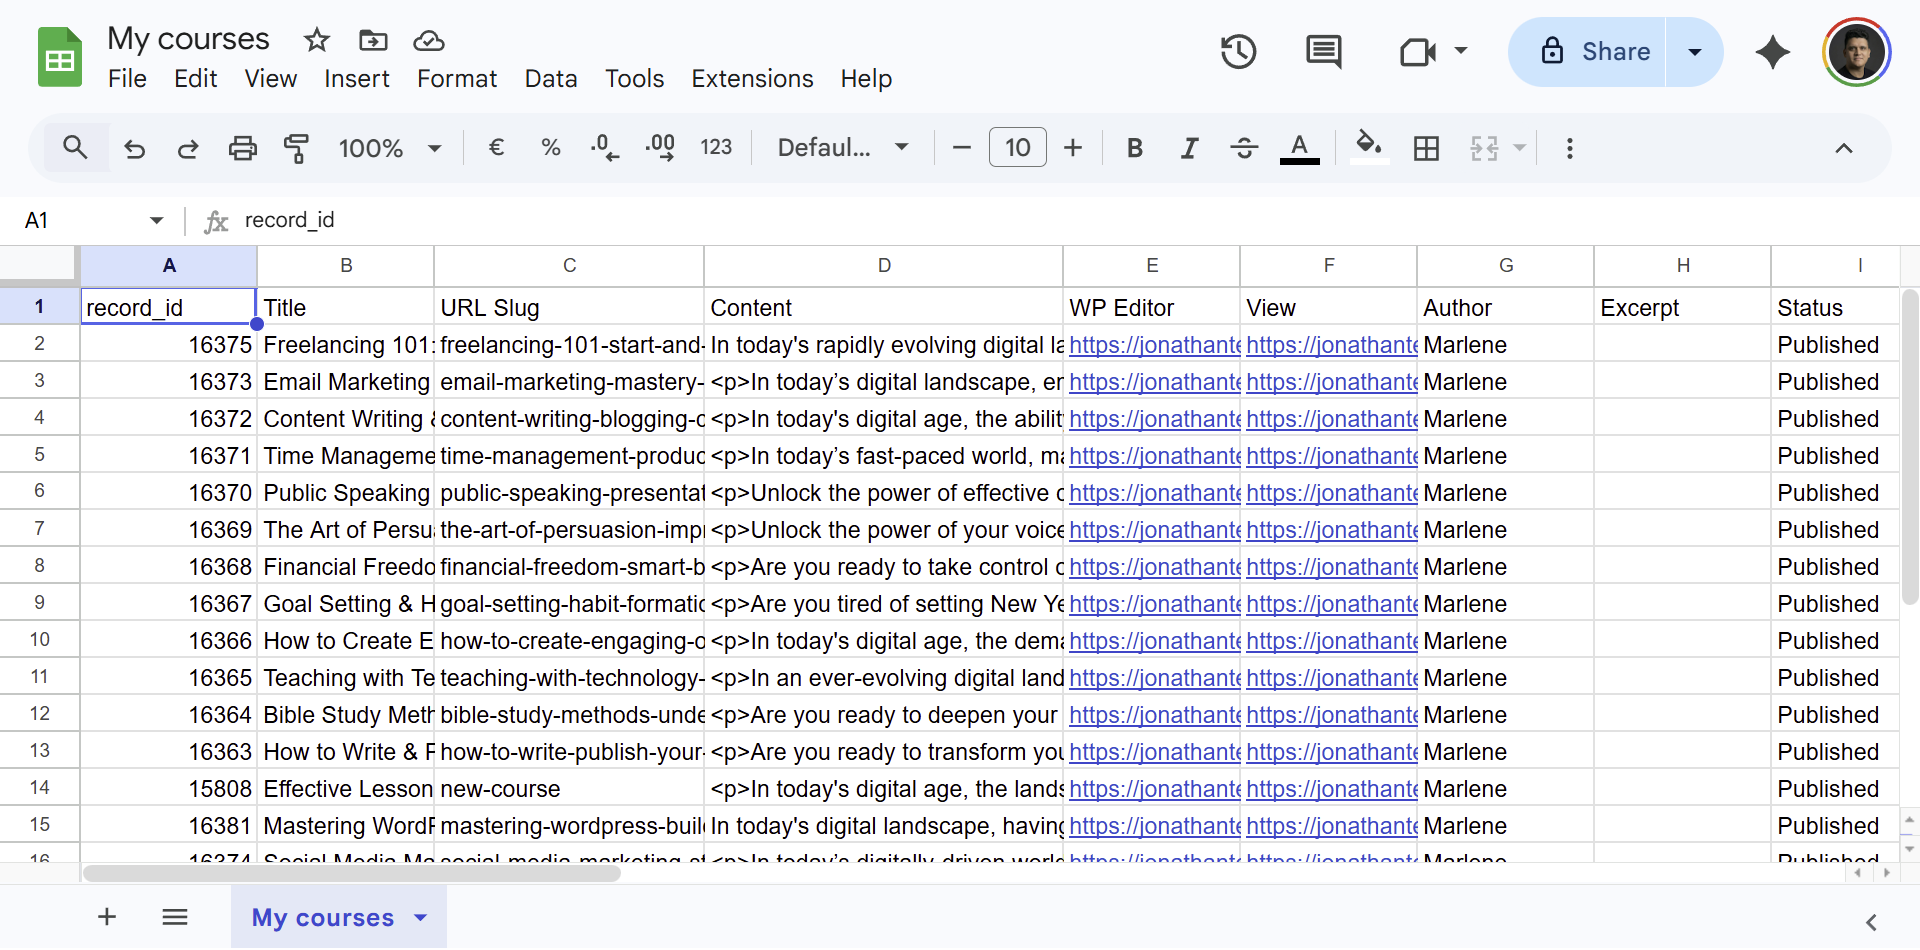
Once you have exported your courses, use that file as your base template in Google Sheets. From there, you can safely create new courses or update existing ones without worrying about mismatched fields.
Make sure to include essential columns such as:
- Title: The name of the course.
- Content: The main course description.
- Status: Use publish to make it live, or draft to keep it hidden while you work on it.
- Author: The username or ID of the instructor.
- Course Difficulty: E.g., beginner, intermediate, expert.
- Maximum Students: The numeric limit of enrollments.
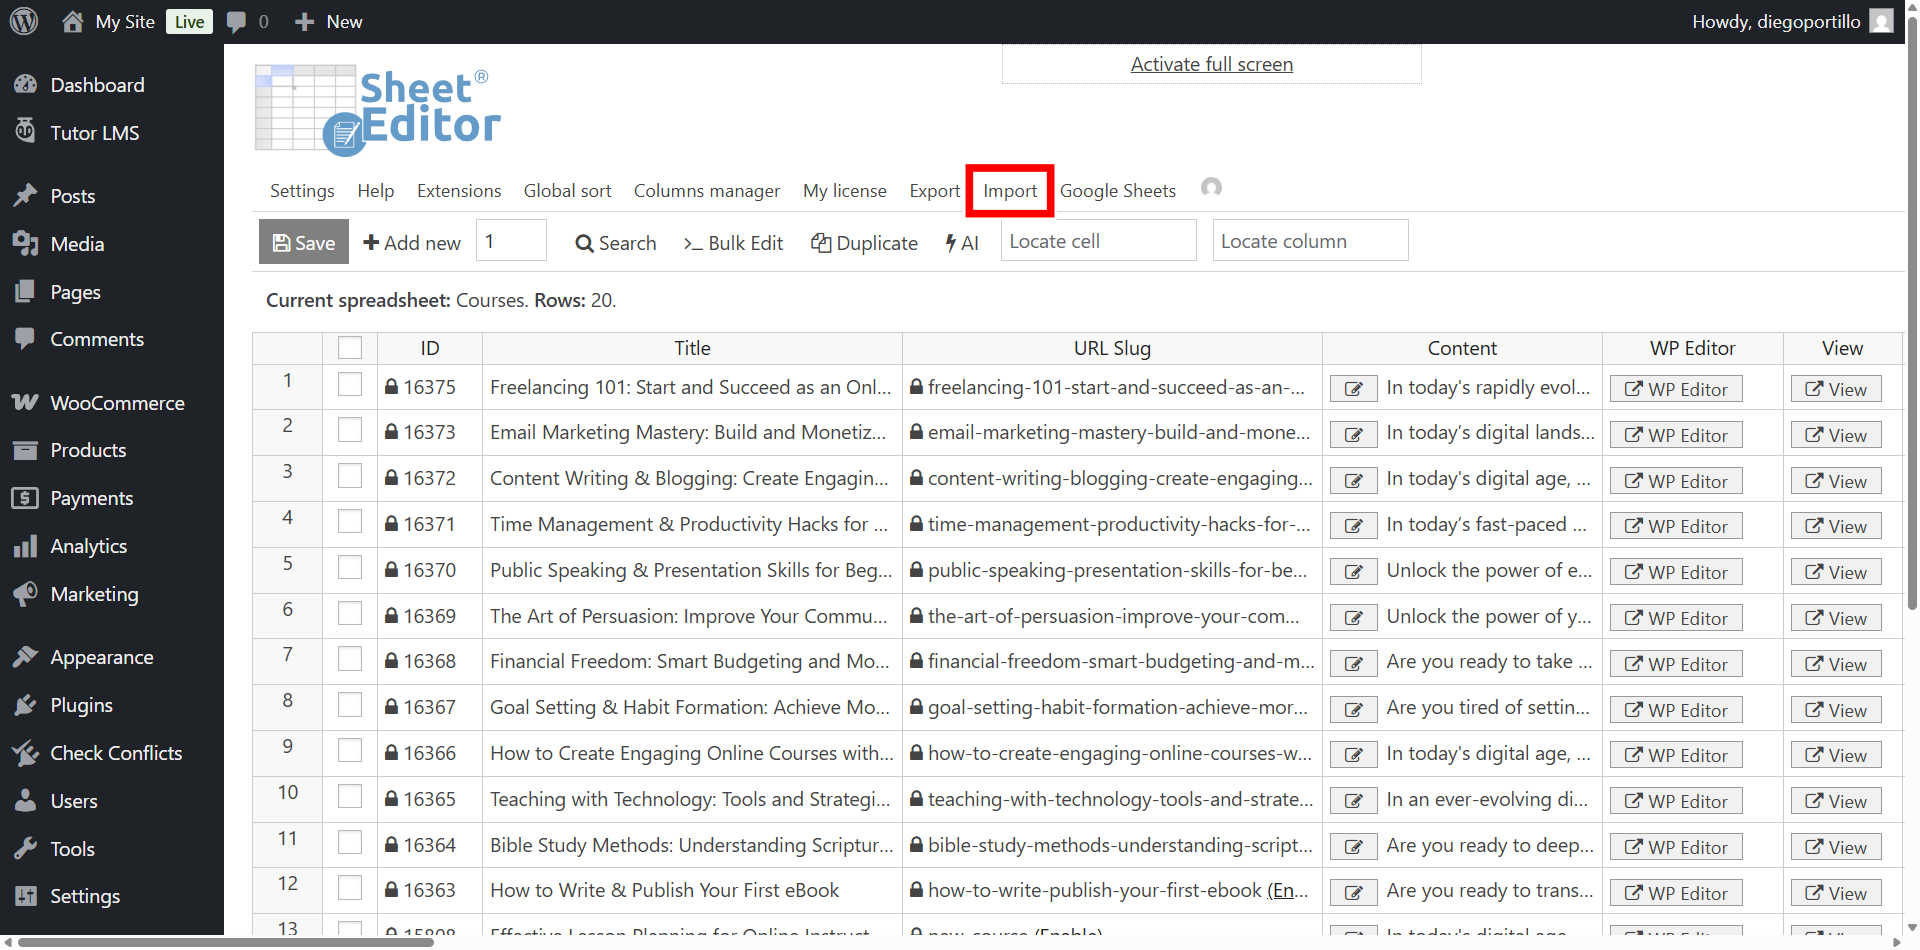
Step 4. Import Tutor LMS Courses to WordPress
Once your Google Sheet is populated with your course data (new, updated, or both), it is time to bring it into your WordPress site.
Click on the Import tool on the toolbar.
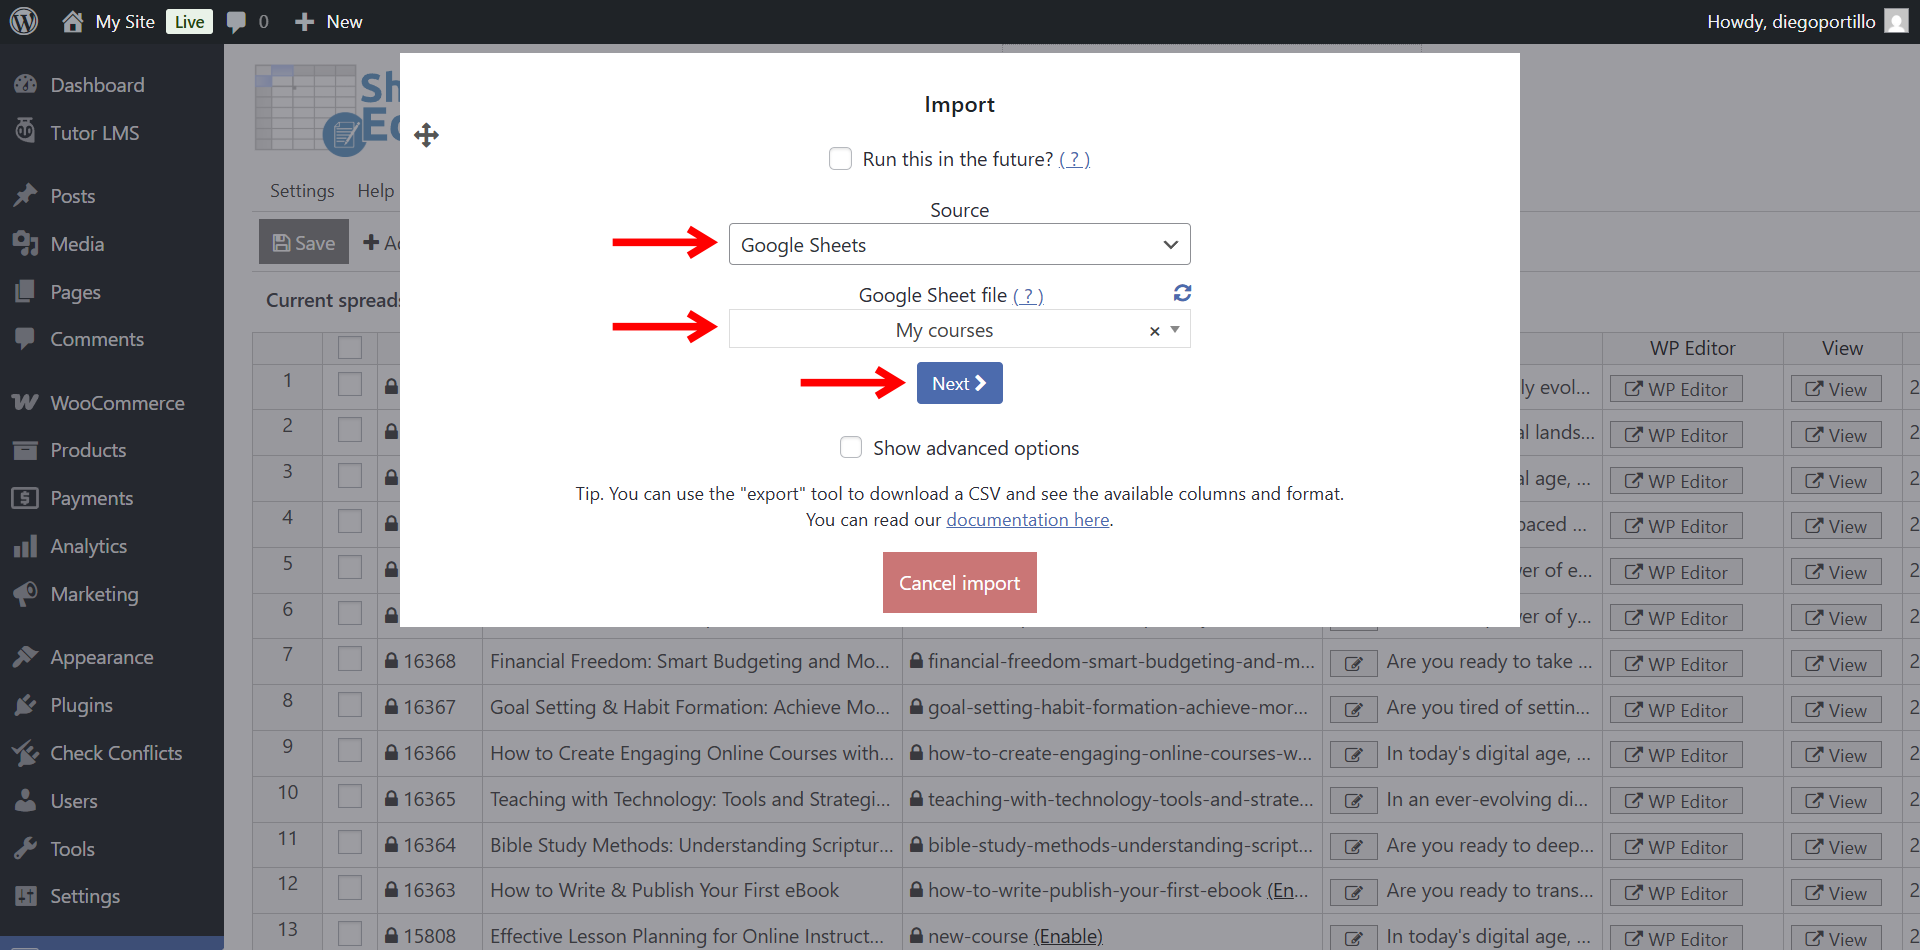
Follow these steps in the import wizard:
- Source: Select Google Sheets.
- Google Sheet file: Select the spreadsheet containing your courses from the dropdown list.
- Click on Next.
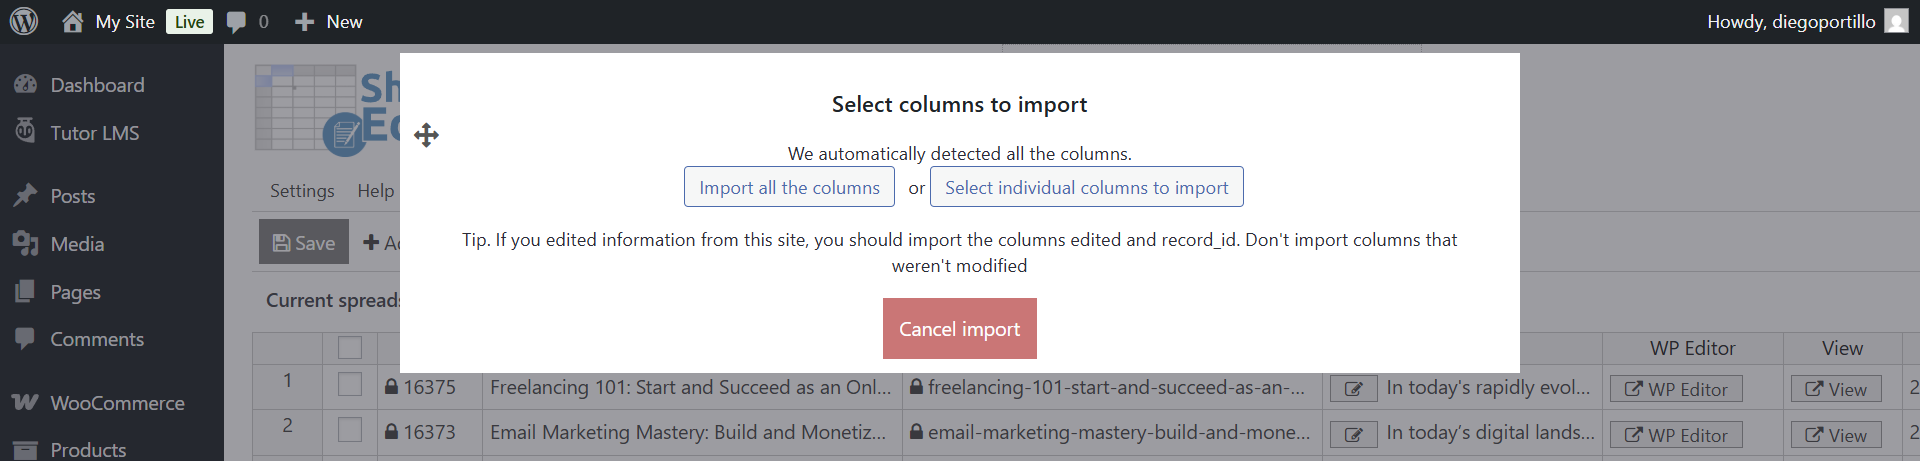
In “Select columns to import”, you can choose to import all columns automatically, or manually map the columns from your sheet to the WordPress fields.
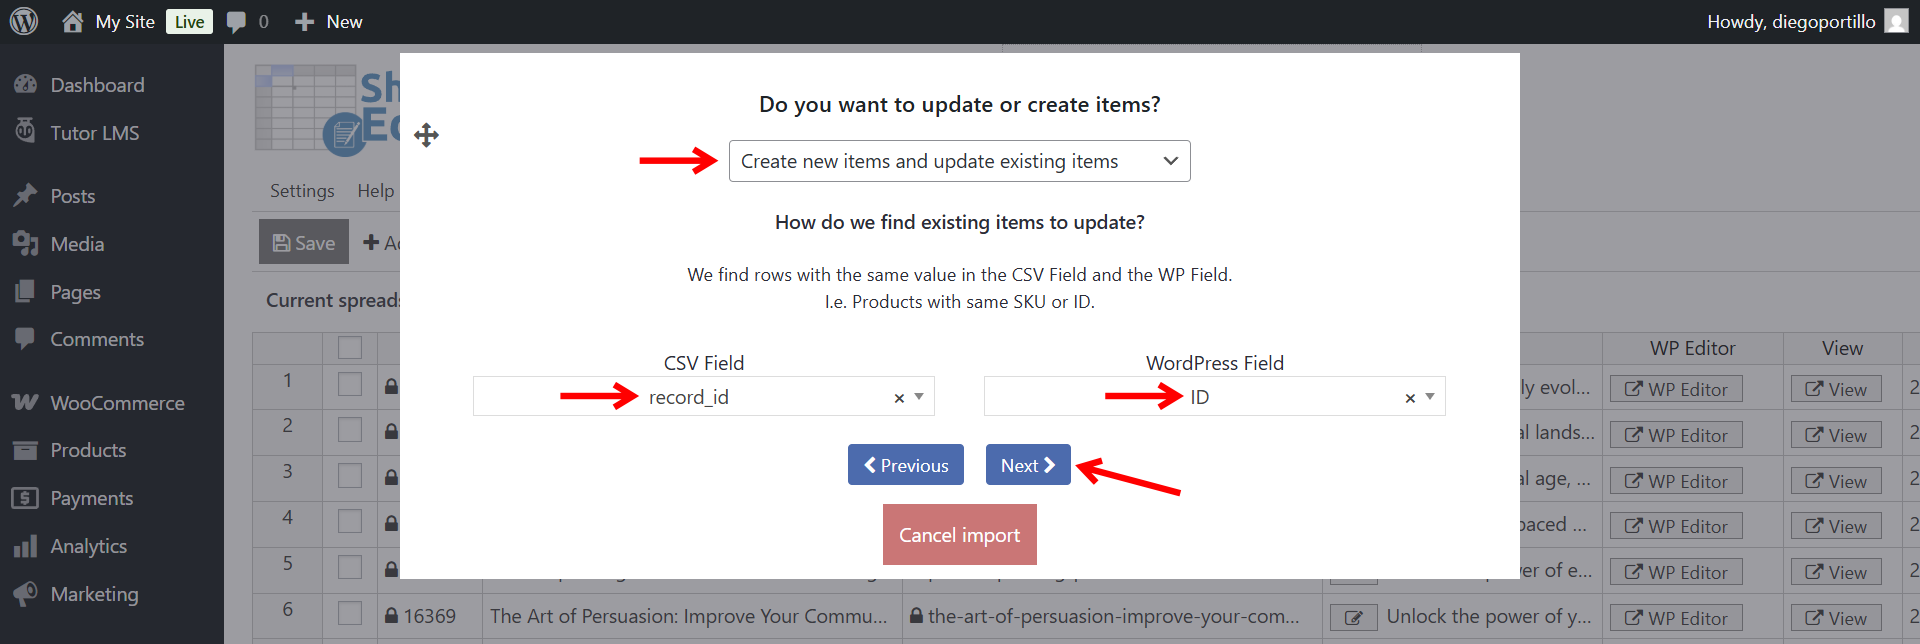
In “Do you want to update or create items” choose whether you will create new courses, update existing ones, or do both in a single import.
In this example, we will create new items and update existing items, so we will match the existing courses by ID.
Finally, you need to click on The preview is fine, start import.
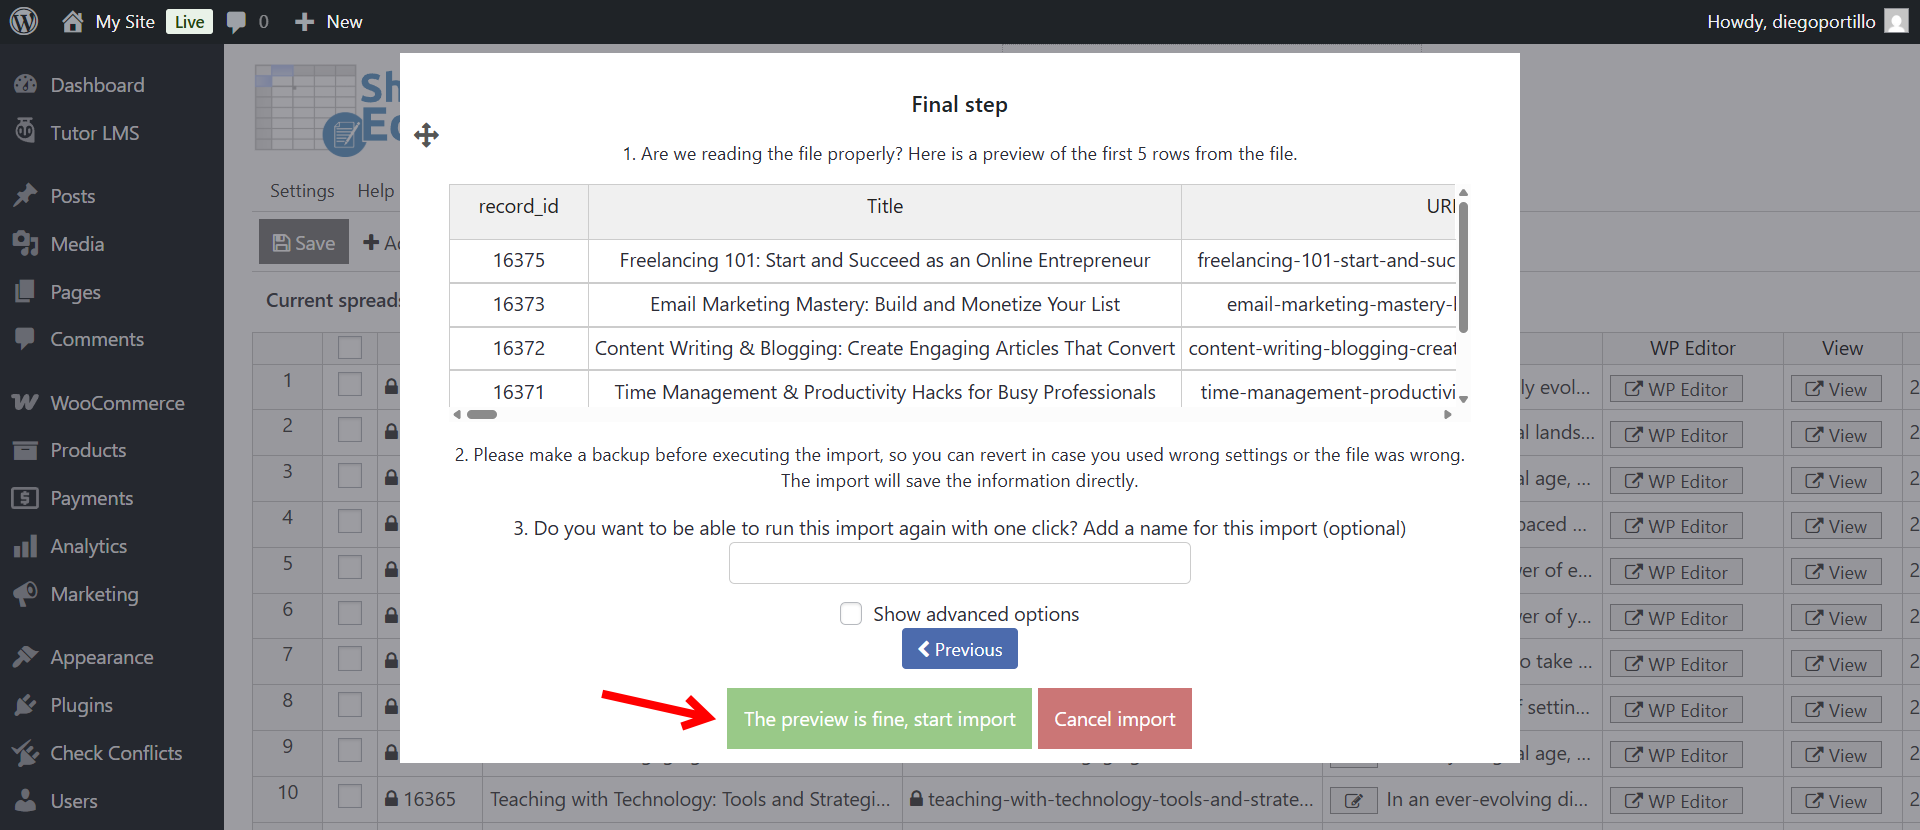
The plugin will process the data. Once finished, you will see all your Tutor LMS courses—both newly created and updated—reflected in the spreadsheet, ready for you to continue building lessons, topics, and quizzes if that’s the case.
Create and maintain your e-learning platform in minutes
Setting up and managing a robust online academy doesn’t require endless hours of manual data entry. By integrating your e-learning site with Google Sheets, you can easily create new courses, update existing ones, migrate platforms, and collaborate with instructors offline.
Using WP Sheet Editor and the Google Sheets Sync service eliminates the friction of content management, making both academy creation and ongoing optimization simple and scalable.