
In this guide, you’ll learn how to bulk edit categories for WooCommerce products using three methods in a spreadsheet. With WP Sheet Editor, you can bulk assign categories to your products, replace categories for hundreds or thousands of products, remove specific categories from your products, move products from one category to another, and more.
Important: This guide focuses on editing categories in WooCommerce products; if you want to learn how to manage categories as taxonomy terms, you can follow this tutorial, which focuses on displaying categories in a dedicated spreadsheet and editing category titles, descriptions, SEO titles, SEO descriptions, category images, etc.
Bulk updating product categories isn’t an easy task if you use WooCommerce’s built-in tools, but with WP Sheet Editor, you can follow any of these three methods to simplify your product management:
- Editing categories in the spreadsheet: Locate the Product categories column in the spreadsheet and assign, replace or remove categories individual rows or multiple rows simultaneously. This is good when you want to make precise updates and quick category reassignments.
- Bulk update cateogries in hundreds of products: You can use the Bulk Edit tool to assign, replace, append, or remove categories across hundreds or thousands of WooCommerce products with a few clicks. Use this method when you want to run large catalog updates and category migrations.
- Export/Import CSV, XLSX or XML files: If you prefer offline editing or delegating category management to team members without granting them WordPress access, you can export category data to a CSV or Excel file, make bulk adjustments in an external editor, and re-import to update your catalog. You can use this for catalog restructuring or working with third-party data feeds.
Table of Contents
Install WP Sheet Editor – WooCommerce Products
The WP Sheet Editor plugin allows you to view and manage your WooCommerce products and variations in an interactive spreadsheet within the WordPress admin dashboard.
You can download the plugin here:
Download WooCommerce Products Spreadsheet Plugin - or - Check the features
Once you install and activate WP Sheet Editor on your WordPress site, you can open the products spreadsheet by going to WP Sheet Editor > Edit Products. You’ll see all your products displayed in the spreadsheet.
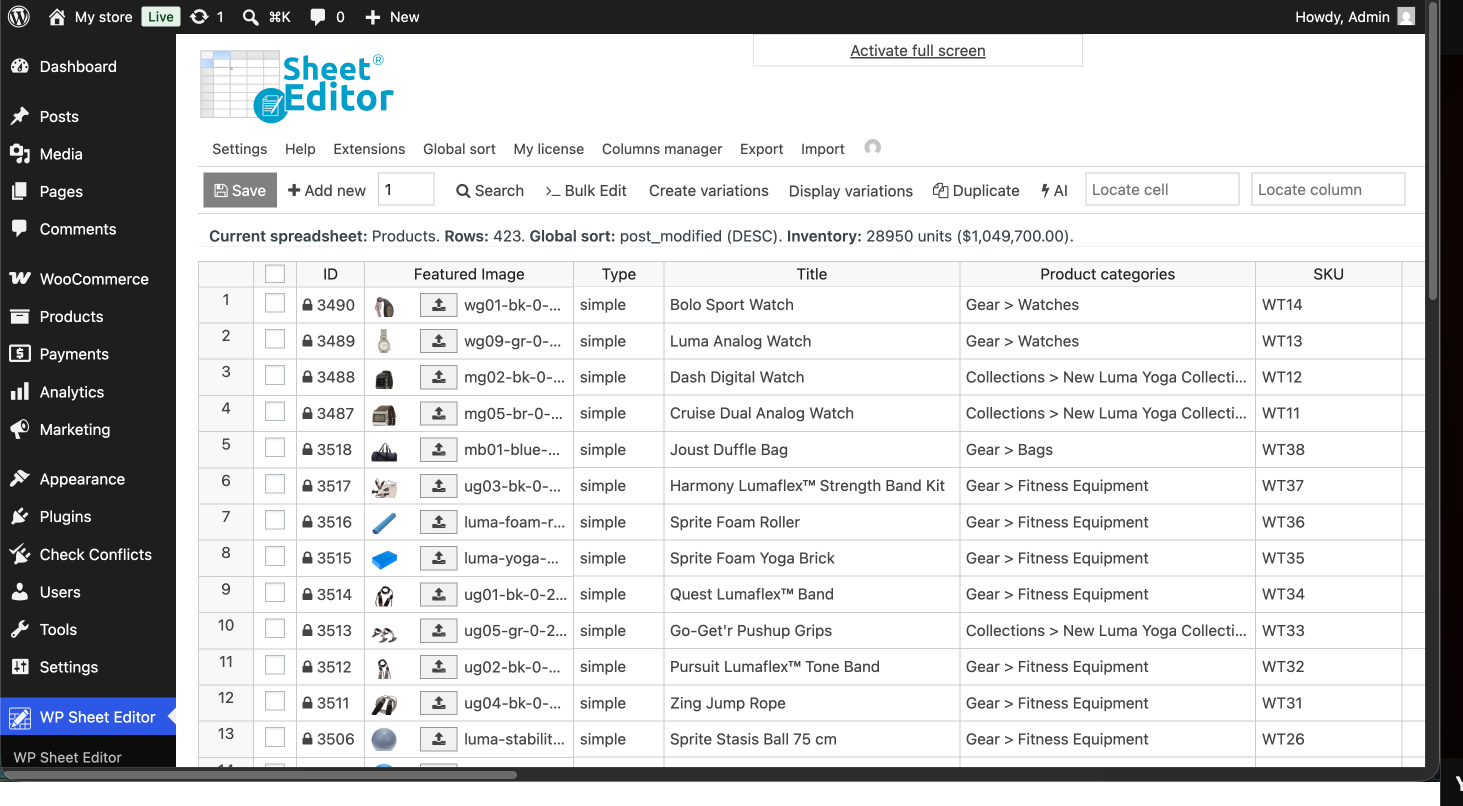
Method 1: Edit product categories in the spreadsheet
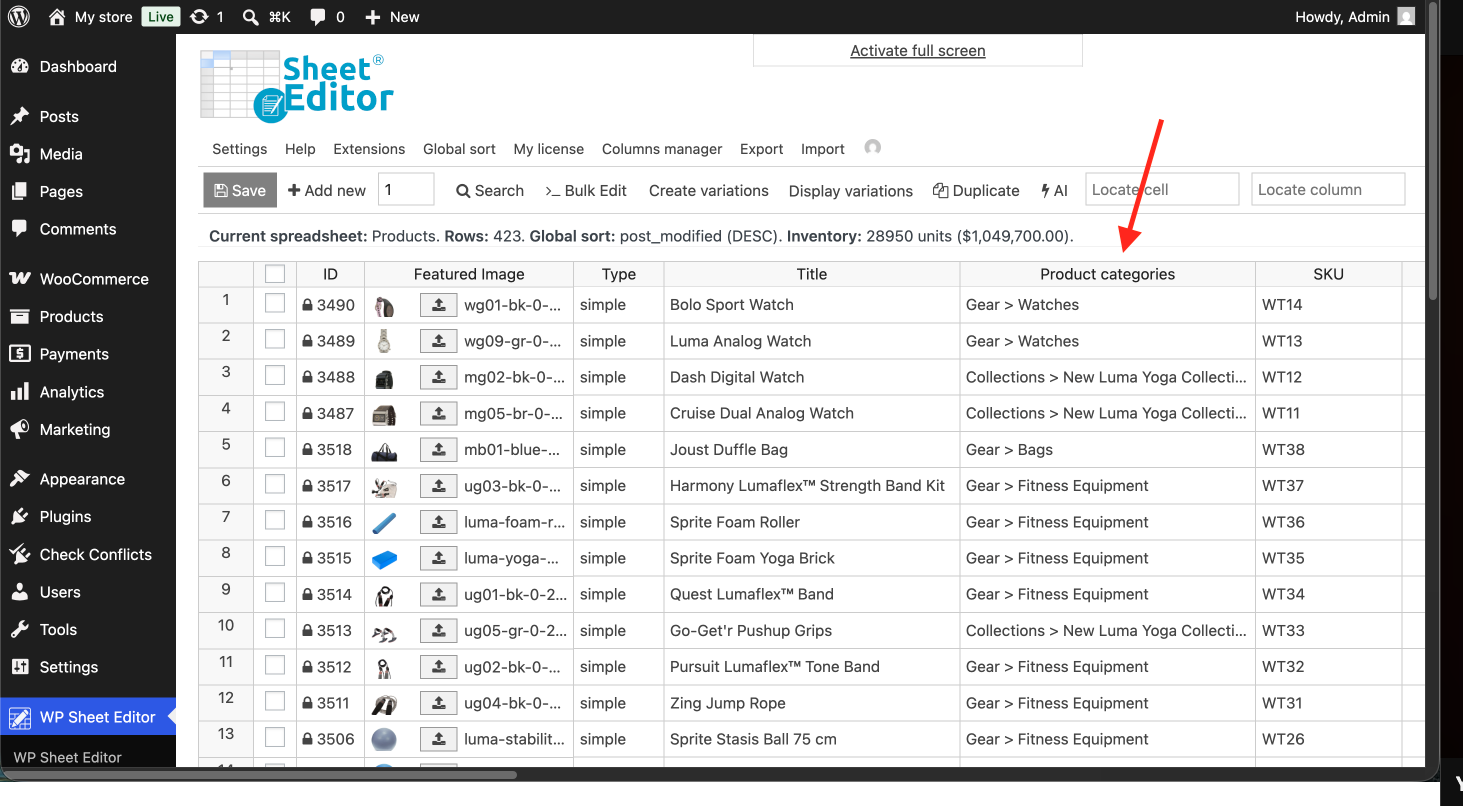
To manage product category assignments in the WP Sheet Editor spreadsheet, you need to locate the Product categories column, where all assigned categories appear for each item.
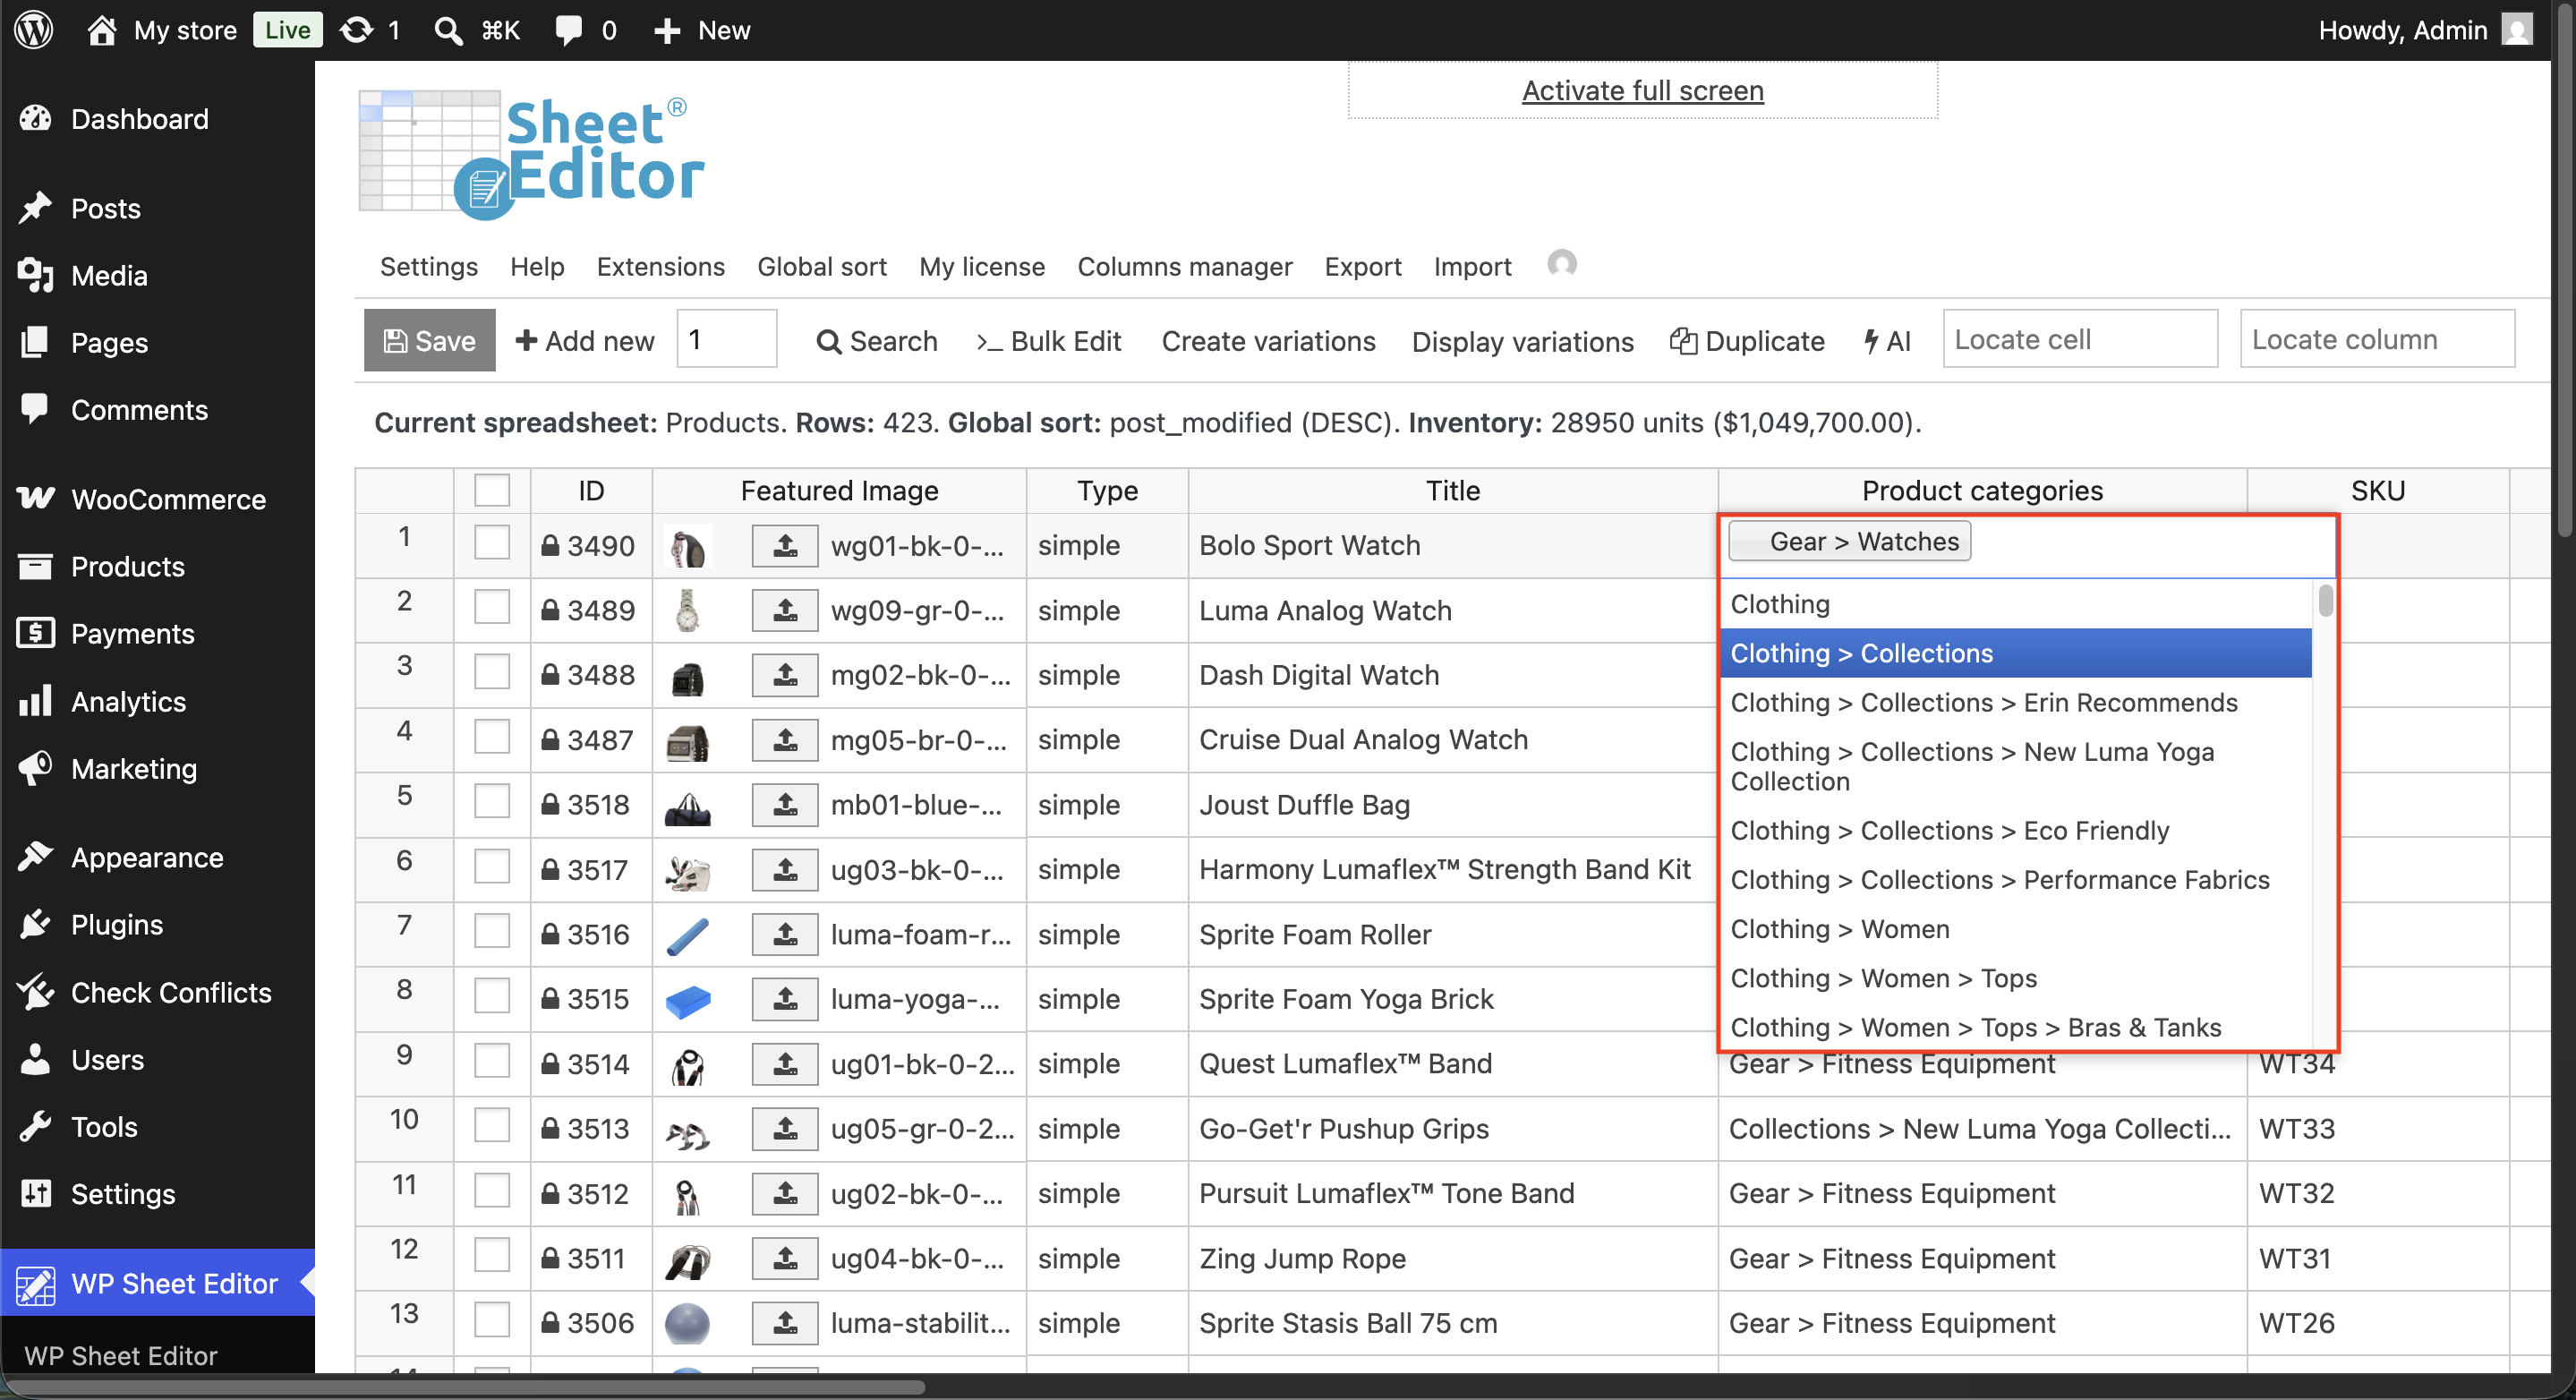
To assign existing category terms, you need to double-click a cell in the Product categories column to open the searchable category selector. Then select the relevant categories you want to assign, remove the categories you want, etc.
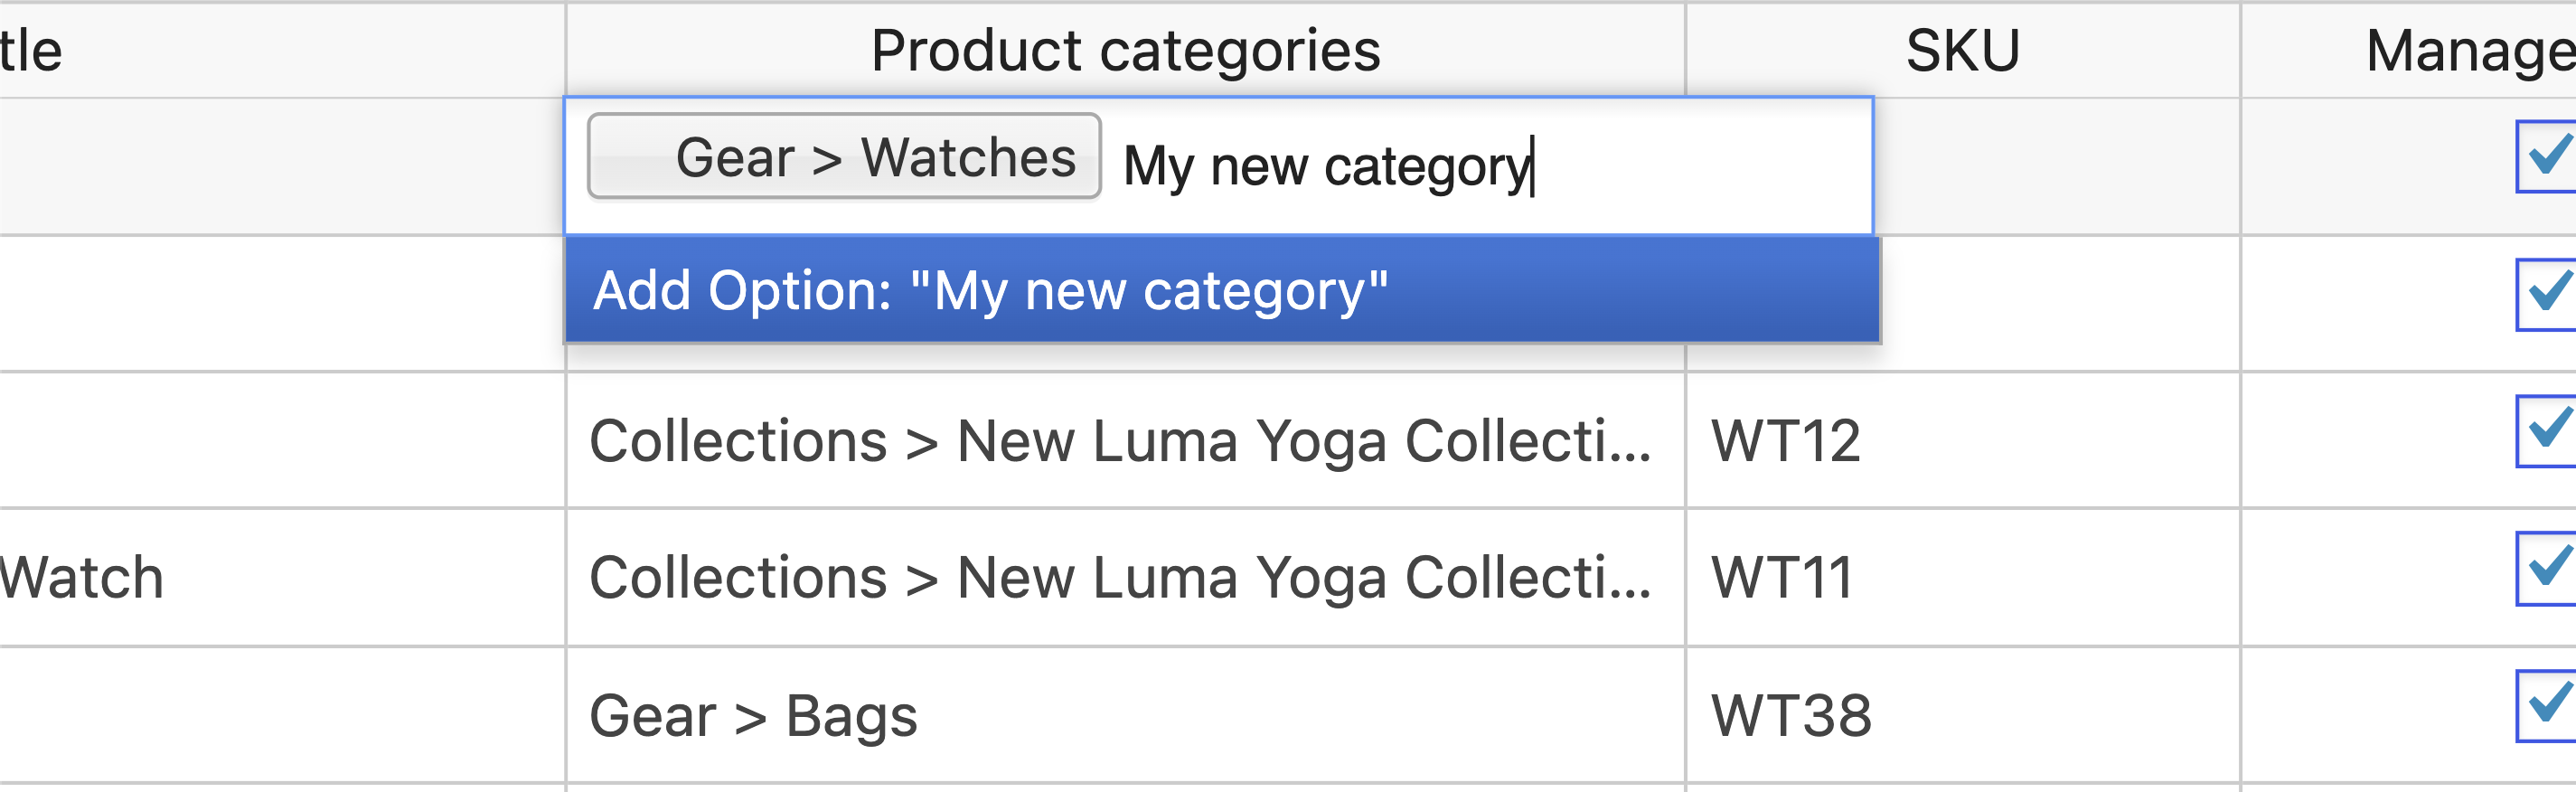
If you need to create a new category term directly in the spreadsheet, you just need to type the category name into the cell and click Add option: “New Category Name”.
You can copy category assignments from one row and paste them into others, or drag down the corner of a cell to autofill category values down a series of consecutive rows.
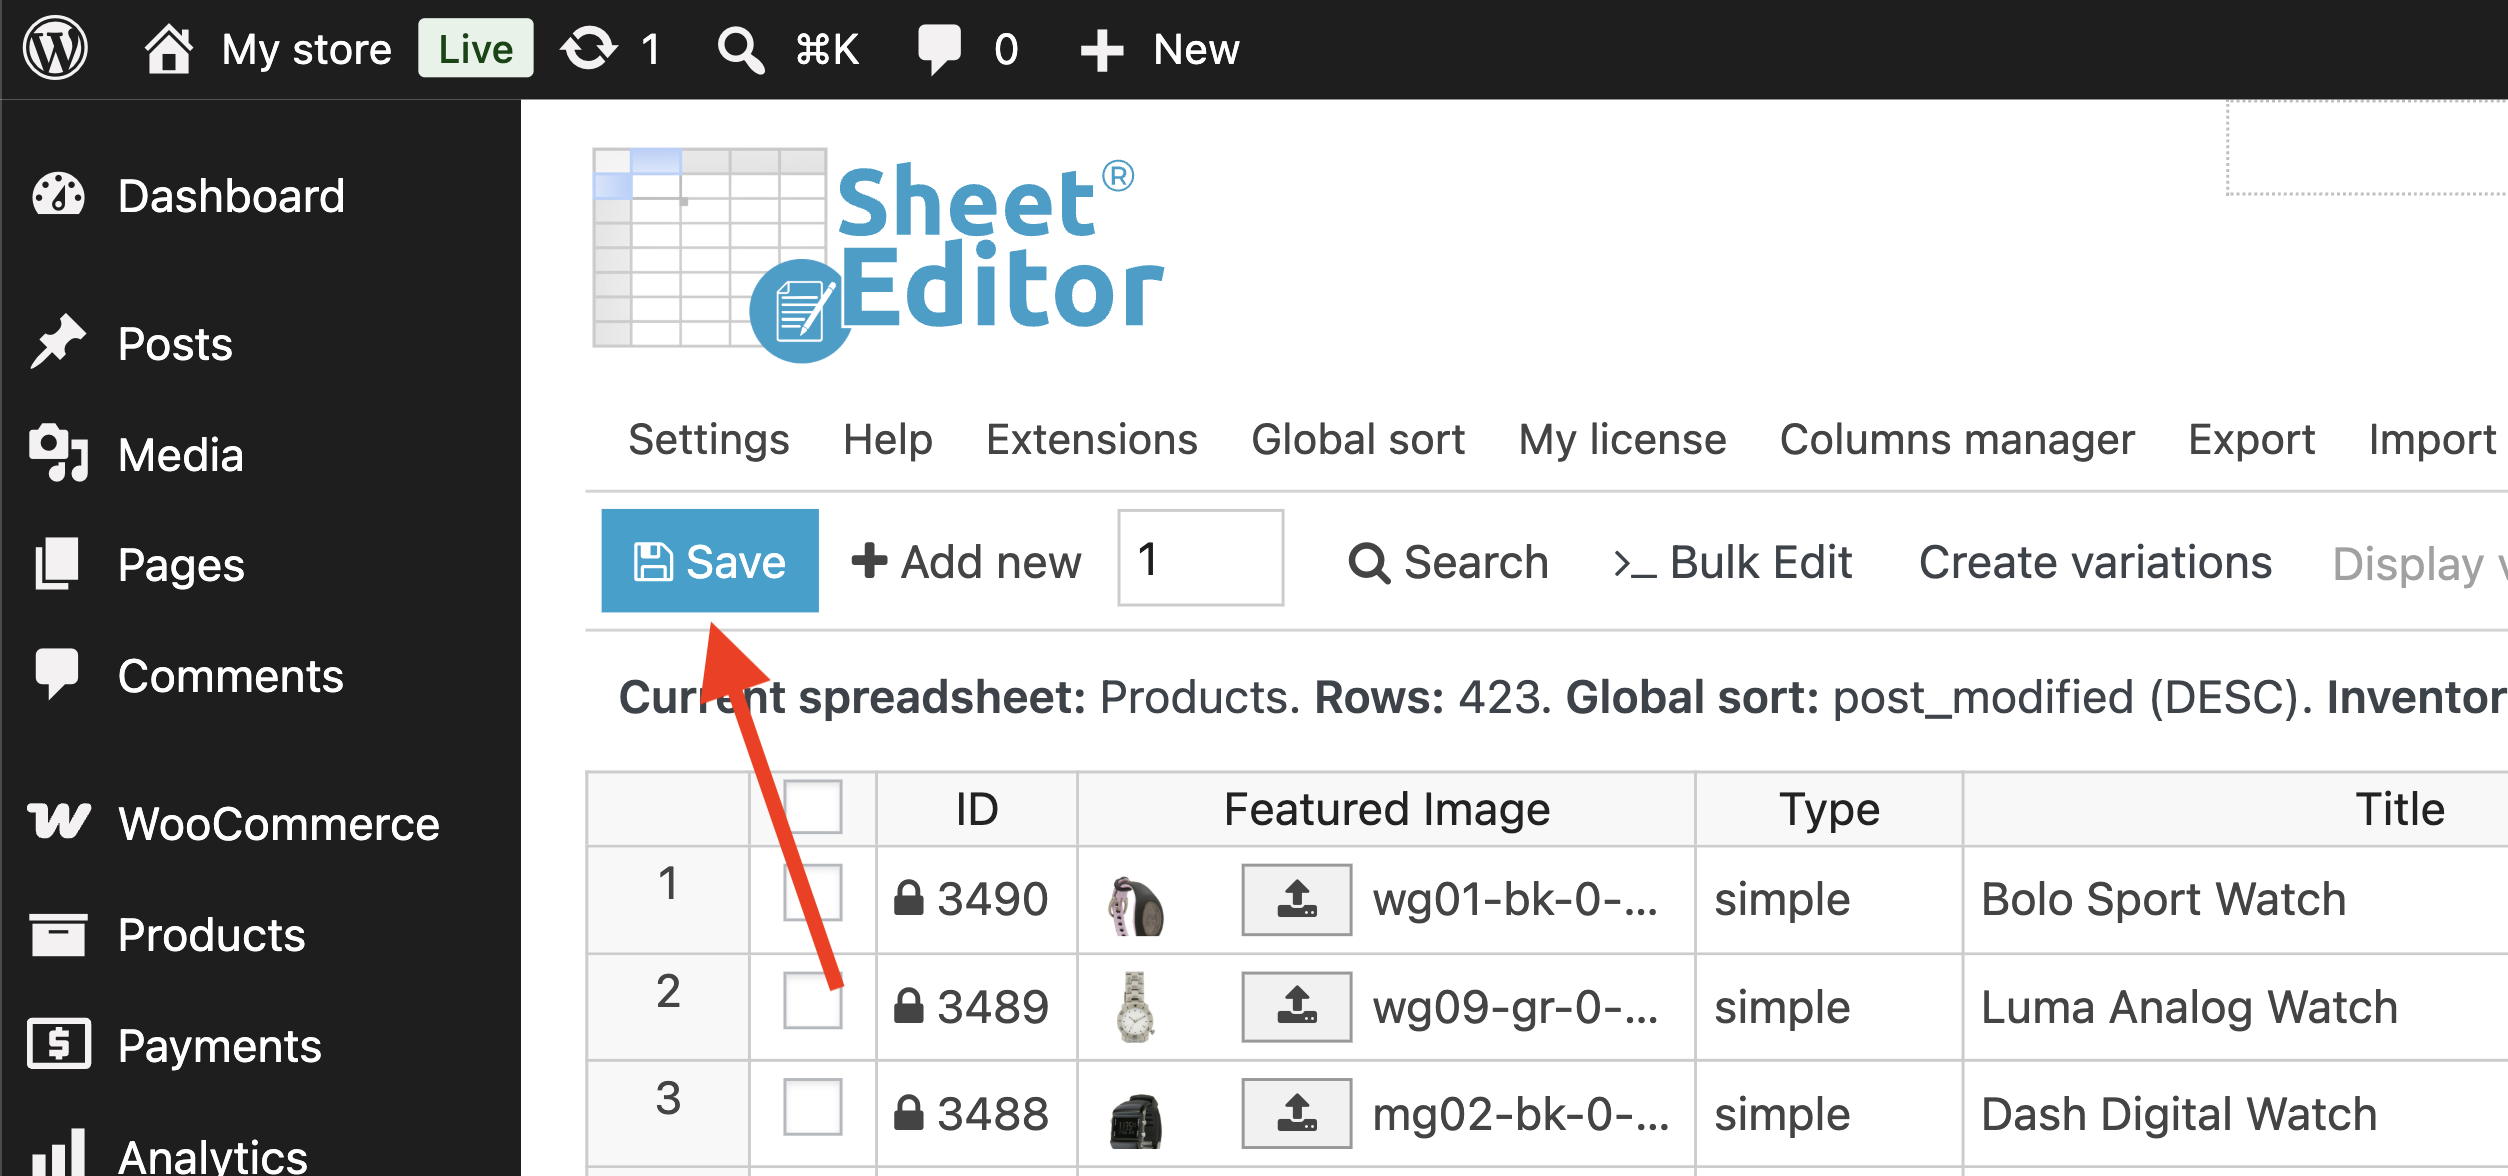
After modifying category assignments in the spreadsheet, click on Save to write the updates to the database.
Method 2: Bulk edit product category assignments
When you want to apply changes to hundreds or thousands of products at once, you can use the Bulk Edit tool, which allows you to bulk update values in any field.
Important: Always make sure to generate a complete site backup before performing bulk database operations.
Before updating categories, you need to decide which products you will decide. WP Sheet Editor allows you to edit all products in your catalog, use advanced search to edit specific groups of products, or manually select the products you want to update.
- Edit all products: Open the Bulk Edit tool and select Edit all the rows from my current search to update every product currently visible or filtered in the spreadsheet.
- Manually select products: Mark the checkboxes in the leftmost column of the spreadsheet for specific products.
- Filter with Search: Use the Search tool to filter items by keyword, current category, tag, status, or custom field combinations before launching the bulk edit.
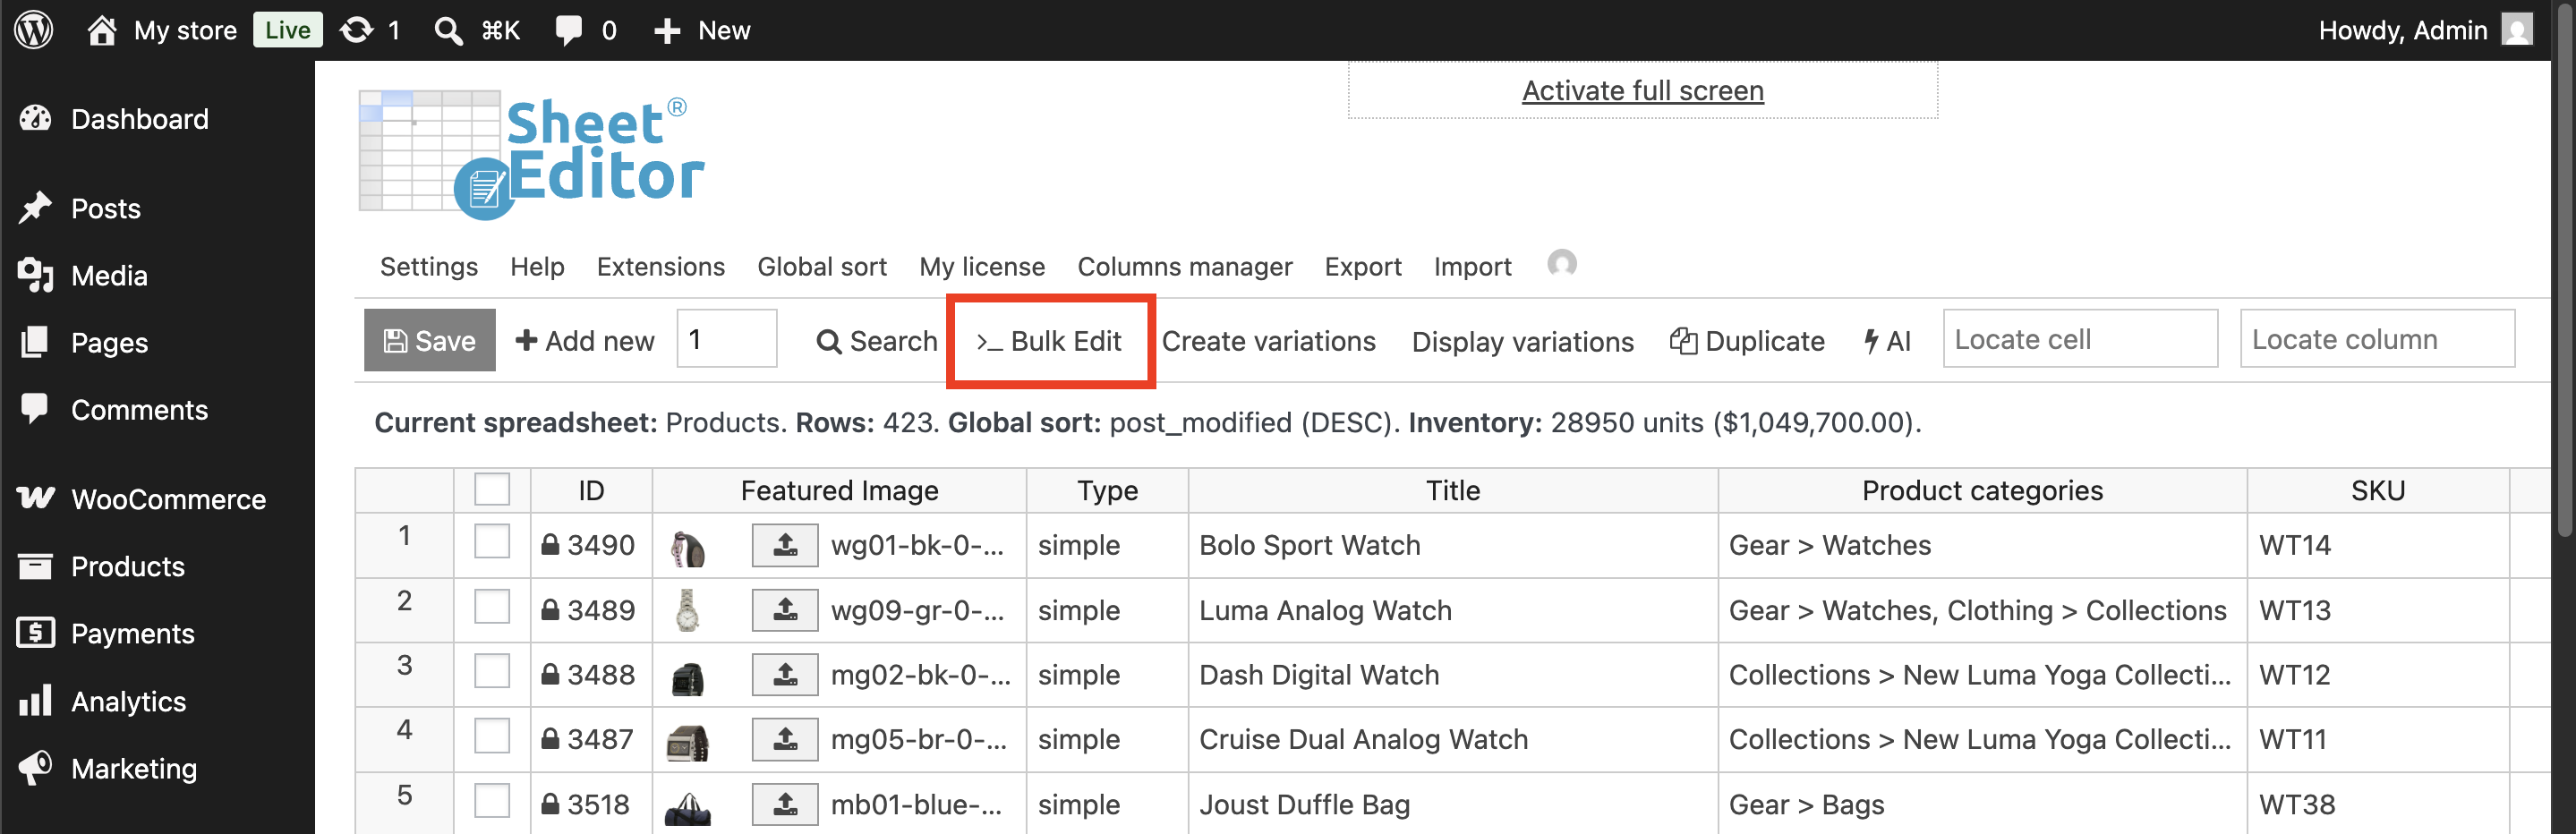
Once you have decided which products to edit, open the Bulk Edit tool.
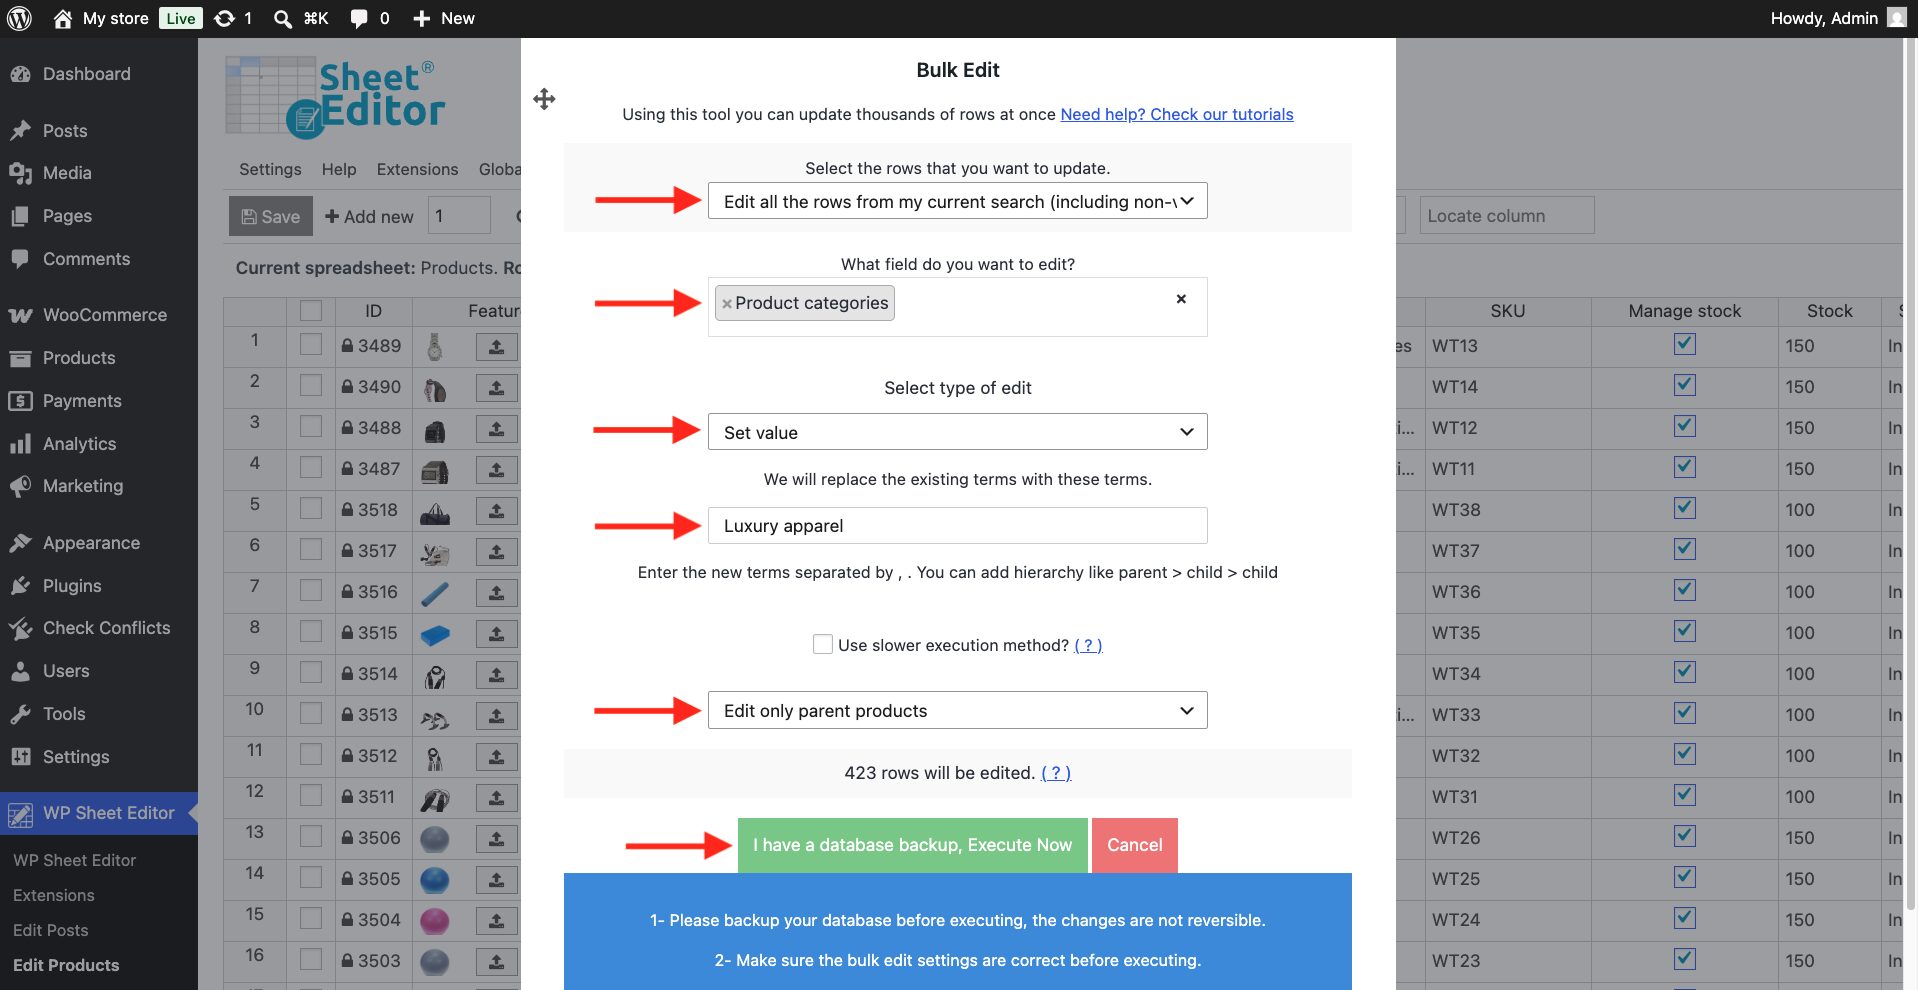
Assign categories on selected products
- Select the products you want to edit (all, search results, manual selection)
- Product categories
- Set value
- Enter the new category: You can enter one category (
Clothing), multiple categories separated by commas (Women, Clothing), as well as categories with hierarchy (Women > Hoodies). - Select Edit only parent products
- Execute
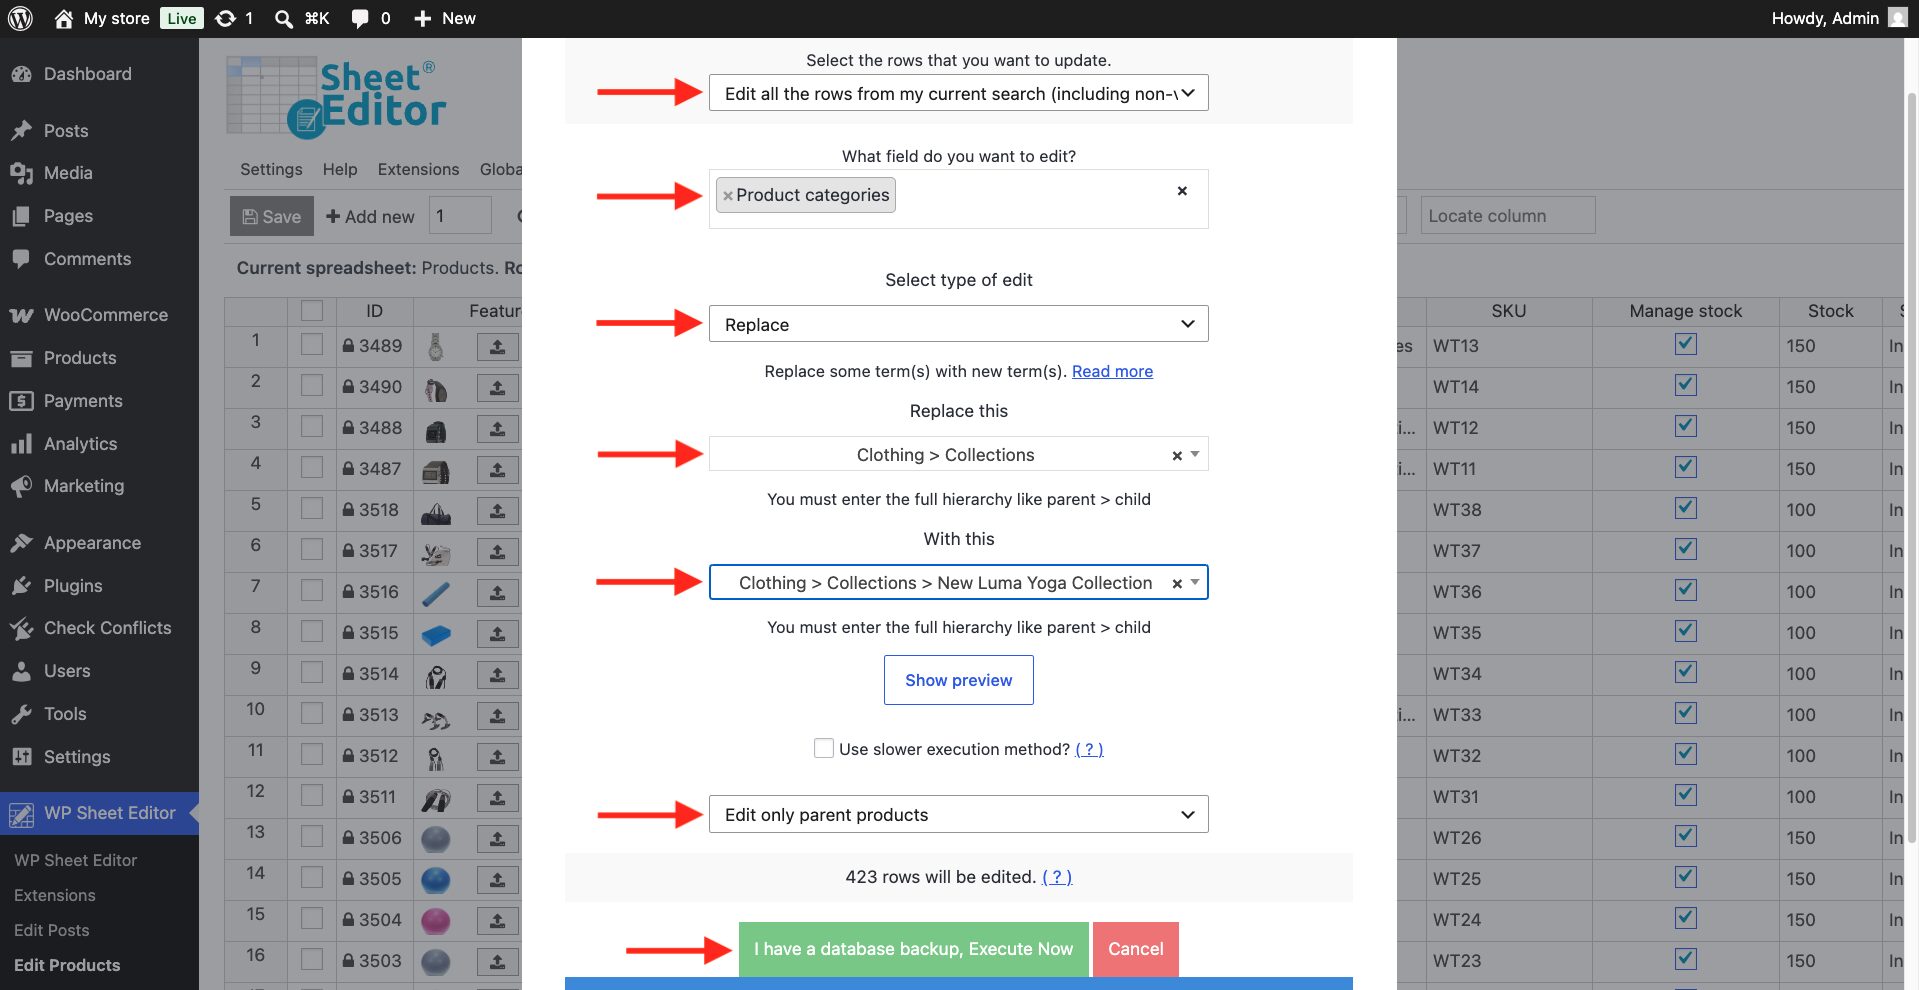
Bulk replace specific categories across products
- Select the products you want to edit (all, search results, manual selection)
- Product categories
- Replace
- Replace this: Enter the category you want to remove
- With this: Replace the category you want to add
- Select Edit only parent products
- Execute
Bulk remove specific categories from products
- Select which products you’ll edit (all, search results, manual selection)
- Product categories
- Remove terms from posts
- Select the categories you want to remove from the products
- Select Edit only parent products
- Execute
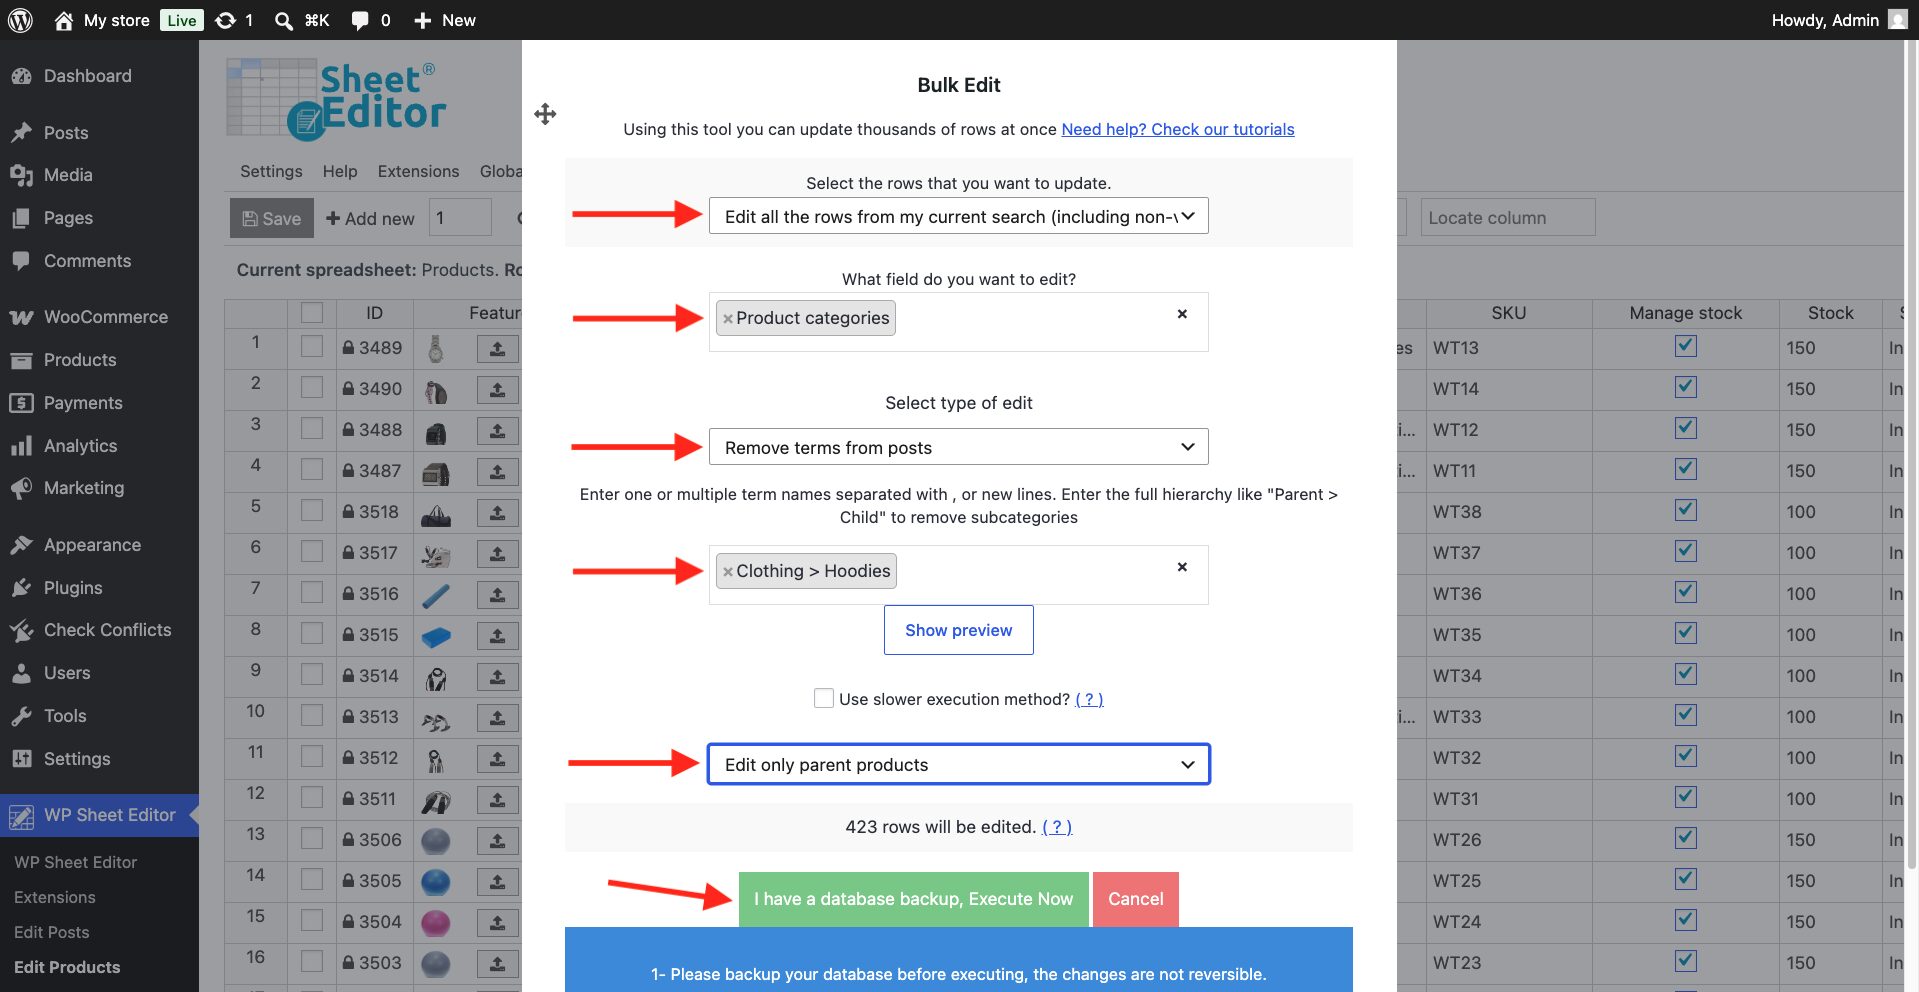
Append categories to existing categories
- Select the products you want to edit (all, search results, manual selection)
- Product categories
- Append
- Select the categories you want to append
- Select Edit only parent products
- Execute
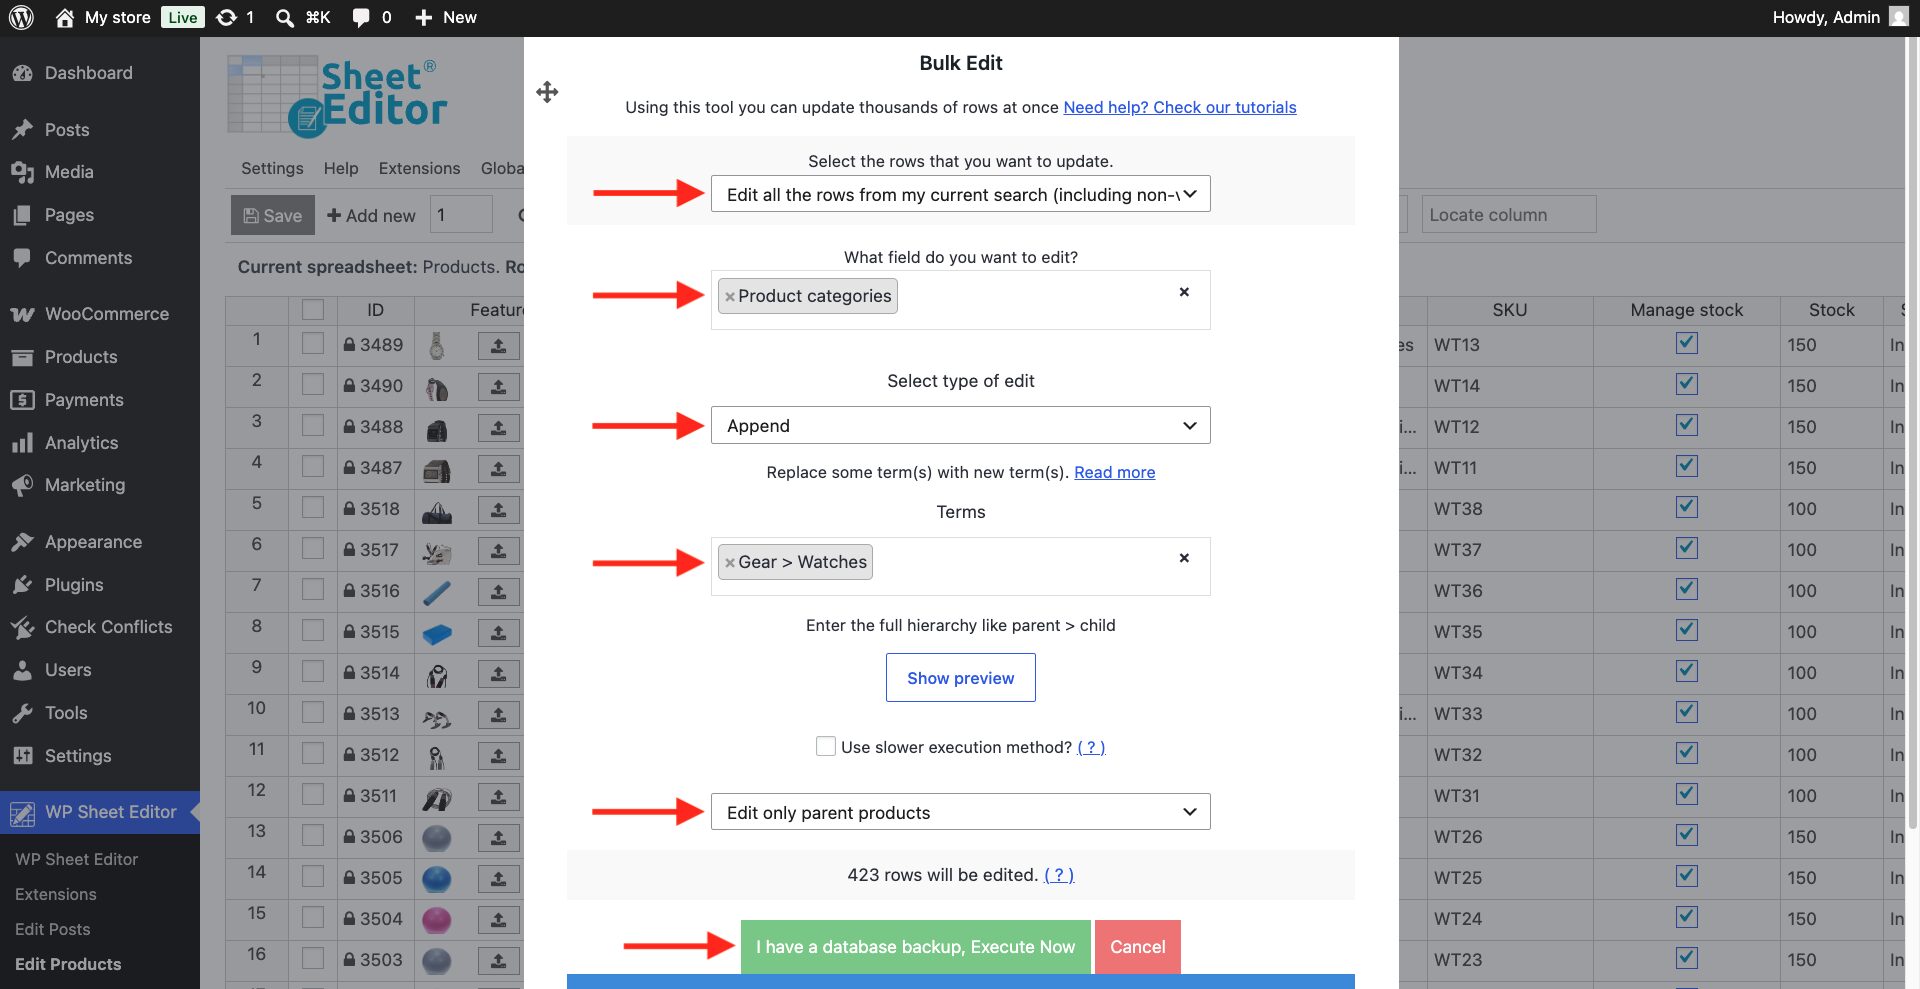
Method 3: Export and import product categories using CSV or Excel files
WP Sheet Editor allows you to export product category data into CSV, XLSX, or XML formats for offline editing and re-importing.
To export category data:
- Click Export in the spreadsheet top toolbar.
- Select the columns to export (e.g., Title and Categories).
- Select the rows to include: all products, current search results, or manually selected rows.
- Select the target file format (CSV or Excel).
- Click Start new export.
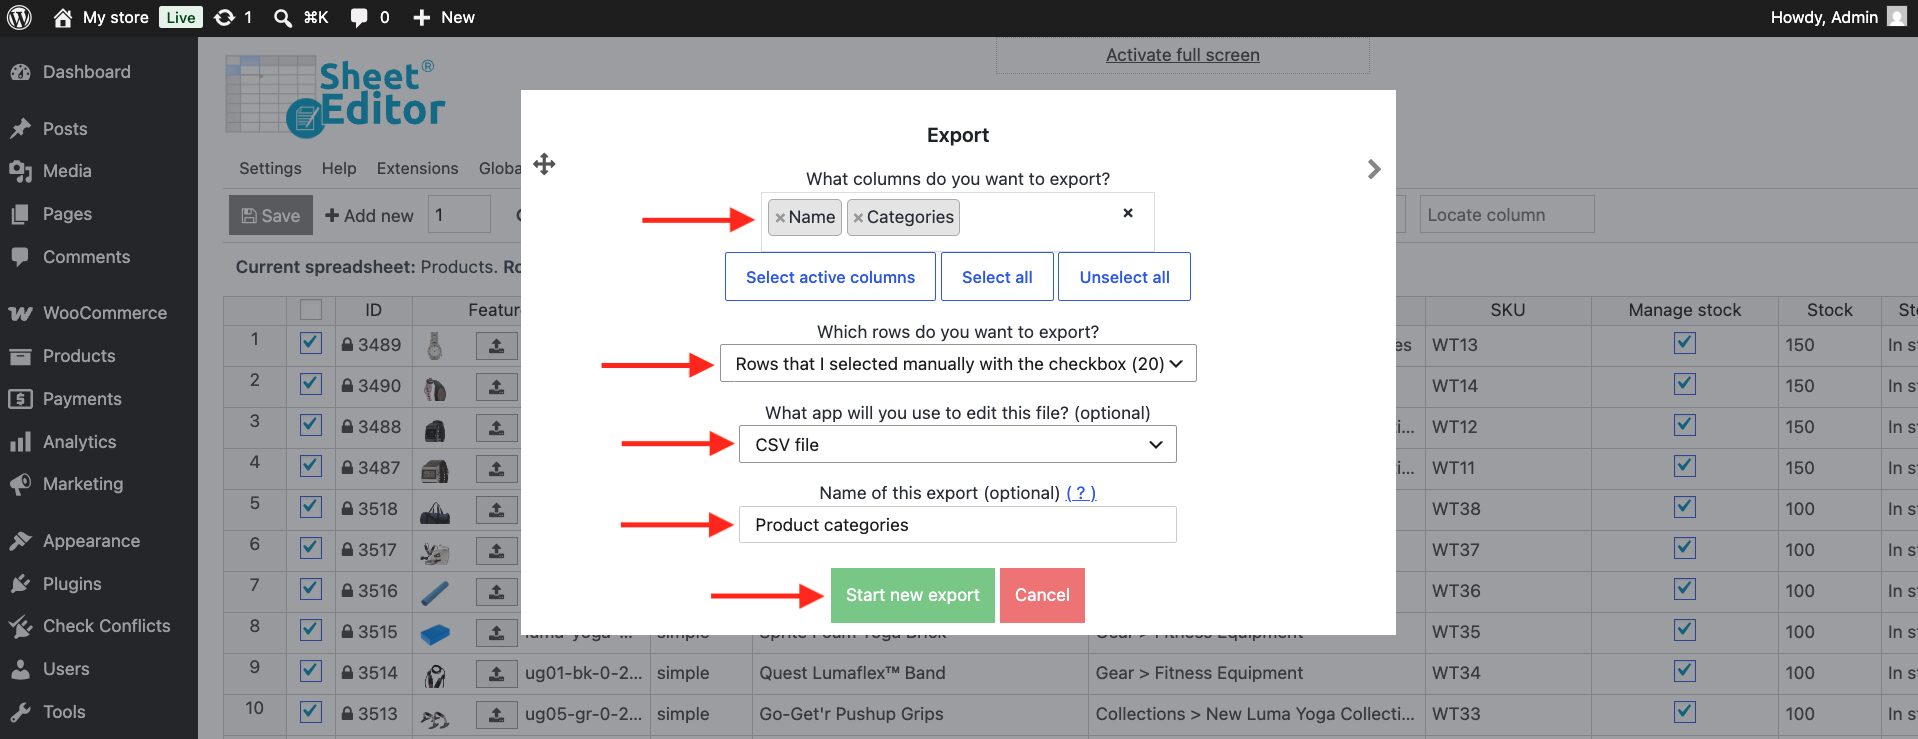
Open the downloaded file in Microsoft Excel or Google Sheets, update or add category names (separated by commas for multiple categories or using > for defining category hierarchies), and save the file.
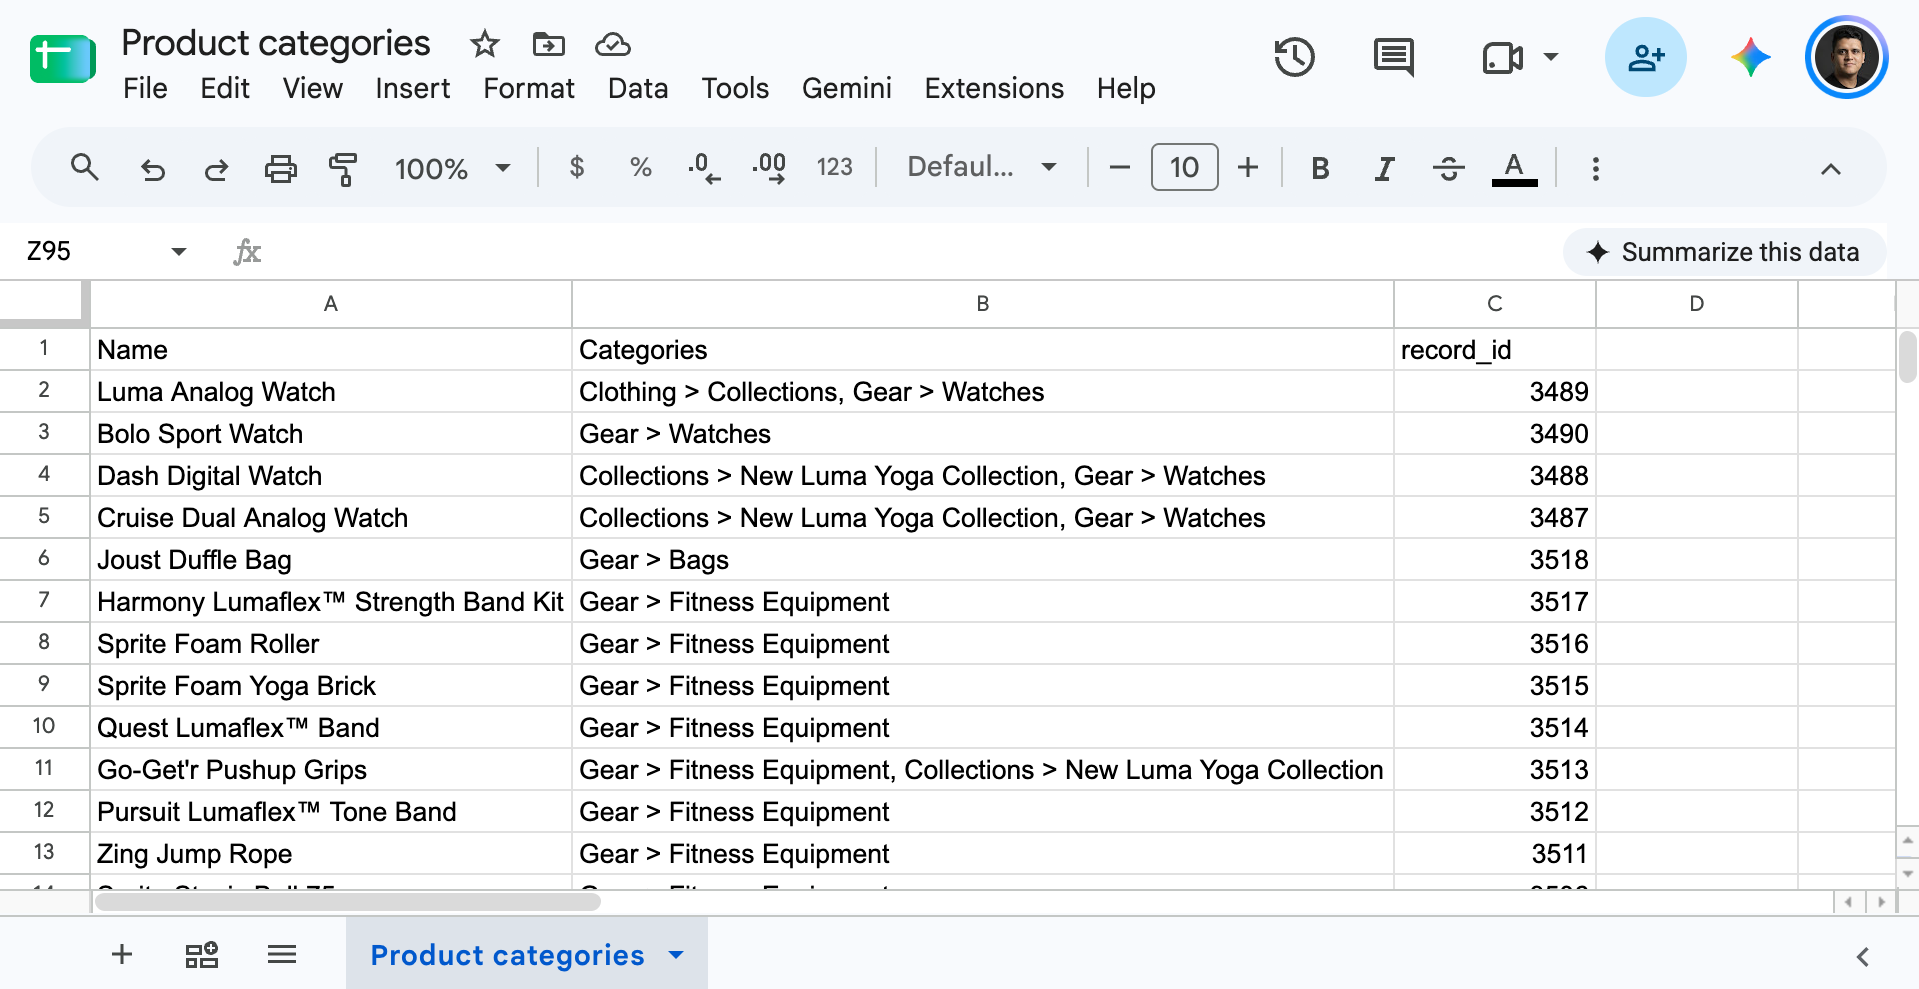
To import updated categories:
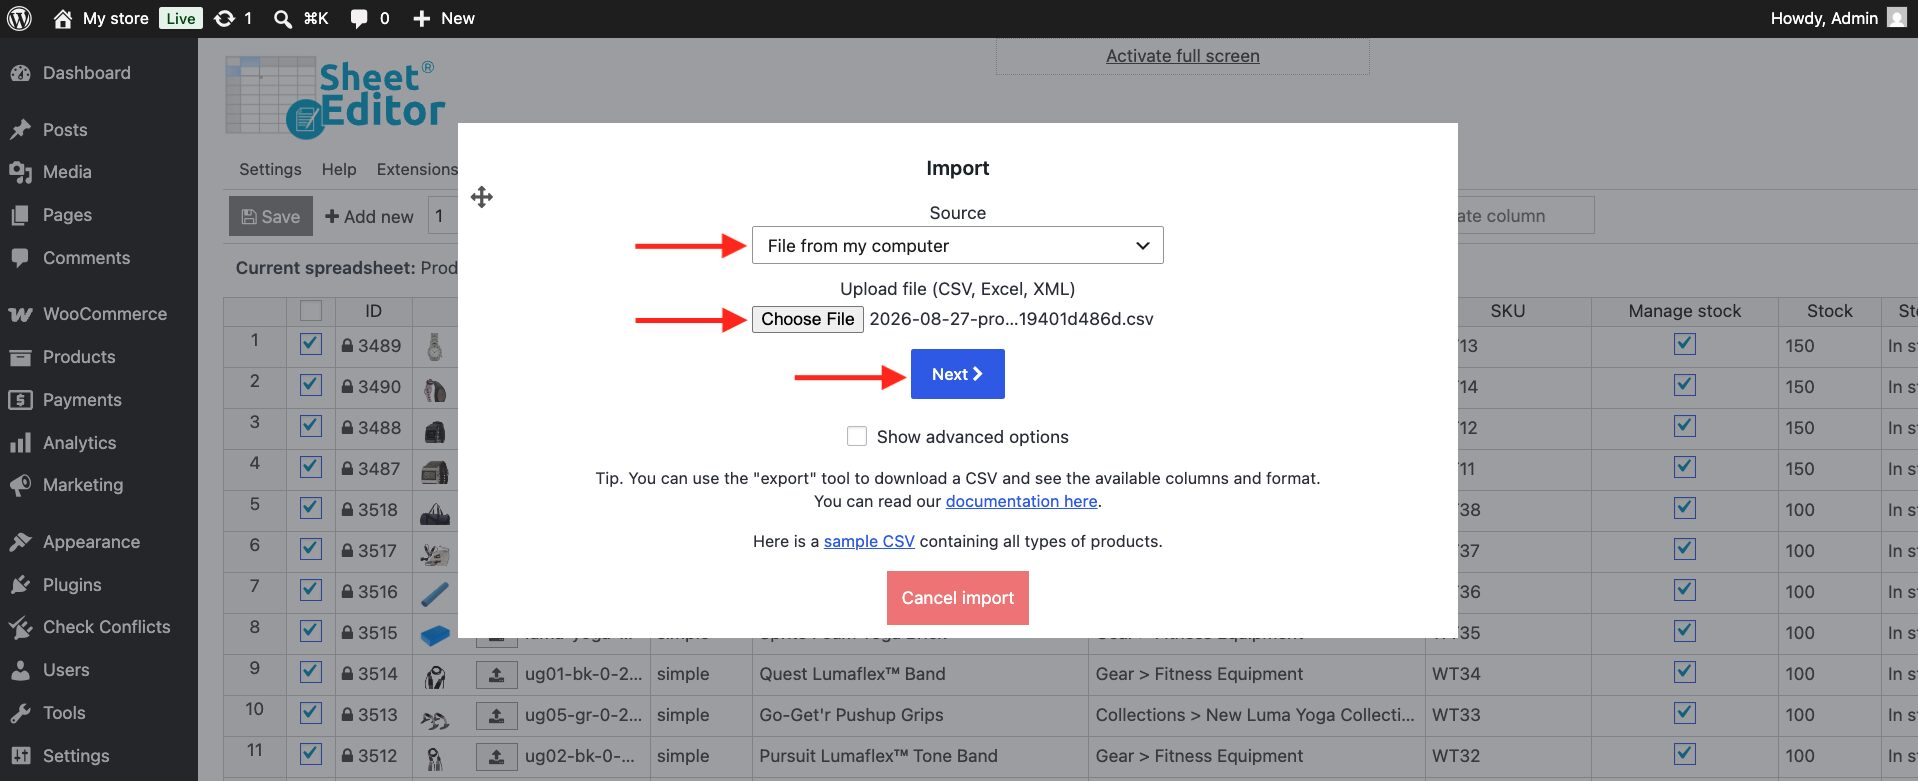
- Click Import in the top toolbar.
- Upload the edited CSV, XLSX, or XML file.
- Confirm the column mapping between your file and WooCommerce fields.
- Select a matching key (such as record_id or SKU) to identify and update existing products.
- Run the import process.
Frequently Asked Questions on Bulk Managing Categories
Can I bulk assign subcategories (hierarchical categories) to products?
Yes. You can assign parent and child categories directly within the spreadsheet cells or Bulk Edit tool by selecting the full hierarchy path (e.g., Clothing > T-Shirts).
Can I remove the “Uncategorized” category from multiple products at once?
Yes. Use the Bulk Edit tool, select Product categories as the field, choose Remove terms from posts, and enter Uncategorized to delete the default term from all matching products.
Can I bulk edit category terms directly (slugs, descriptions, parent categories, and thumbnails)?
The workflows above cover assigning category terms to products. If you want to edit the category taxonomy terms themselves (changing parent categories in bulk, writing SEO descriptions, or updating category images across dozens of terms in a spreadsheet), use the WooCommerce Category Spreadsheet view.
You can download the plugin here:
Download WooCommerce Products Spreadsheet Plugin - or - Check the features