In this quick guide, we’ll show you how to bulk edit only the selected cells in the WP Sheet Editor spreadsheet. This is useful when you want to apply changes to specific products, posts, or fields without affecting the entire dataset.
Instead of editing all rows or columns that match a condition, you can choose exactly which cells to modify and apply any bulk operation to them in just a few clicks.
Step 1: Select the cells you want to edit
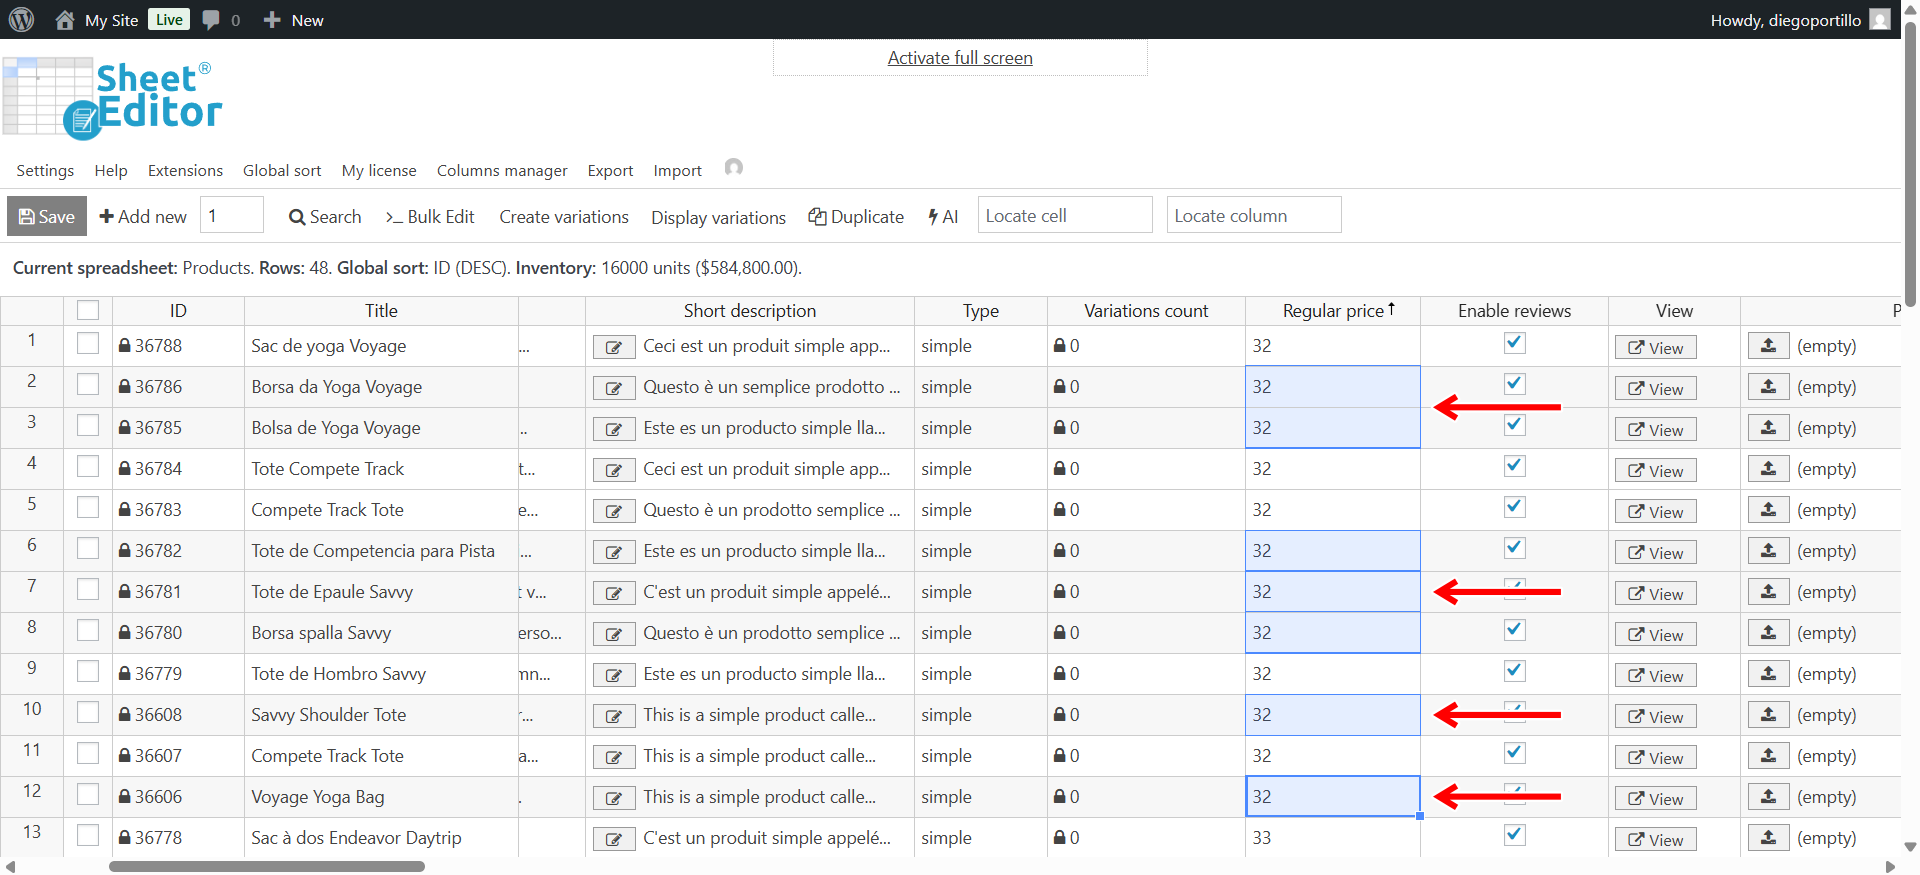
Open your spreadsheet by going to WP Sheet Editor → Edit Products (or the corresponding post type). Then, click and drag your mouse to select the cells you want to bulk edit.
You can select cells from one or multiple columns, even across different rows.
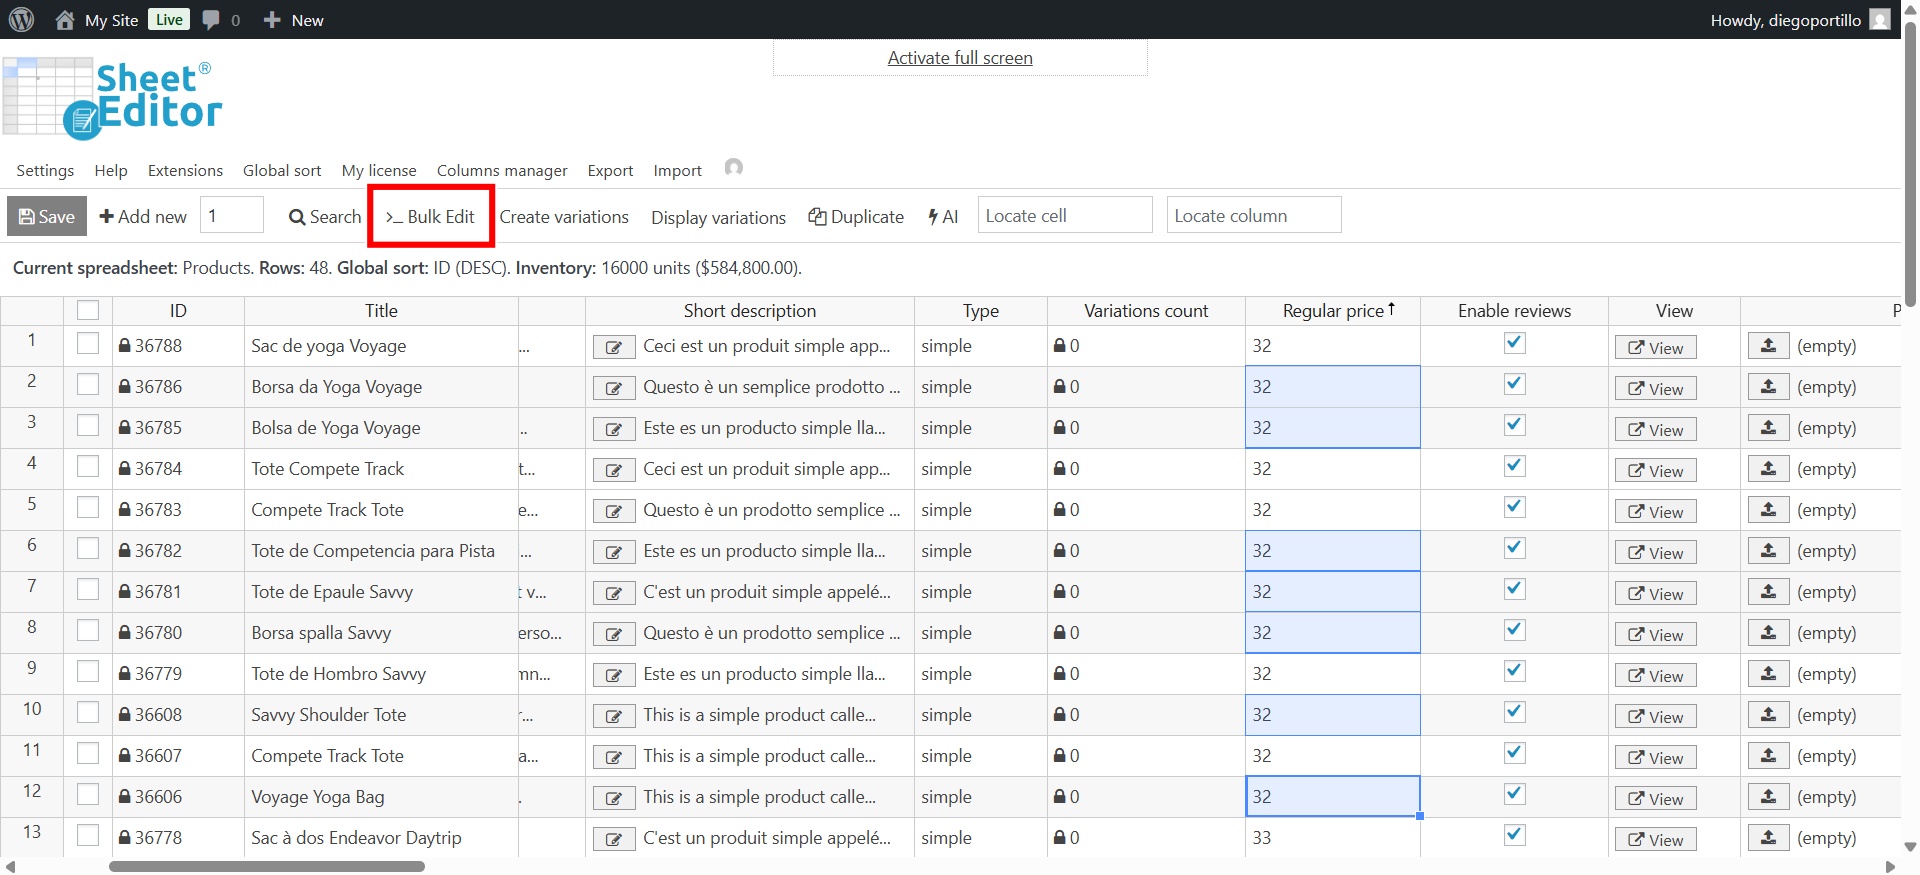
Step 2: Open the Bulk Edit tool
Once you’ve selected the cells, click on the Bulk Edit button located on the top toolbar. This will open the bulk edit window where you can configure your changes.
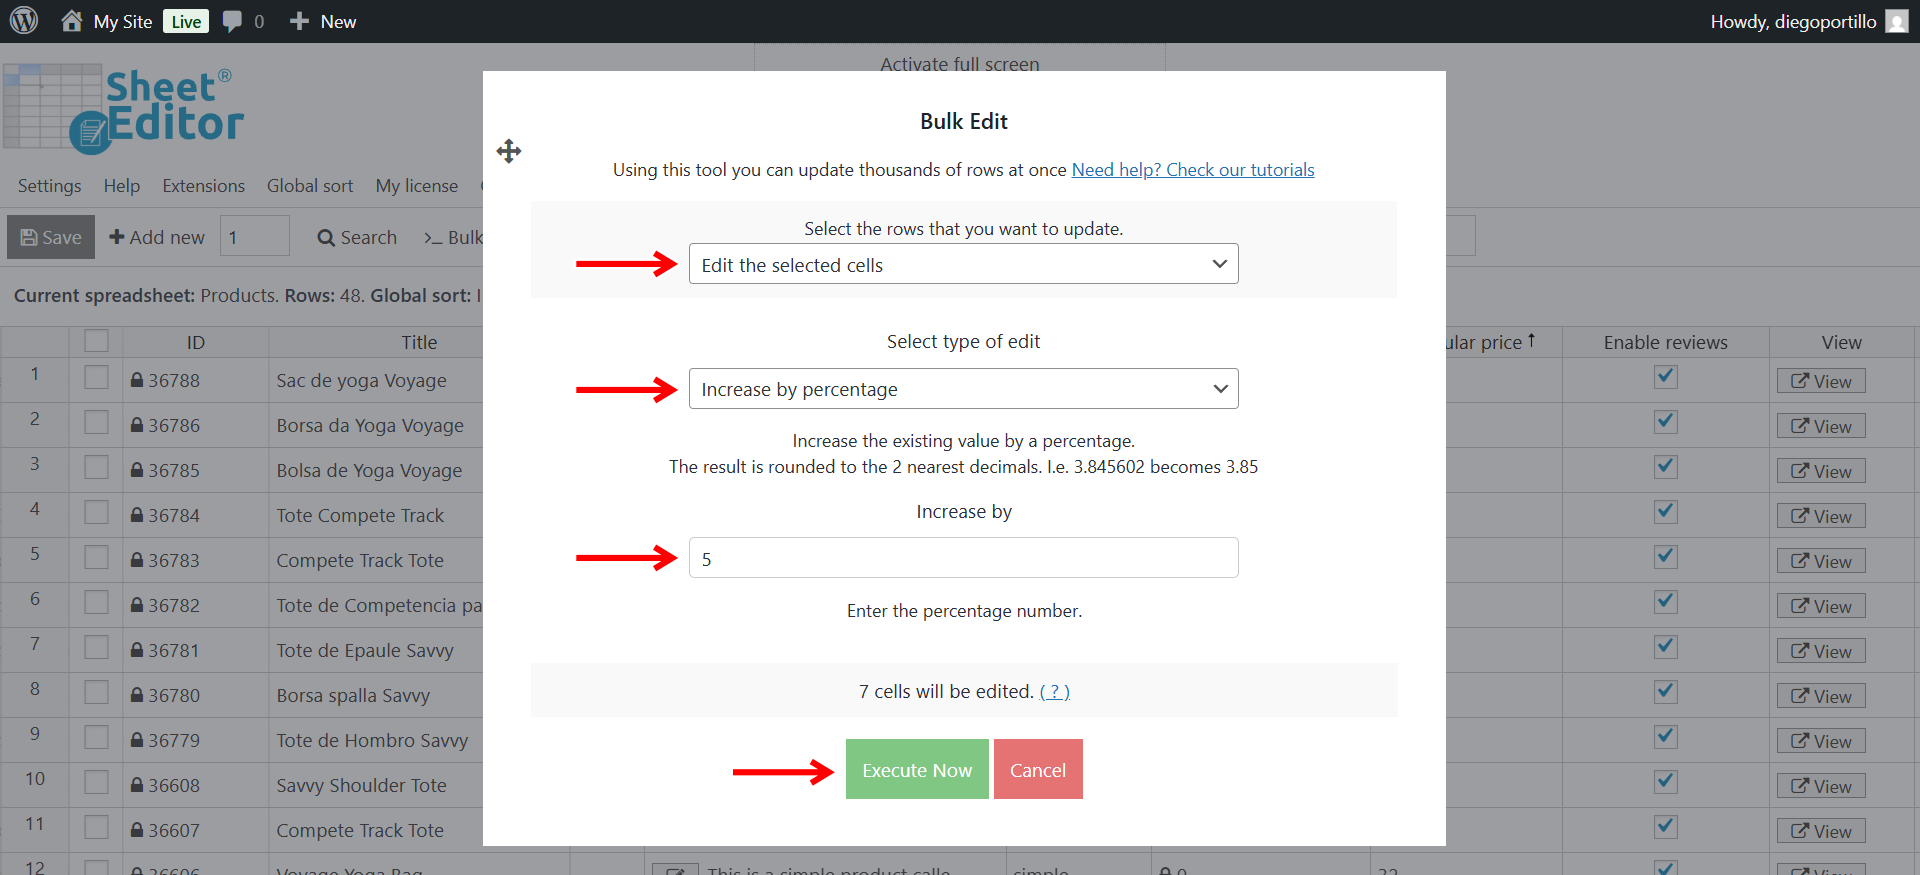
Step 3: Choose “Edit selected cells”
Now select these values in the bulk edit tool to bulk update values in the selected cells only:
- Select the rows that you want to update: Edit the selected cells
- Important: When you use the “Edit selected cells” option, the bulk edit tool will automatically detect the field (column) of the selected cells and display only the editing options available for that specific field. For this reason, you should select cells from one column at a time; for example, only “Regular price” or only “Post title”, so the tool can show the right types of edits for that field.
- Select type of edit: Select what you want to do in that field. In this case, since we’re editing cells in the Regular price column, we will Increase by percentage.
- Enter values: Enter the values you want to set, replace, increase, decrease, remove, etc.
- Click on Execute Now.
Step 4: Apply your bulk edits
Now, configure the bulk edit rule you want to apply. For example:
- Increase prices by 10%
- Change the product status
- Add text to product titles
- Replace part of a description
Once configured, click Execute now to apply the changes.
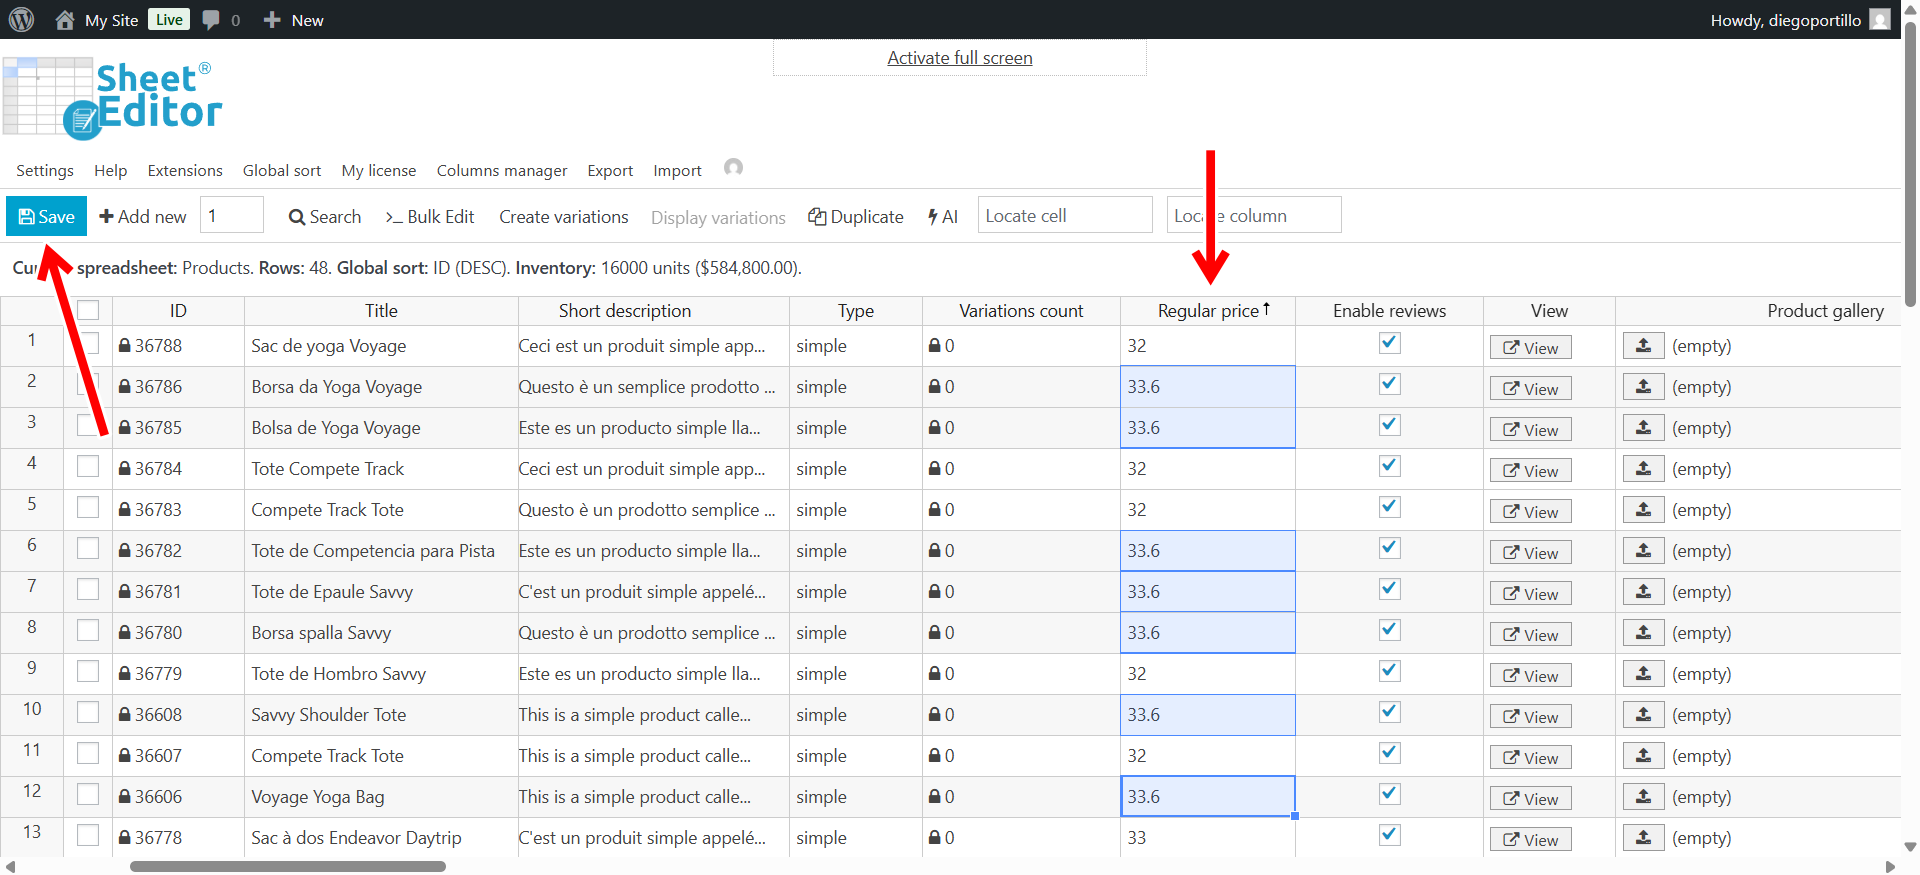
Step 5: Review and save your changes
After the bulk edit finishes, review the modified cells in the spreadsheet. You’ll see the updated values directly in the spreadsheet.
If everything looks correct, click Save on the toolbar to store the changes in your WordPress database.
That’s it!
You’ve successfully applied a bulk edit to selected cells only. This feature is perfect for making precise edits without affecting other data on your site.
Use this workflow whenever you need to modify specific fields quickly and safely in WP Sheet Editor.