In this tutorial, we’ll show you how to import and bulk edit product layers from WooCommerce Product Configurator using an intuitive spreadsheet. You can save a lot of time because you won’t have to open and edit the products one by one, and you can edit thousands of products at once.
We’ll show you:
- How to Enable the Configurator for all variable products at once
- How to Upload image layers quickly in the spreadsheet
- How to Upload image layers in bulk
- How to Replace background layers in bulk
- How to Import image layers from Excel or Google Sheets
This way, you can create beautiful stores with hundreds of variable products in just some minutes. Forget about spending a lot of hours or even days editing your WooCommerce variable products one by one. Instead, manage your products completely from an intuitive spreadsheet designed to simplify your life.
You need to follow these simple steps.
Step 1. Install WooCommerce Product Configurator
WooCommerce Product Configurator allows you to create “image layers” and generate the variation images automatically based on the selected attributes (colors, styles, etc.). For example:
The product configurator plugin provides some fields where you can configure the image layers.
You can download the plugin here:
Download WooCommerce Product Configurator
Step 2. Install WP Sheet Editor: WooCommerce Products Spreadsheet
This plugin allows you to bulk edit your products in seconds. It displays the products and their complete information in a spreadsheet where you can do advanced searches, apply massive changes in seconds, export and import products, create variations in seconds, duplicate products quickly, etc.
You can download the plugin here: Download WooCommerce Products Spreadsheet Plugin - or - Check the features
Step 3. Install the “WP Sheet Editor – Iconic WP’s Product Configurator” extension
This extension will add special columns to the spreadsheet editor where you can edit the Product Configurator options.
This extension is free for users of the premium plugin: WP Sheet Editor – Products Spreadsheet.
Step 4. Create a configurable product with WooCommerce Product Configurator
You need to configure a variable product and set the Configurator settings so that the spreadsheet can detect the Configurator fields and display the columns.
Here you can read how to create your first configurable product.

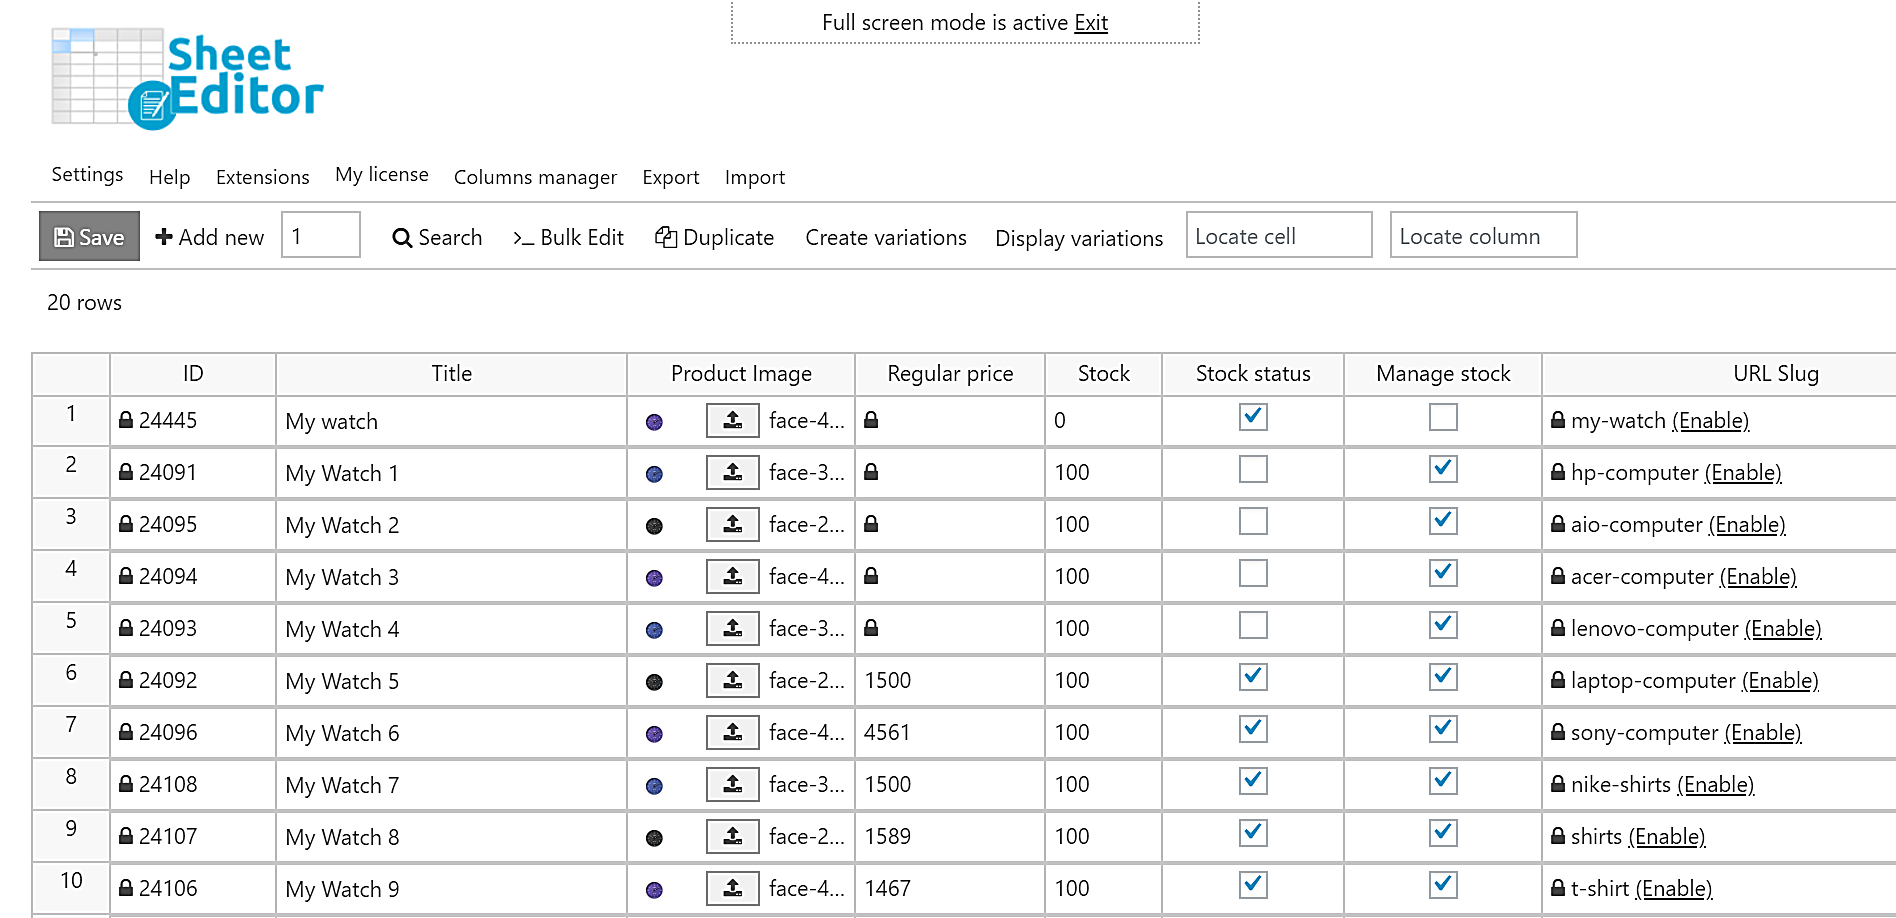
After you’ve created a configurable product, go to WP Sheet Editor > Edit Products to open the spreadsheet.
All your products will be displayed as rows and their complete information as columns.
Now we want to show you how to get the most out of the integration of WP Sheet Editor’s Products Spreadsheet and WooCommerce Product Configurator in the sections below.
1- How to enable the Configurator for all variable products at once
To enable the Configurator for all the variable products at once, you need to follow some simple steps:
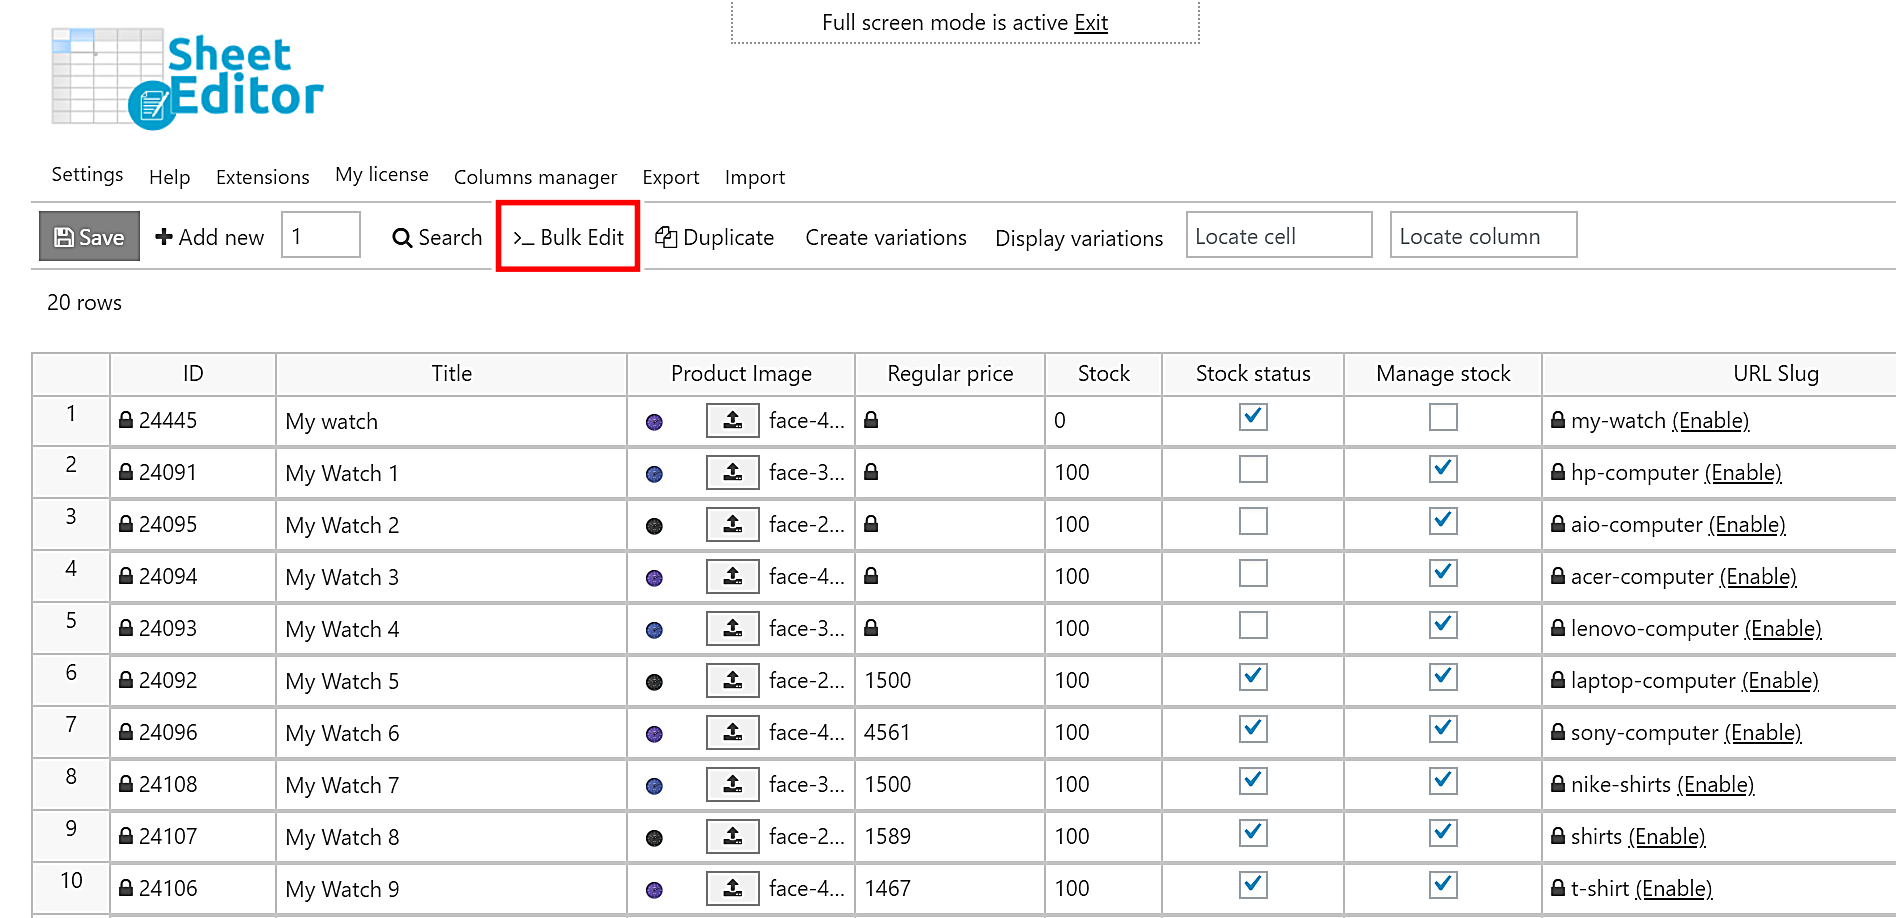
a) Open the “Bulk Edit” tool
This tool allows you to edit thousands of products at once, and now we’ll use it to enable the Configurator for all the products.
Open it with one click on Bulk Edit on the toolbar.
b) Search for all the variable products
To search for all the variable products, select I want to search rows to update and edit all the search results. This will open the Search tool to filter your products.

Once the Search tool has been opened, you need to tick the Enable advanced filters and select the following values:
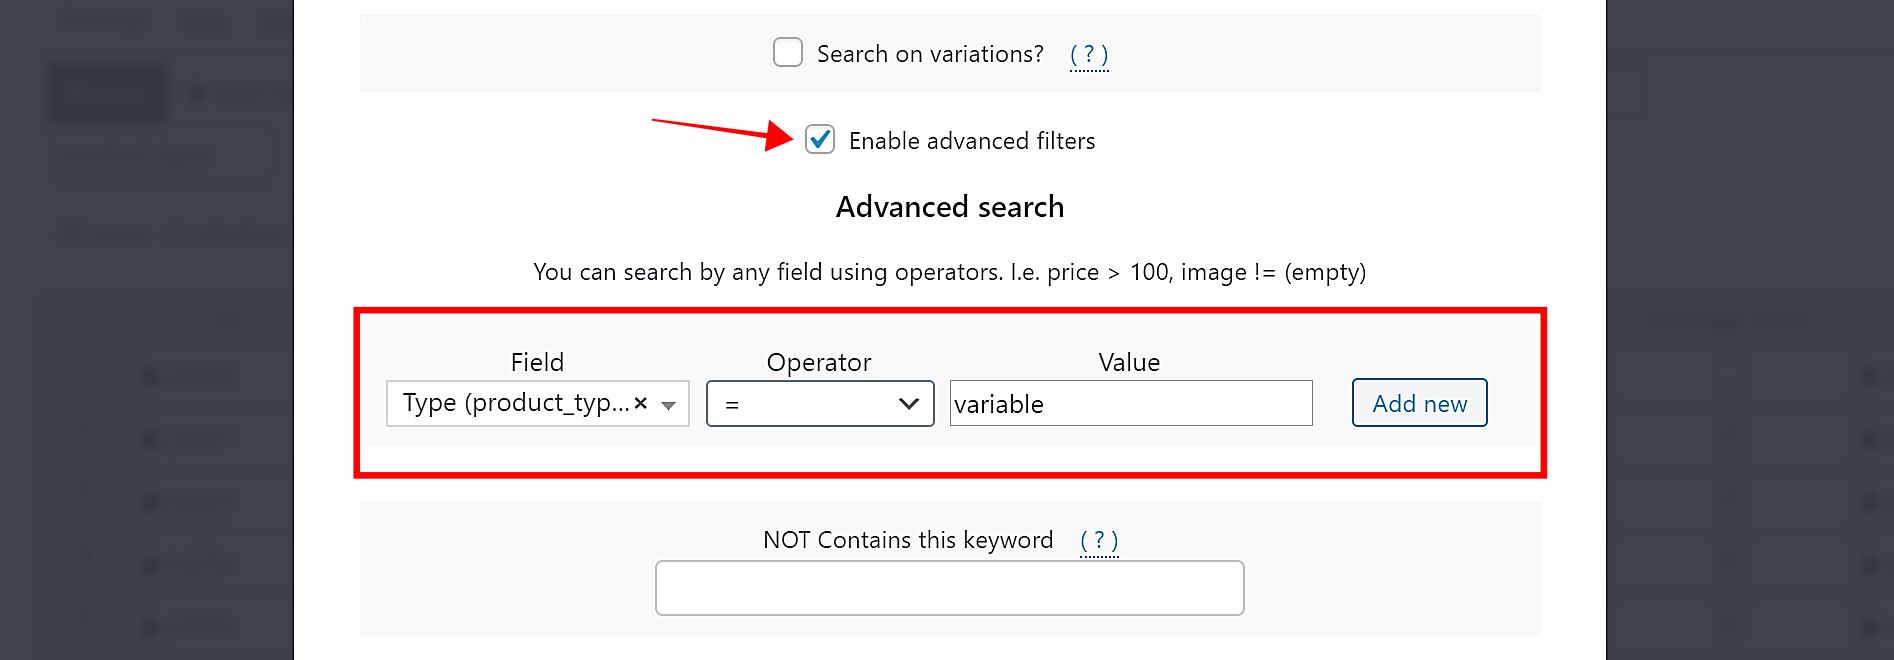
- Field: Type
- Operator: =
- Value: variable
- Click on Run search to filter all the variable products
c) Enable the Configurator for all the filtered products
After filtering all the variable products, select these values to enable the Configurator for all the filtered products.

- Select the rows that you want to update: I want to search rows to update and edit all the search results.
- What field do you want to edit: Configurator enabled
- Select type of edit: Set value
- Replace existing value with this value: Tick the checkbox to enable the Configurator for all the filtered products.
- Click on Execute now to apply this massive change.
After these simple steps, you’ll have enabled the Configurator for all the variable products. As you see, you don’t have to open and edit the products one by one.
2- How to upload image layers in the spreadsheet
You can upload image layers quickly using the spreadsheet. This is great because you don’t have to spend a lot of time opening, editing, and saving changes to your products one by one.
You just need to go to the Product Configurator columns for layers and upload the images or paste a valid URL.
We have these three product colors: Black, Blue, Purple. Therefore, the spreadsheet will show us these columns:
- Configurator Enabled
- Configurator: Background
- Configurator: Pa Color: Black
- Configurator: Pa Color: Blue
- Configurator: Pa Color: Purple
The Configurator Enabled column is a checkbox field to enable/disable the Configurator. You can tick the first one and autofill the cells below.
In the Background column, you can upload the background image layer. In the Pa Color columns, you can upload the different image layers for your products.
Something great is that you have two options:
- Upload the image layers from your computer by clicking on the Upload button.
- Paste a valid URL by double-clicking the cell to edit it as simple text.

Once you’re done adding the image layers to all the products, click on Save to apply all the changes
Important. You can auto-fill the cells below as if you were editing in Excel or Google Sheets.
3- How to upload image layers in bulk
In this example, we’ll show you how to upload image layers for all the products containing the Blue attribute, but you can apply this to all products by keyword, category, tag, any other attribute, etc.
a) Open the “Bulk Edit” tool
Start by opening the Bulk Edit tool. It’s on the toolbar, so just click on it.
b) Search for all the products containing the “Blue” attribute
To search for all the products containing the Blue attribute, you need to select I want to search rows to update and edit all the search results. This will open the Search tool.
After opening the Search tool, you need to select the Blue attribute in the Enter Tags field and click on Run Search.

c) Upload the new background layer for all the filtered products
Once the products with the Blue attribute have been filtered, select these values to upload an image layer to all of them:

- Select the rows that you want to update: I want to search rows to update and edit all the search results.
- What field do you want to edit: Configurator: Pa Color : Blue. Important. You decide in which color you want to upload the image layer.
- Select type of edit: Set value
- We will replace the existing media file with this file: You can upload the file or paste a valid URL.
- Click on Execute now.
After applying this massive change, all the products with the Blue attribute will contain the same image layer.
4- How to replace background layers in bulk
If you have designed a new background layer for all your watches for example, you can replace the current layer from all your products with just a few clicks.
First, open the Bulk Edit tool with one click on the toolbar.
After that, you may want to search for all the products containing the Watch keyword in their titles, so you need to open the Search tool by selecting this option: I want to search rows to update and edit all the search results.
Now you need to enter the Watch keyword in Contains keyword and click on Run search to filter all the products containing it.

After filtering all the products containing the Watch keyword in their titles, you need to select these values to replace the existing background for a new one.
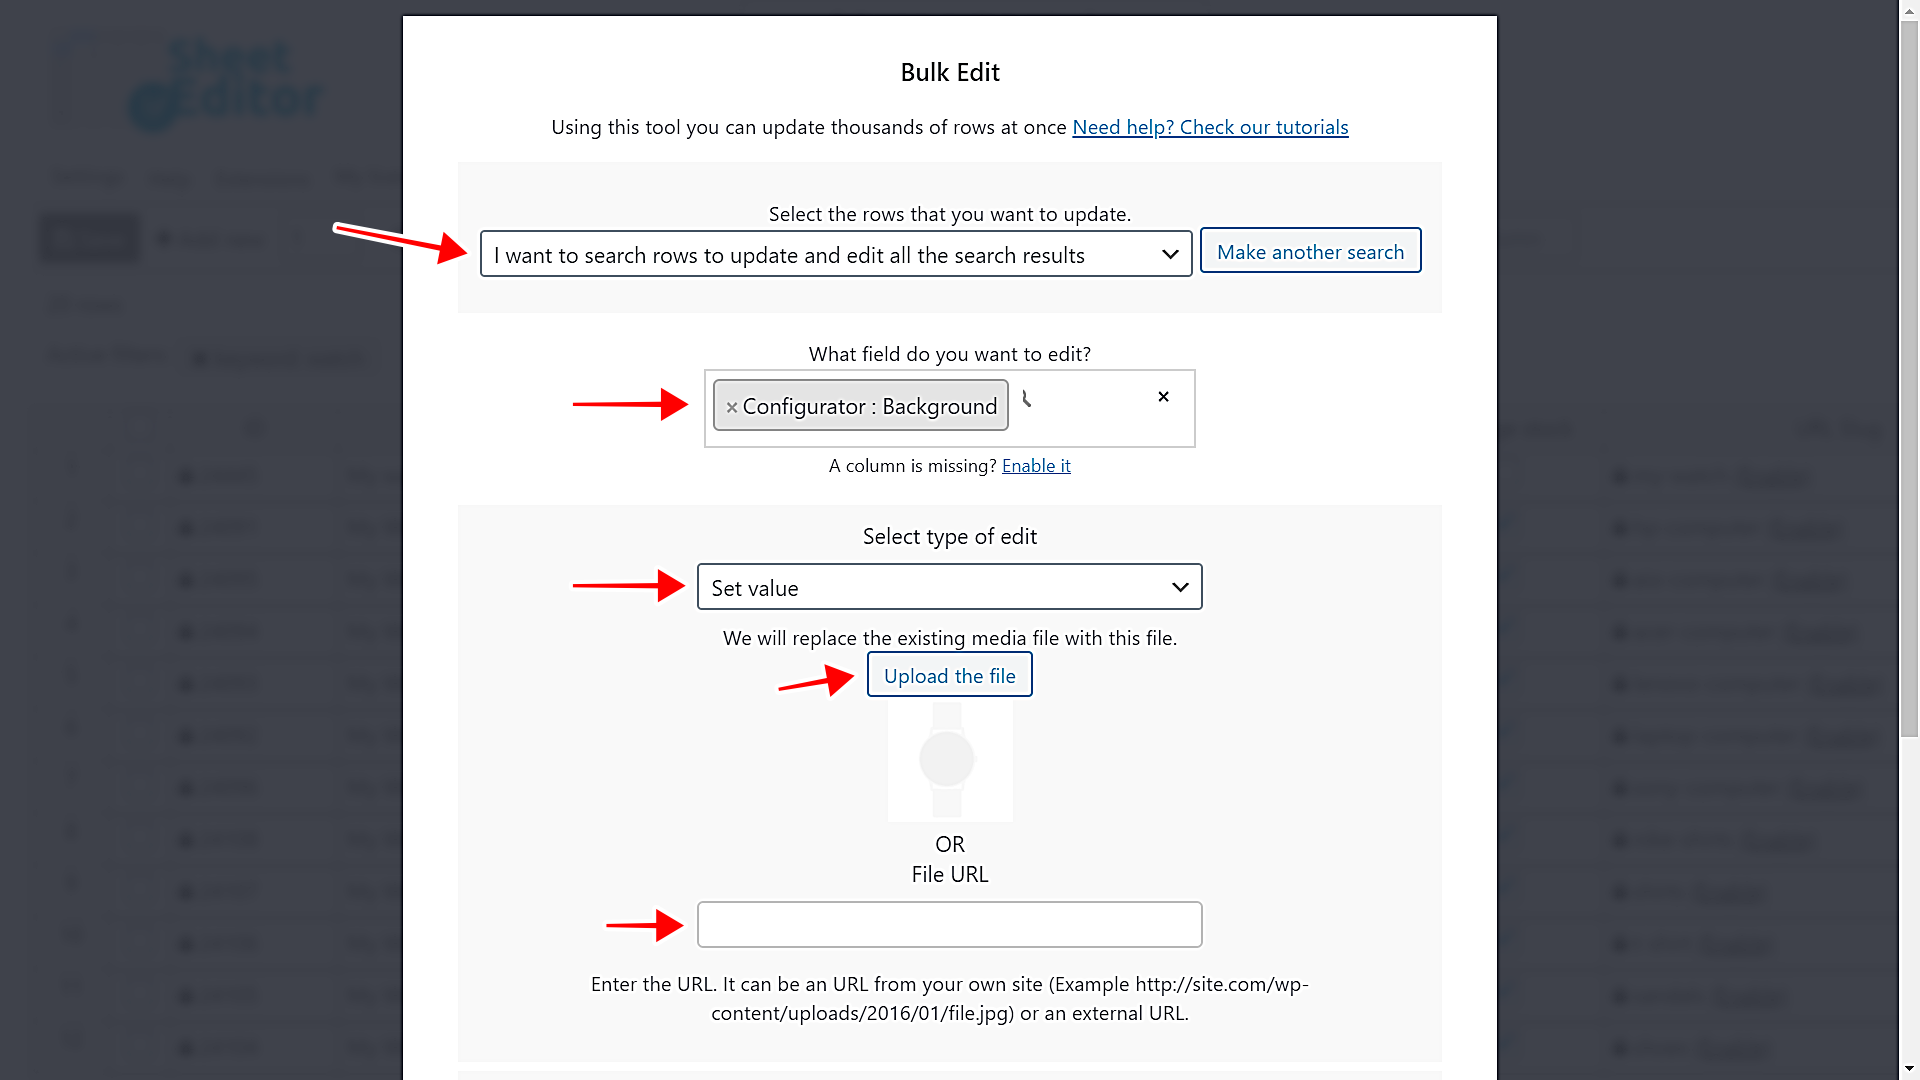
- Select the rows that you want to update: I want to search rows to update and edit all the search results.
- What field do you want to edit: Configurator: Background
- Select type of edit: Set value
- We will replace the existing media file with this file: You can upload the background layer or paste a valid URL.
- Click on Execute now.
Done! With these simple steps, you’ll have replaced the background layer from all the selected products.
5- How to import image layers from Excel or Google Sheets
If you have created a CSV file in Excel or Google Sheets containing the background and color layers for all your products, you can import it quickly.
Supported values:
- The layers must be image URLs from your server
- or external URLs (they are imported to your site automatically)
- or use the file name of an image from the wp media library

First, you need to open the Import tool with one click on the top toolbar.

After that, select the Source from which you want to obtain the layers. You have these options:
- CSV file from my computer
- CSV from URL
- Copy & paste from another spreadsheet or table
- CSV file in the server
We’ll choose the first one: CSV file from my computer. Once you select the file from your computer, click on Next.

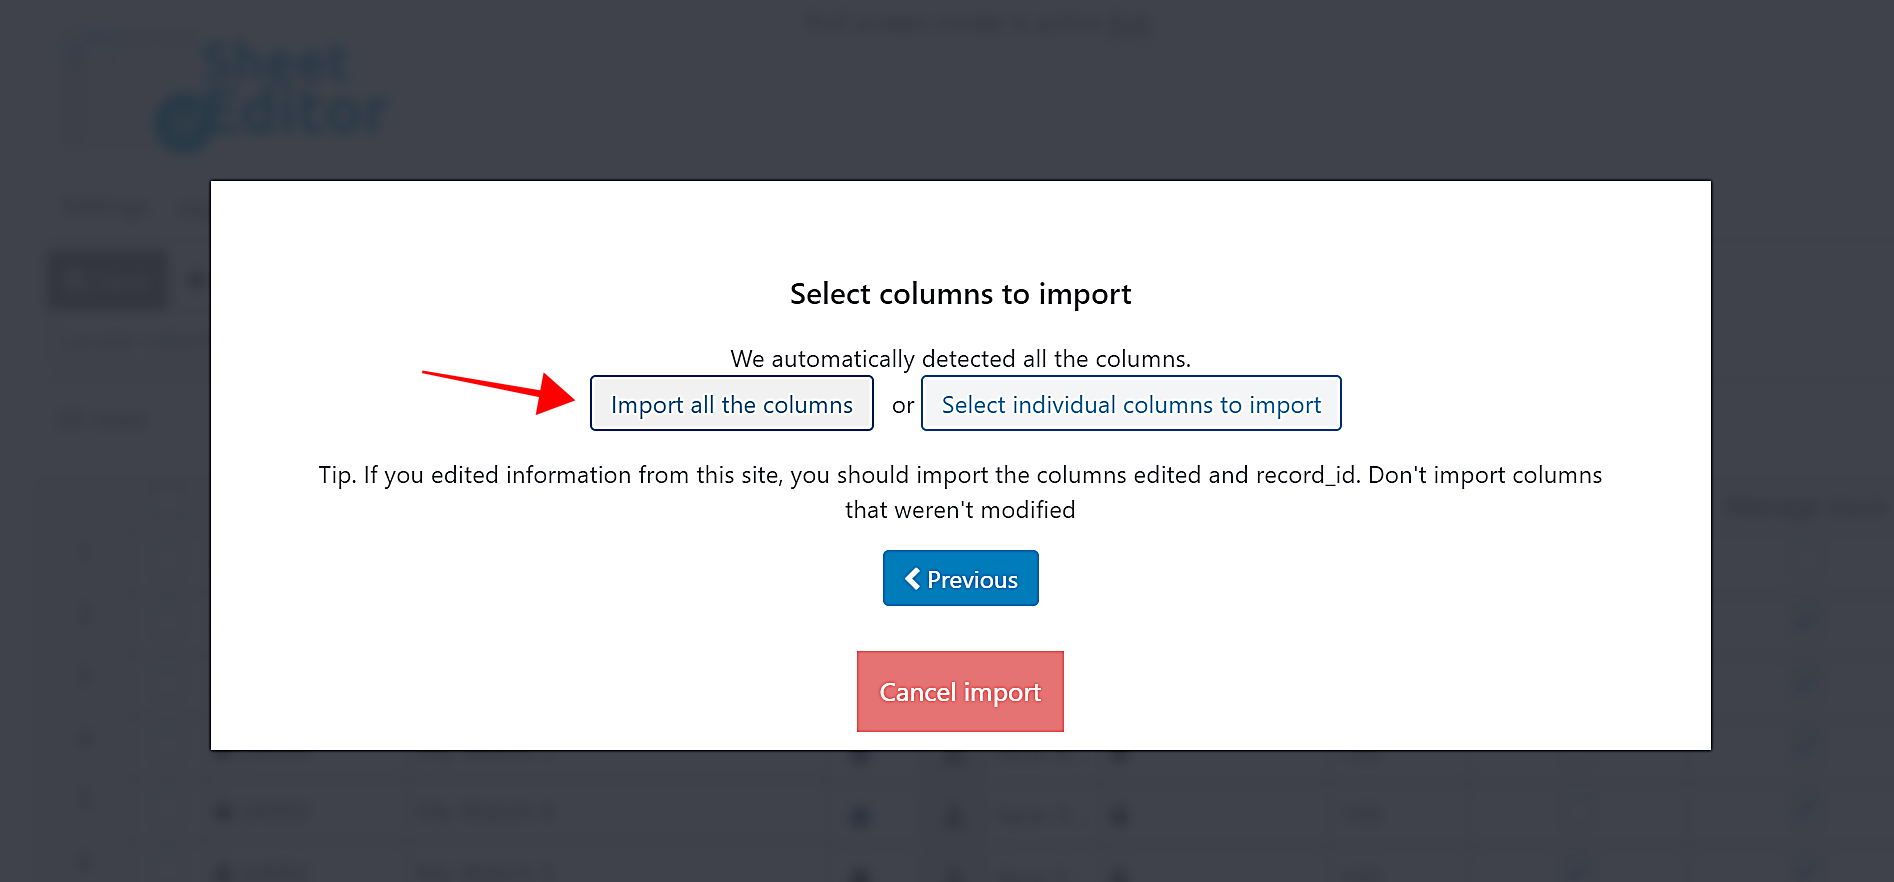
After that, click on Import all columns.
Now you need to do the following:
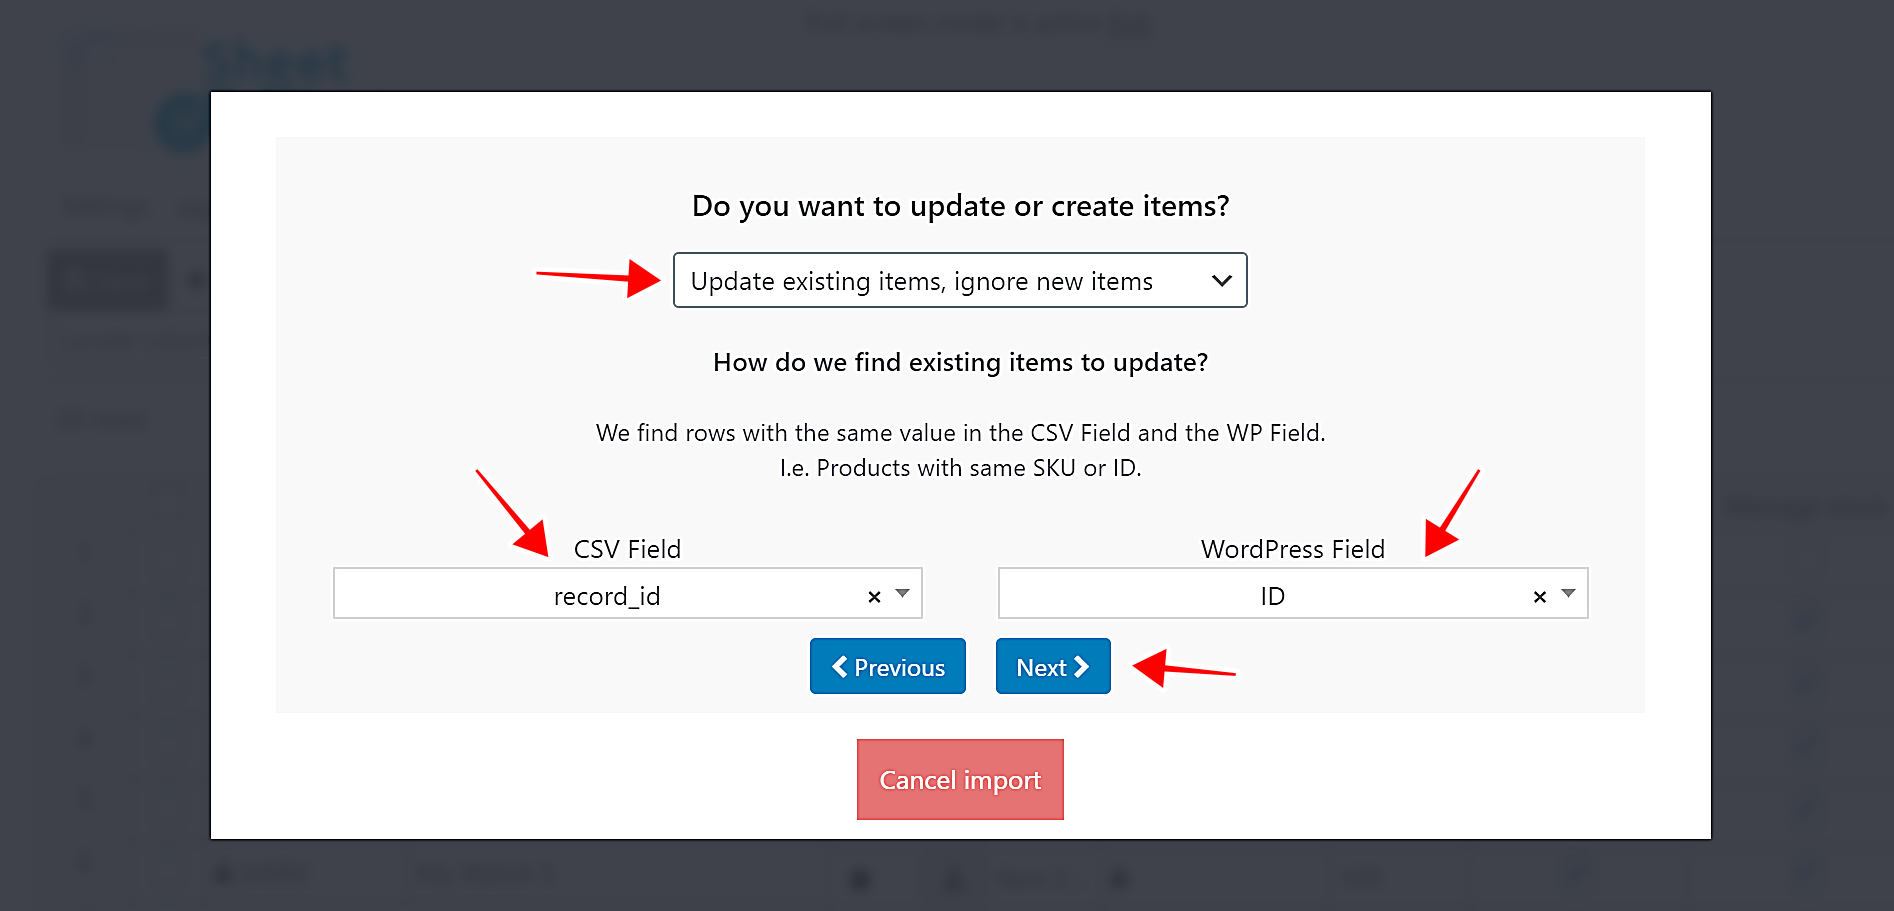
- Select Update existing items, ignore new items.
- Match the product IDs in the CSV with the IDs in WordPress.
- Click on Next.
After that, you’ll see a preview, if everything is OK, click on start import.
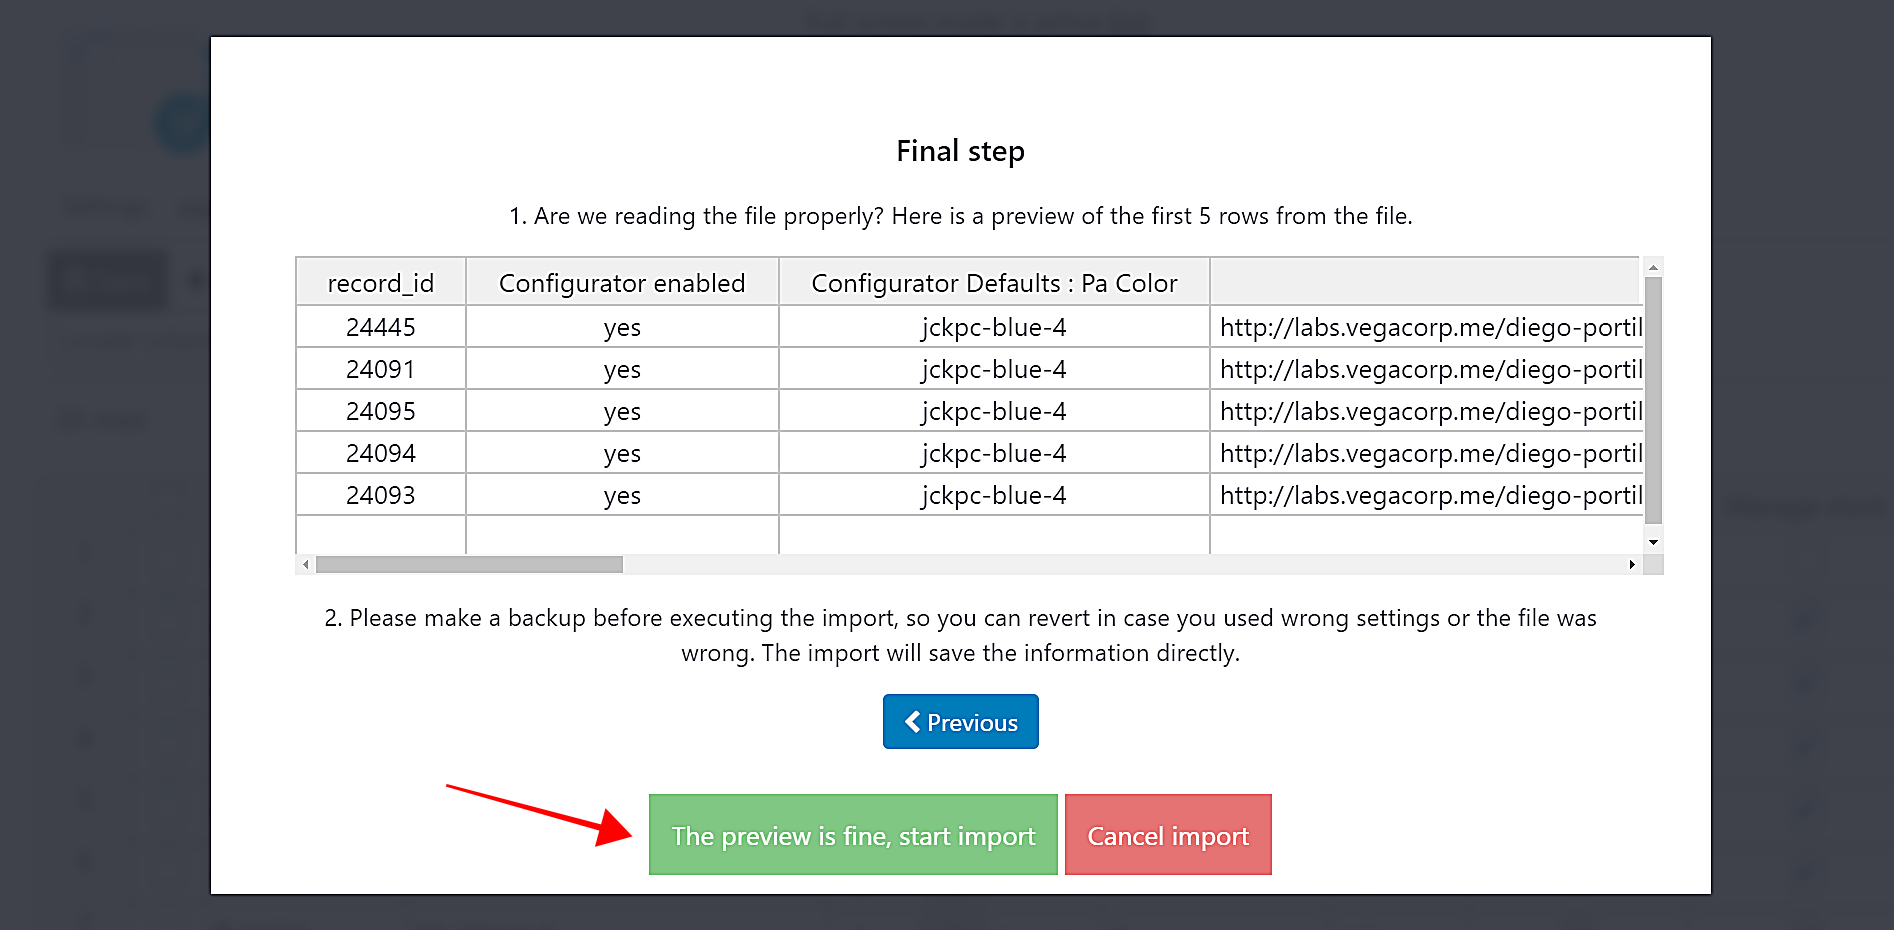
Once the import process has finished, you’ll see all the values imported and applied to your products in the spreadsheet.
Start editing your image layers with WP Sheet Editor!
WP Sheet Editor and WooCommerce Product Configurator are the perfect integration to upload and manage image layers for your variable products.
You can save a lot of working hours by editing your products in bulk and using advanced search filters. You can also import image layers in seconds from Excel or Google Sheets.
You can download the plugin here: Download WooCommerce Products Spreadsheet Plugin - or - Check the features