Selling apparel, electronics, or customizable items means dealing with variable products. While offering different sizes, colors, and materials is great for your customers, variations are arguably the most time-consuming data type to manage in the default WooCommerce backend.
To change the price, update the SKU, or adjust the stock of a single variation, you have to:
- open the parent product,
- click on the Variations tab,
- wait for the interface to load,
- expand the specific dropdown accordion,
- type your new value,
- and finally save the changes.
If you need to increase the price of all “XXL” t-shirts across a catalog of 200 items, doing this manually is simply not a realistic option.
In this tutorial, we will show you how to manage WooCommerce product variations directly in Google Sheets. By setting up a real-time, bidirectional sync, you can view every single variation as an individual row, bulk edit prices based on attributes, and update your stock levels using spreadsheet formulas.
Why manage WooCommerce variations from Google Sheets?
Moving your variation data out of the clunky WooCommerce interface and into a spreadsheet offers massive workflow improvements:
- Uncover hidden data: Instead of variations being buried inside parent product accordions, Google Sheets displays every variation as its own row, making it instantly accessible.
- Attribute-based bulk edits: Use Google Sheets filters to isolate specific combinations (e.g., filter by “Color: Black” and “Size: Small”) to update their stock status all at once.
- Advanced pricing formulas: Quickly apply a 10% price markup to specific variations by referencing the parent product’s base price using simple math formulas.
What you need to sync your variations
To bypass the default WooCommerce interface and manage variations in bulk, we will use these two WP Sheet Editor tools:
WP Sheet Editor – WooCommerce Products: This plugin creates a spreadsheet inside your WordPress dashboard that allows you to view and edit parent products alongside their variations.
You can purchase the plugin here:
Get the WooCommerce Products spreadsheet - or - Check the features
Google Sheets Sync: This service connects your WP Sheet Editor spreadsheets to your Google Sheets account, enabling automatic exports and imports between your WordPress sites and Google Sheets.
You can sign up to the service here:
Sign up to the Google Sheets Sync Service - or - Check the features
Step 1. Connect WordPress to Google Sheets
Once you have subscribed to the Google Sheets Sync service, you will need to install a helper plugin that handles the secure API connection between your store and your Google account.
Follow our comprehensive installation guide to authorize your account and get the synchronization engine running.
Step 2. Export WooCommerce variations for real-time sync
To establish the link between your store and Google Sheets, we need to create an active export job that includes both parent products and their variation children.
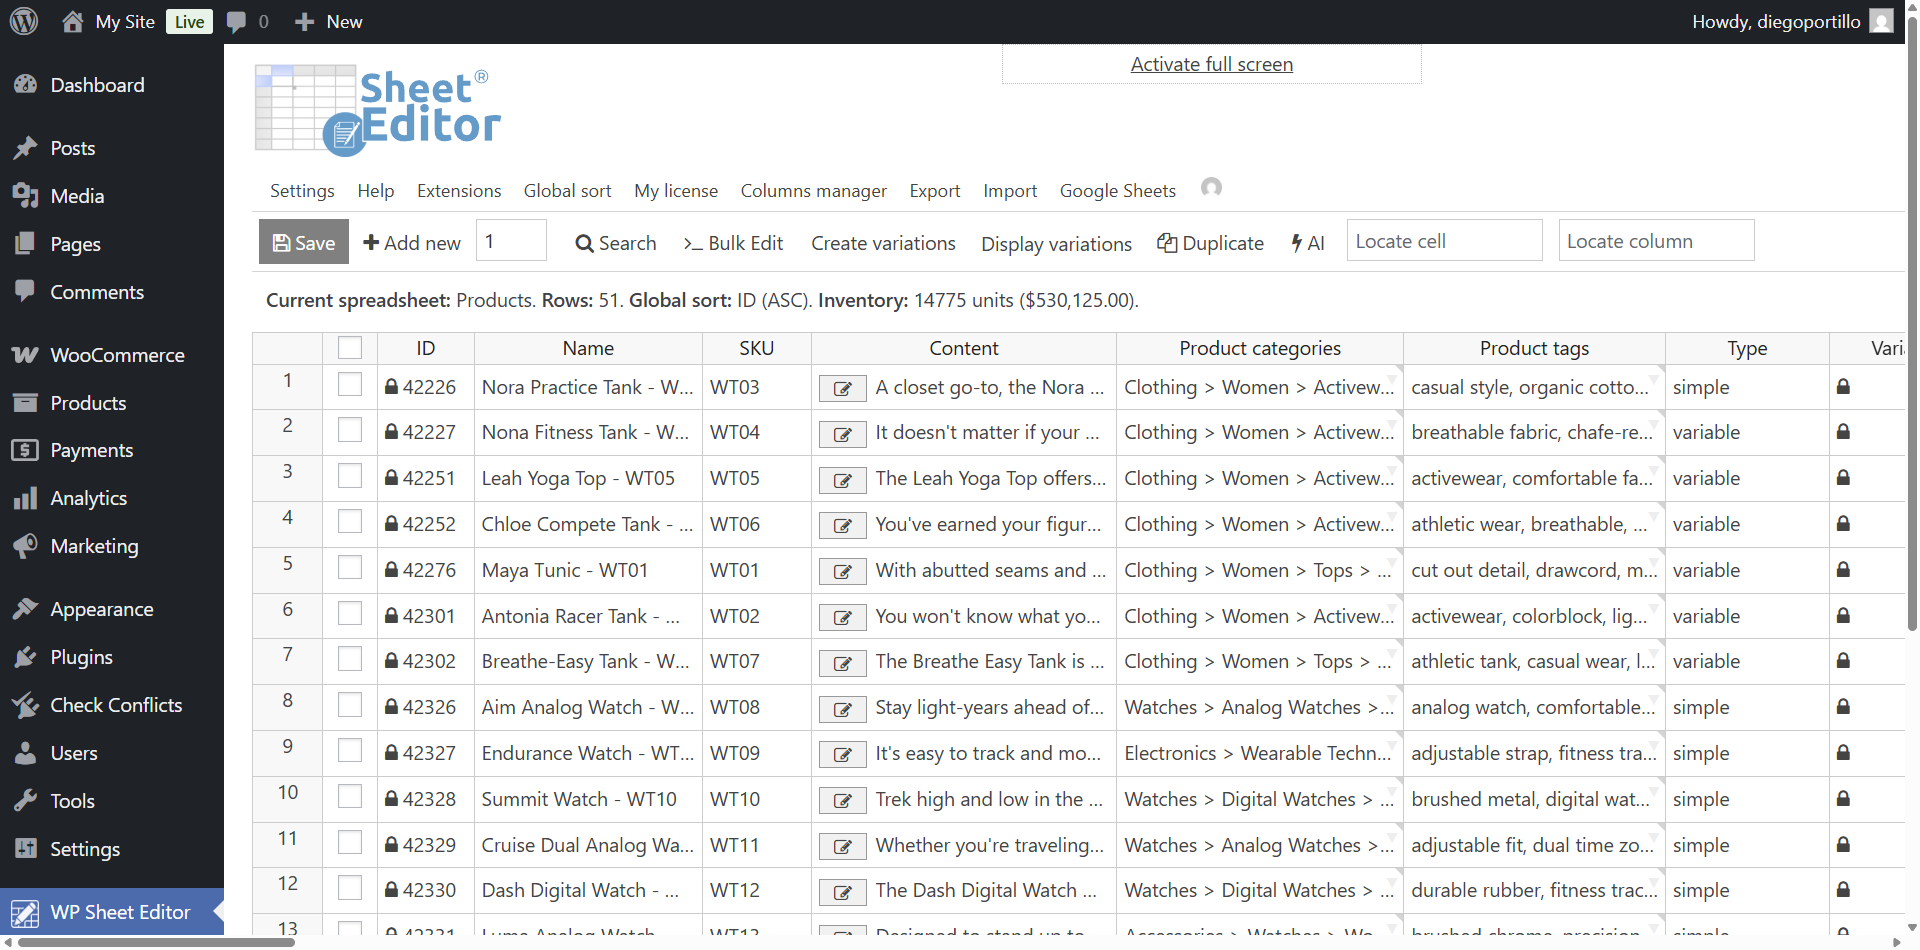
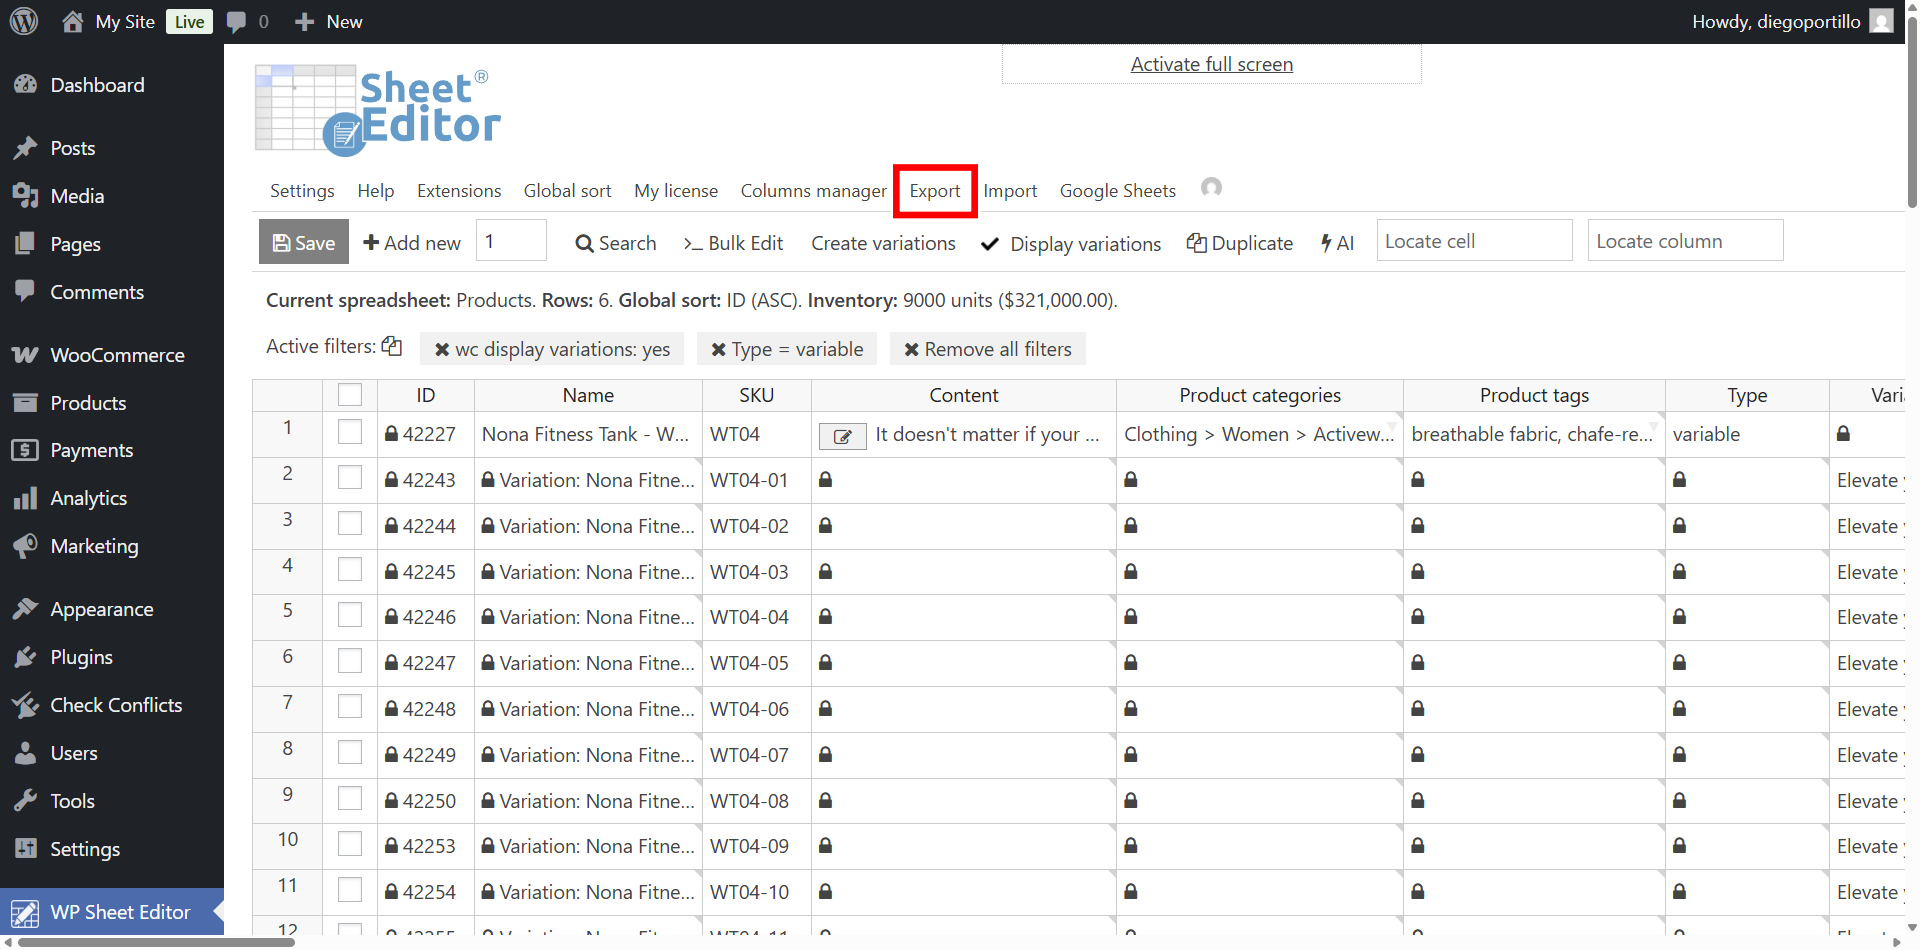
Go to WP Sheet Editor > Edit Products.
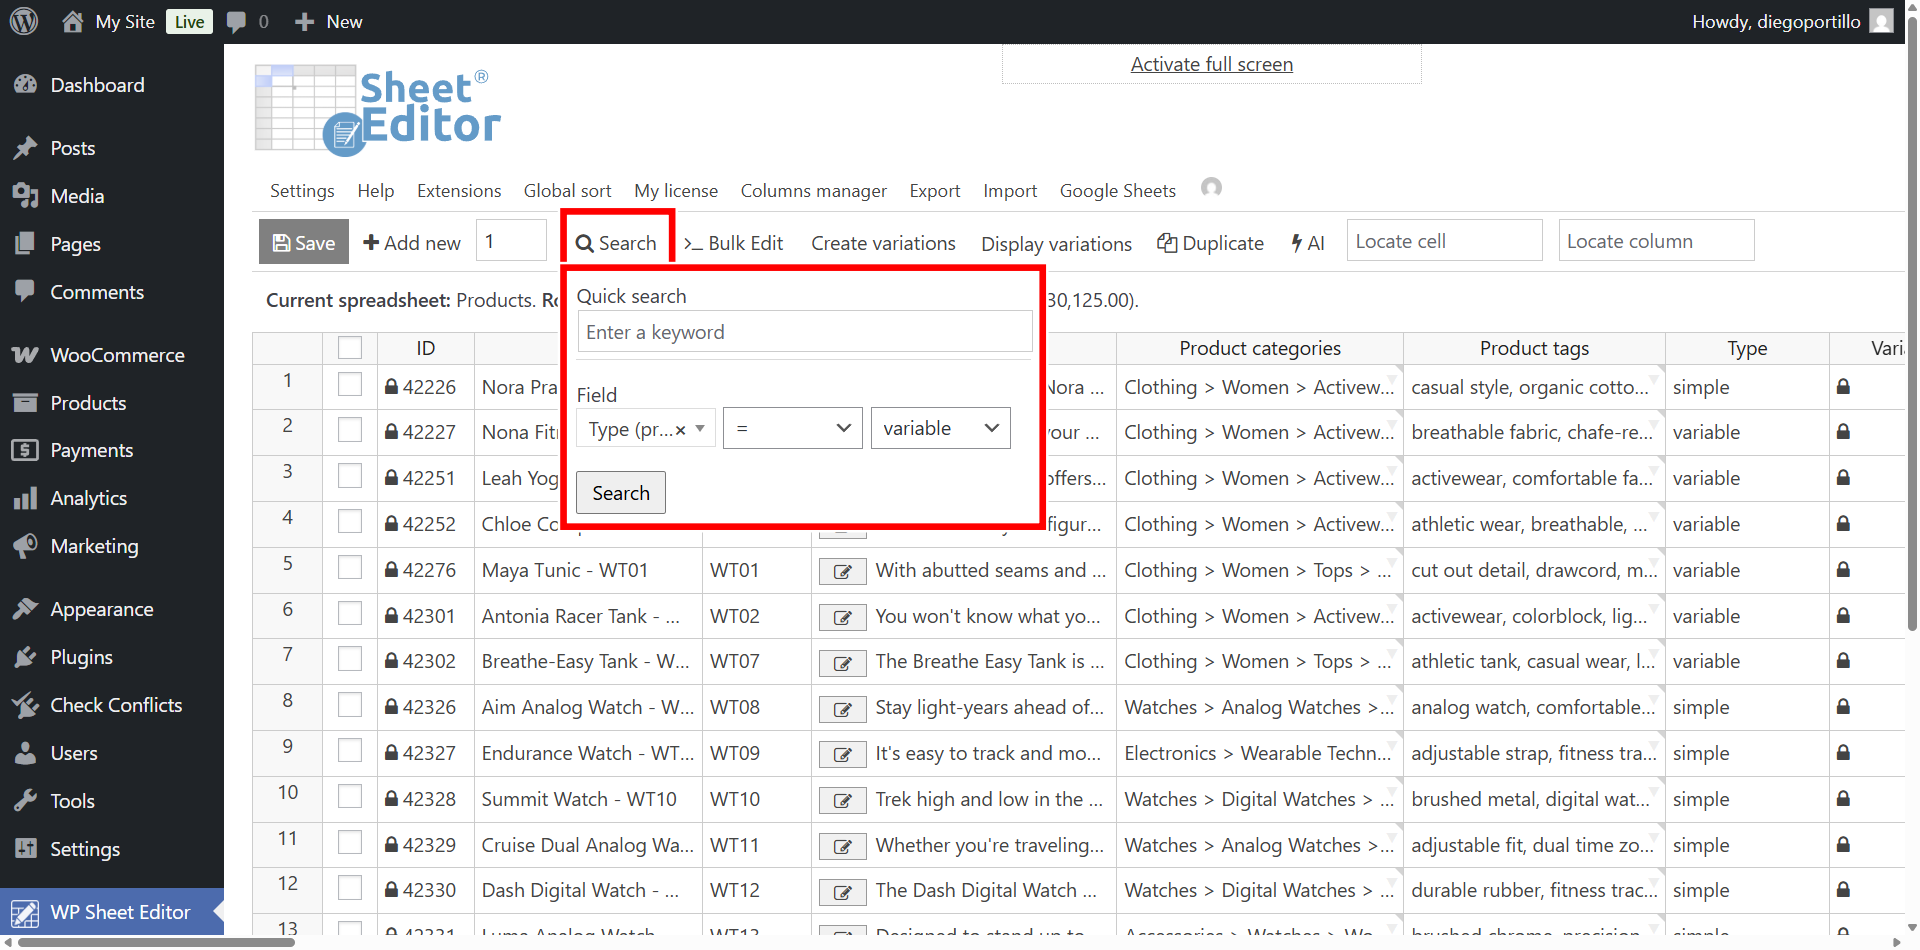
Before exporting, let’s filter all the variable products. Just hover your mouse cursor over the Search tool and use the advanced filter:
- Type = Variable
Once you’ve entered the search terms, click on Search.
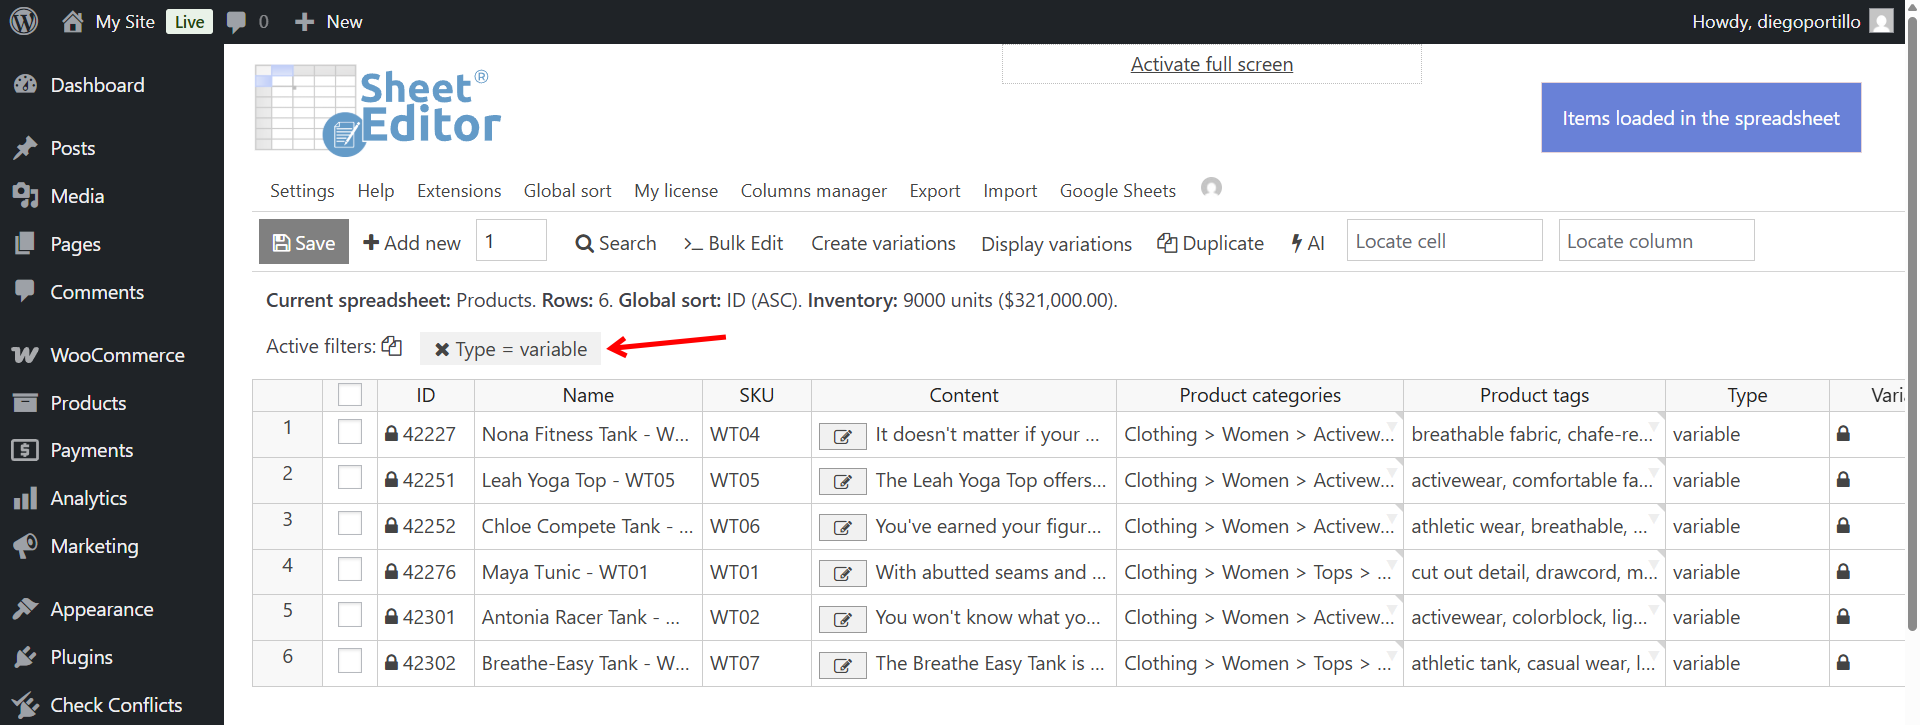
The spreadsheet will display variable products only.
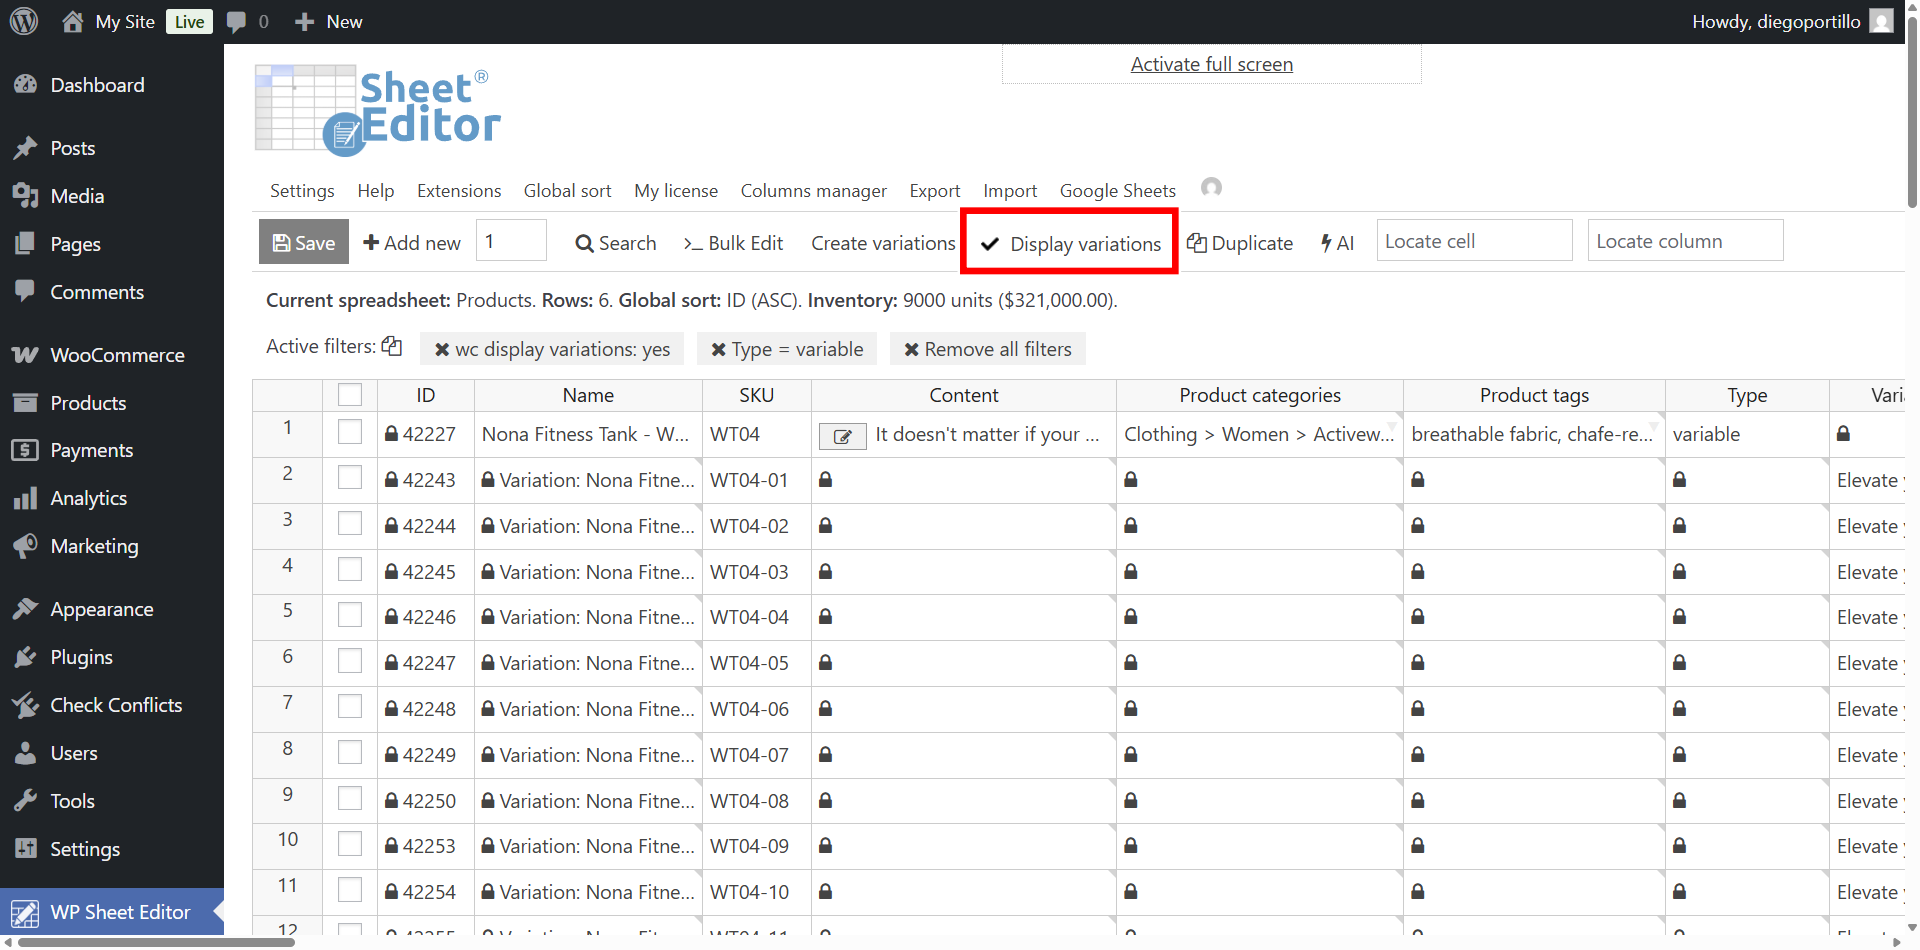
Now make sure variations are visible in the plugin’s spreadsheet. Click on the Display variations button on the top toolbar so the child rows appear under their parent products.
Next, click on the Export tool.
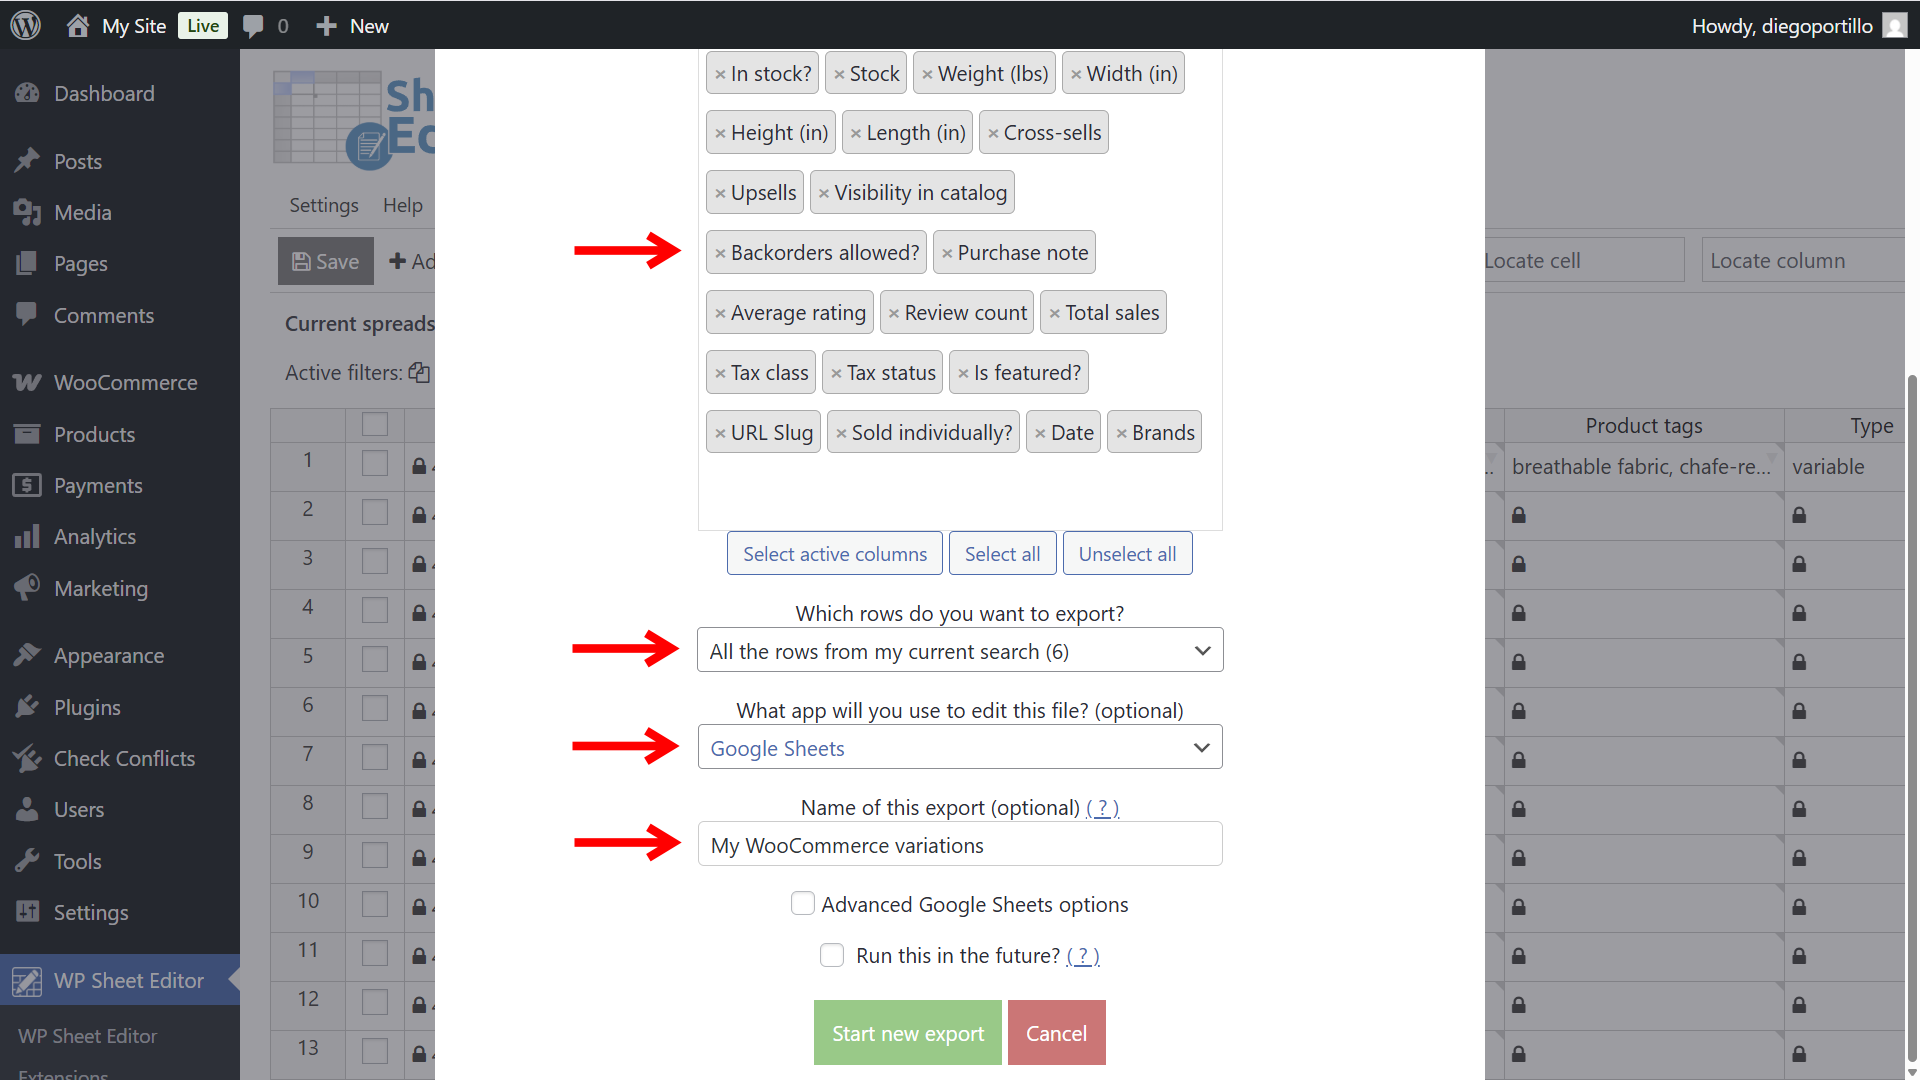
Select these settings in the Export popup window:
- What columns do you want to export: Select the columns crucial for variation management. In this example, we will export all the fields, but you can export specific fields like:
- Name (This will show the variation name, e.g., “T-Shirt – Black, Large”)
- SKU
- Parent
- Type (To distinguish between ‘product’ and ‘variation’)
- Regular price
- Stock
- Product attributes (e.g., Attribute 1: Size, Attribute 2: Color)
- Which rows do you want to export?: Select “All the rows from my current search”.
- What app will you use to edit this file?: Choose Google Sheets.
- Name of this export: You can name it something identifiable like “Live Variations Sync”.
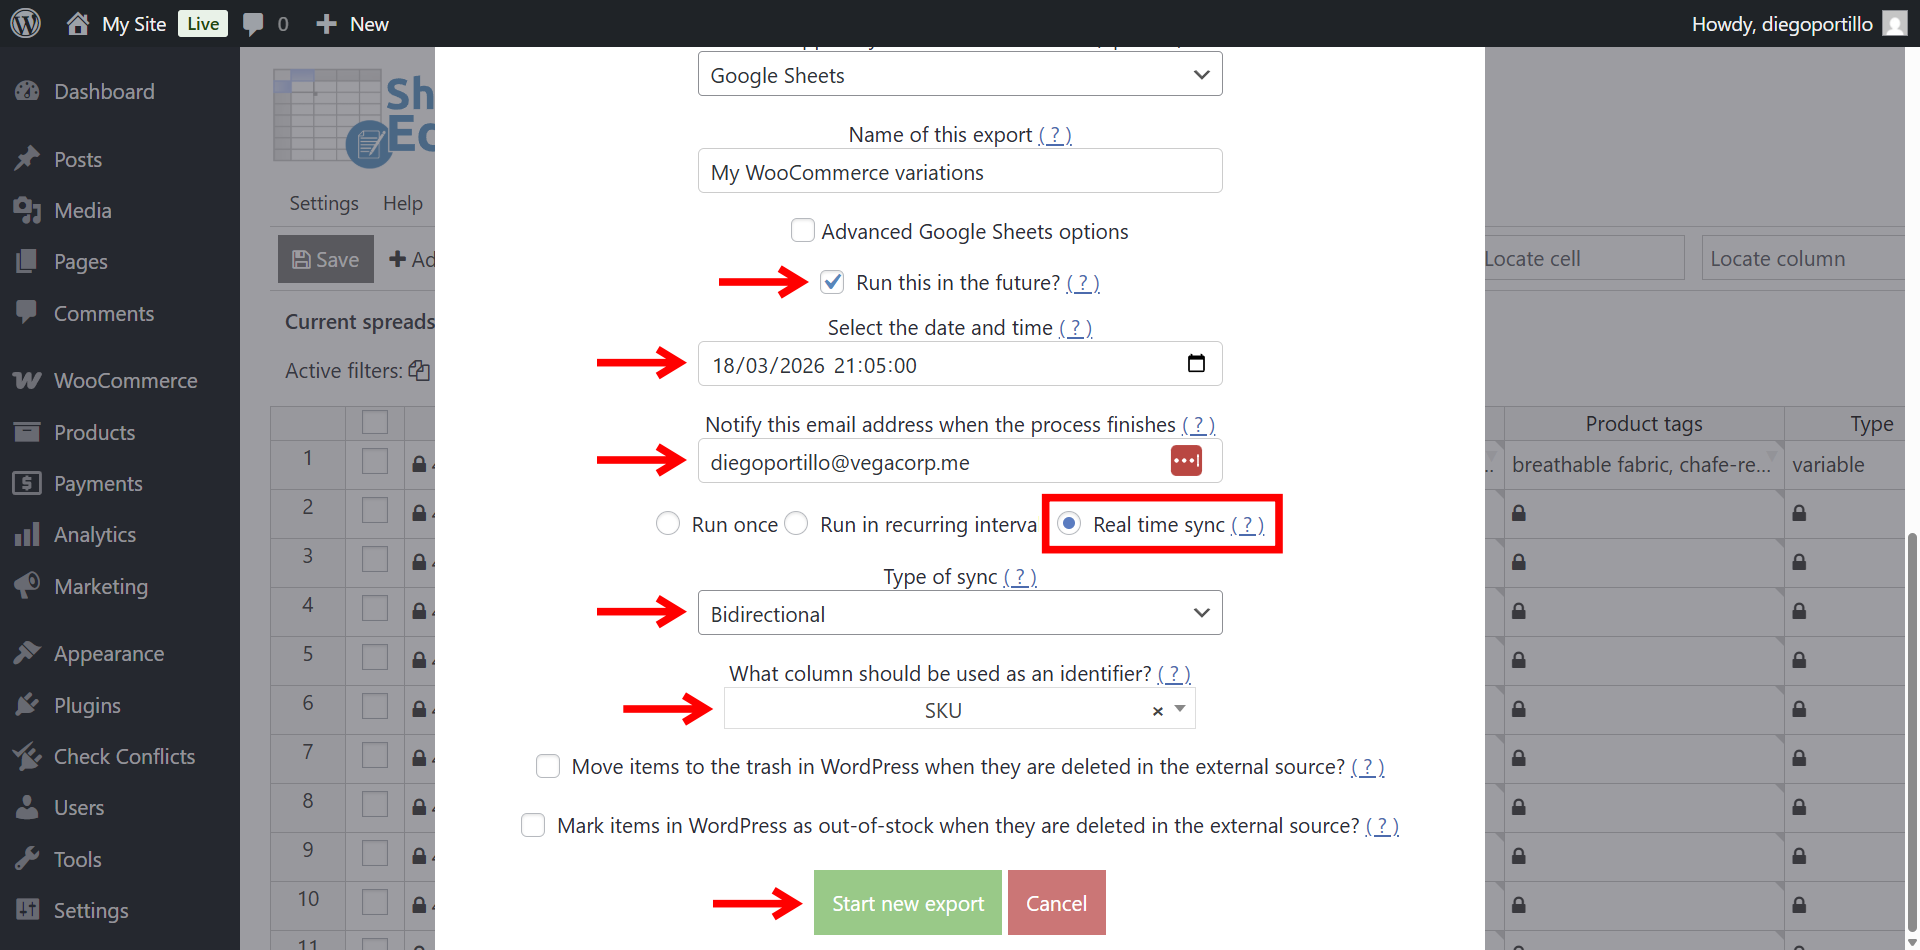
To make this a live connection rather than a one-time export, configure the automation settings:
- Tick the Run this in the future checkbox.
- Select the date and time when you want this bidirectional sync to start.
- Notify this email address when the process finishes: Input your email to receive sync logs.
- Select Real time sync.
- Type of sync: Choose Bidirectional so edits in Google Sheets flow back to WooCommerce.
- What column should be used as an identifier: Select ID or SKU to ensure variations map perfectly to the database.
- Click Start new export.
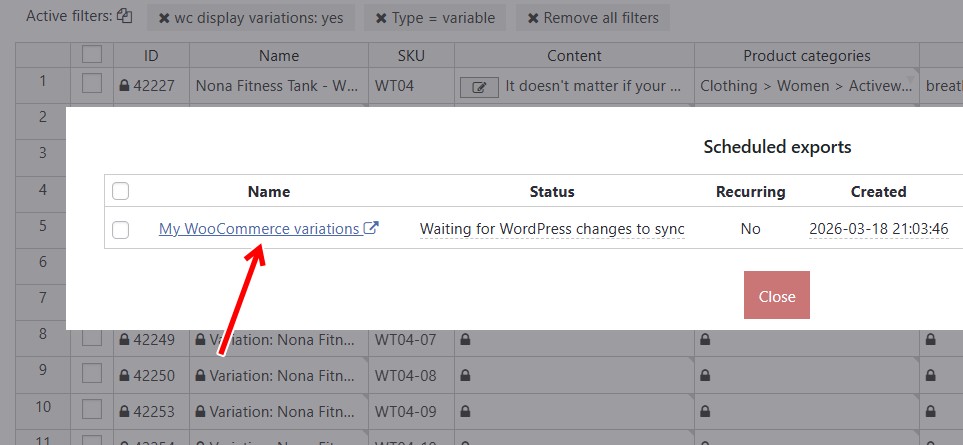
Now if you go to Export > View scheduled exports, you’ll see the new export you just scheduled.
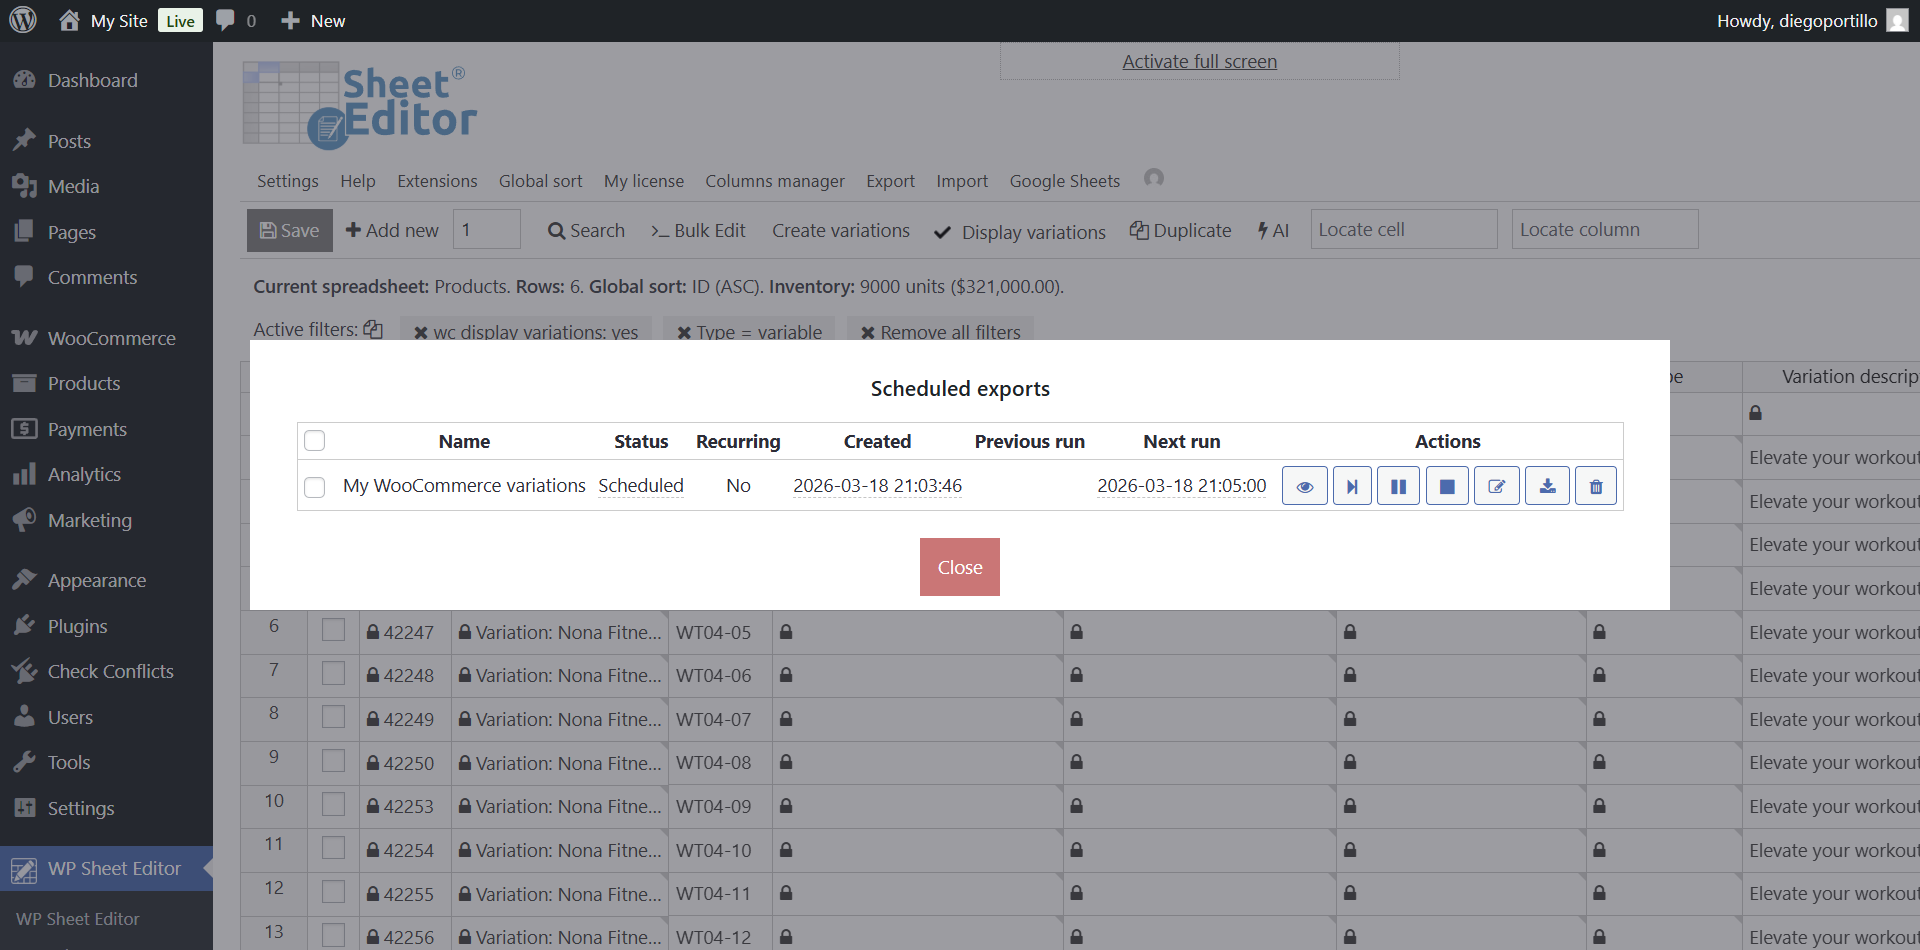
Once it runs, you’ll see a link to the new Google Sheet containing your products and variations data.
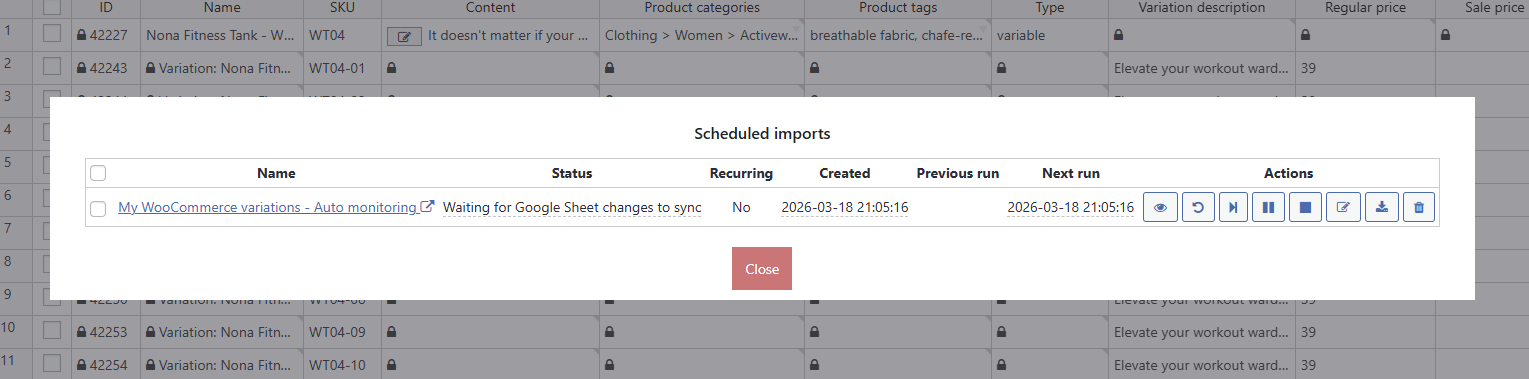
Also, the plugin will automatically set up an import that will auto monitor the changes you make in Google Sheets to import them back to WooCommerce automatically; this is what allows you to manage variations in Google Sheets on autopilot.
Step 3. Edit Variation Prices and Stock in Google Sheets
Once you open the generated Google Sheet link, you will notice how much easier it is to digest your catalog data. Parent products and their variations are listed clearly row by row.
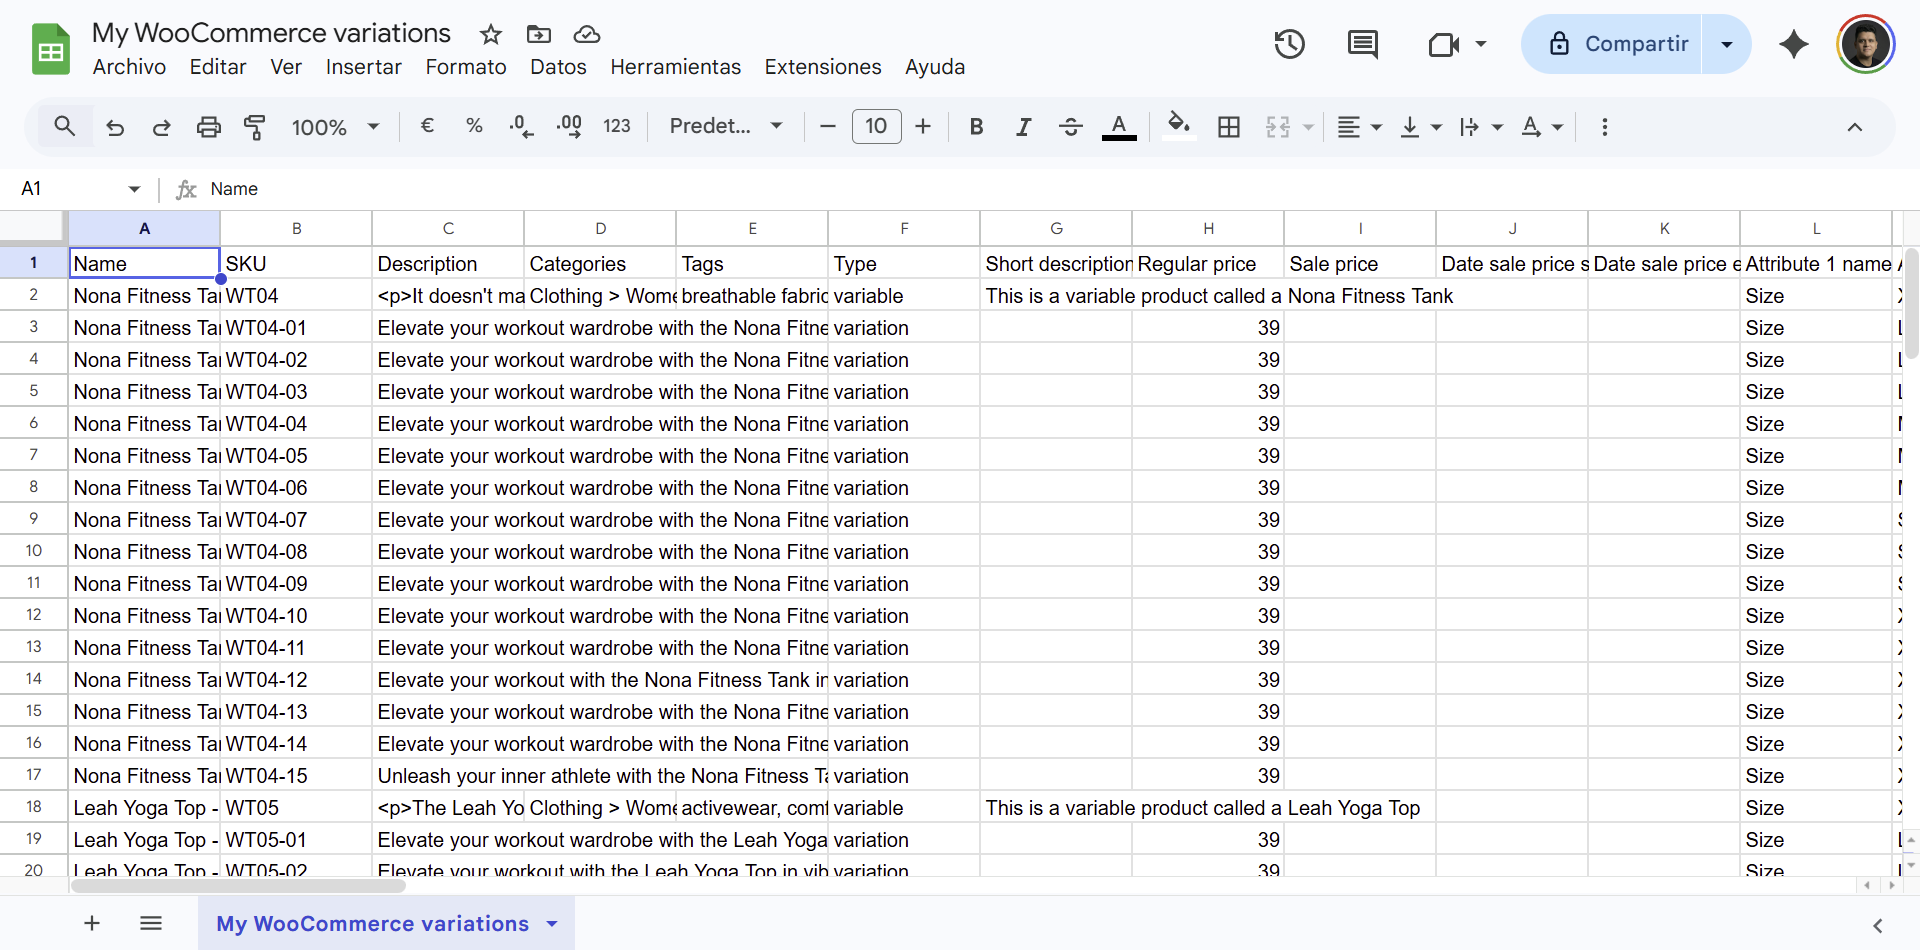
You can perform powerful bulk actions:
- Filter and update: Use Google Sheets’ native filtering to show only rows where Type = variation and Attribute 1: Size = XXL. Now, you can highlight the Regular price column and increase the value for all XXL items simultaneously.
- Inventory audits: Sort your spreadsheet by the Stock column to instantly identify which specific color and size combinations are sold out, allowing you to reorder accurately.
- Drag-and-fill data: If you are standardizing SKUs across a product line, you can establish a naming convention in the first variation row and drag the cell downward to auto-generate sequential SKUs for the rest.
Step 4. Auto-sync changes back to WooCommerce
Because we selected a bidirectional sync, you do not need to manually upload a CSV file when you are done making changes in Google Sheets. The integration listens for your edits.
Every time you modify a variation’s price, stock, or attribute in Google Sheets, the service queues the update and pushes it directly into your live WooCommerce database.
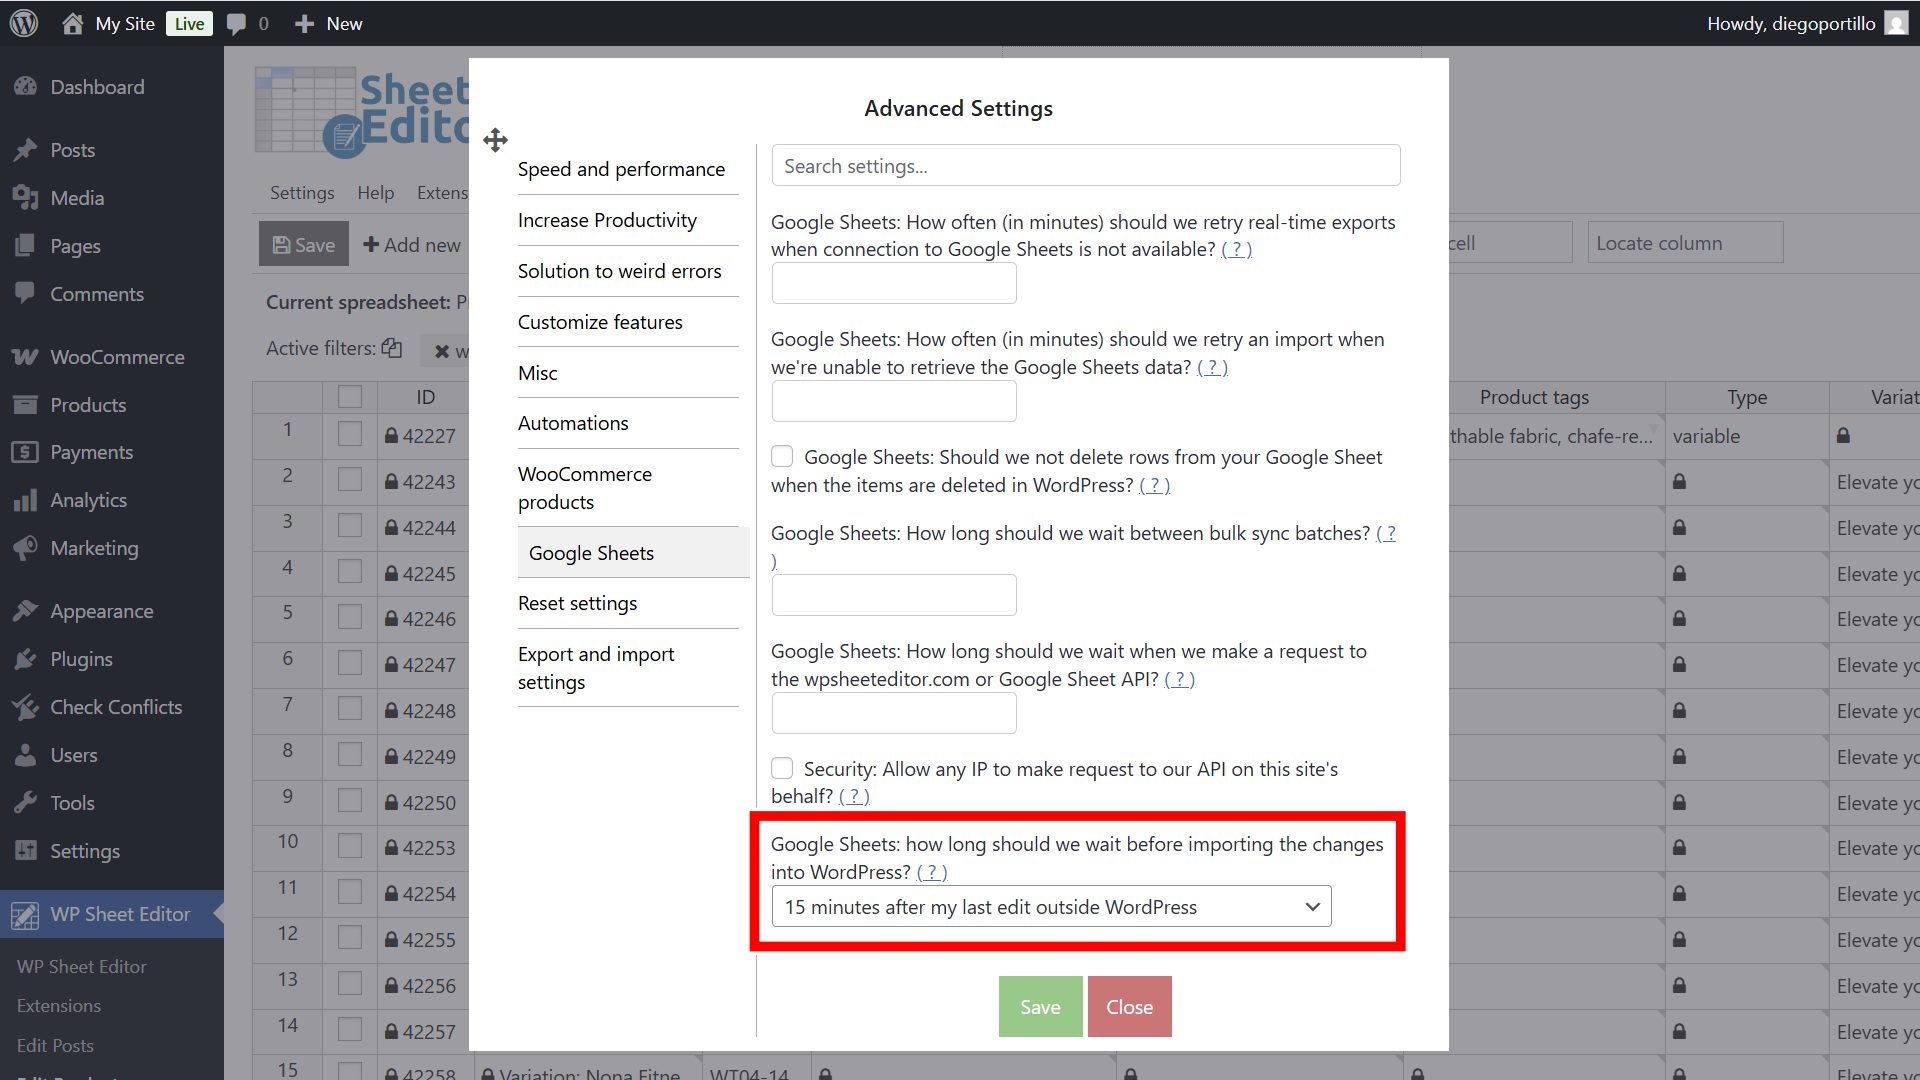
To prevent the system from importing half-finished formulas or typos while you are actively working, the sync includes a customizable buffer time.
Navigate to Settings > Advanced Settings > Google Sheets in your WordPress admin to define how long the plugin should wait (e.g., 15 minutes) after your last spreadsheet keystroke before running the import.
Take control of your WooCommerce variations
Managing complex variable products does not have to be a bottleneck for your business. By syncing your catalog to Google Sheets, you transform a tedious, click-heavy WordPress task into a streamlined spreadsheet operation. With WP Sheet Editor and Google Sheets Sync, you can adjust prices, replenish stock, and audit your variations faster than ever before.