The Pods plugin allows you to create any post type and add custom fields to it. You can create products, portfolios, courses, etc. This gets you off the limits when it comes to customizing your website and creating content for it.
However, a problem arises when you have to edit hundreds of those custom post types you’ve created. You need to spend hundreds of hours editing your post types one by one using the complex WP editor.
In a previous tutorial, we showed you how to bulk edit custom post types and fields quickly using WP Sheet Editor. In this tutorial, we’ll show you how to export your post types to a CSV file to edit it offline in Excel or Google Sheets, and we’ll show you how to import the post types into WordPress using the CSV file you’ve edited externally.
Also, this is helpful when you want to transfer posts from your development site to the live site or vice versa.
You can download the plugin here:
Download Posts, Pages, and Custom Post Types Spreadsheet Plugin – or – Check the features
Video Guide
Text Guide
Important: Install the “WP Sheet Editor – Pods” extension
 This extension allows you to edit the Pods using rich cells. That means that your yes/no fields will be read by the spreadsheet as a dropdown fields, and so on. If you don’t install the extension, the fields will be read as simple text cells.
You can edit any content types created with the Pods plugin using WP Sheet Editor. Here are some examples:
- Custom Post Types (like pages, posts, podcast episodes, etc.)
- Custom Taxonomies (like categories, tags, custom attributes, etc.)
- Custom settings pages
For this example, we’ve created a custom post type called Freelancers.
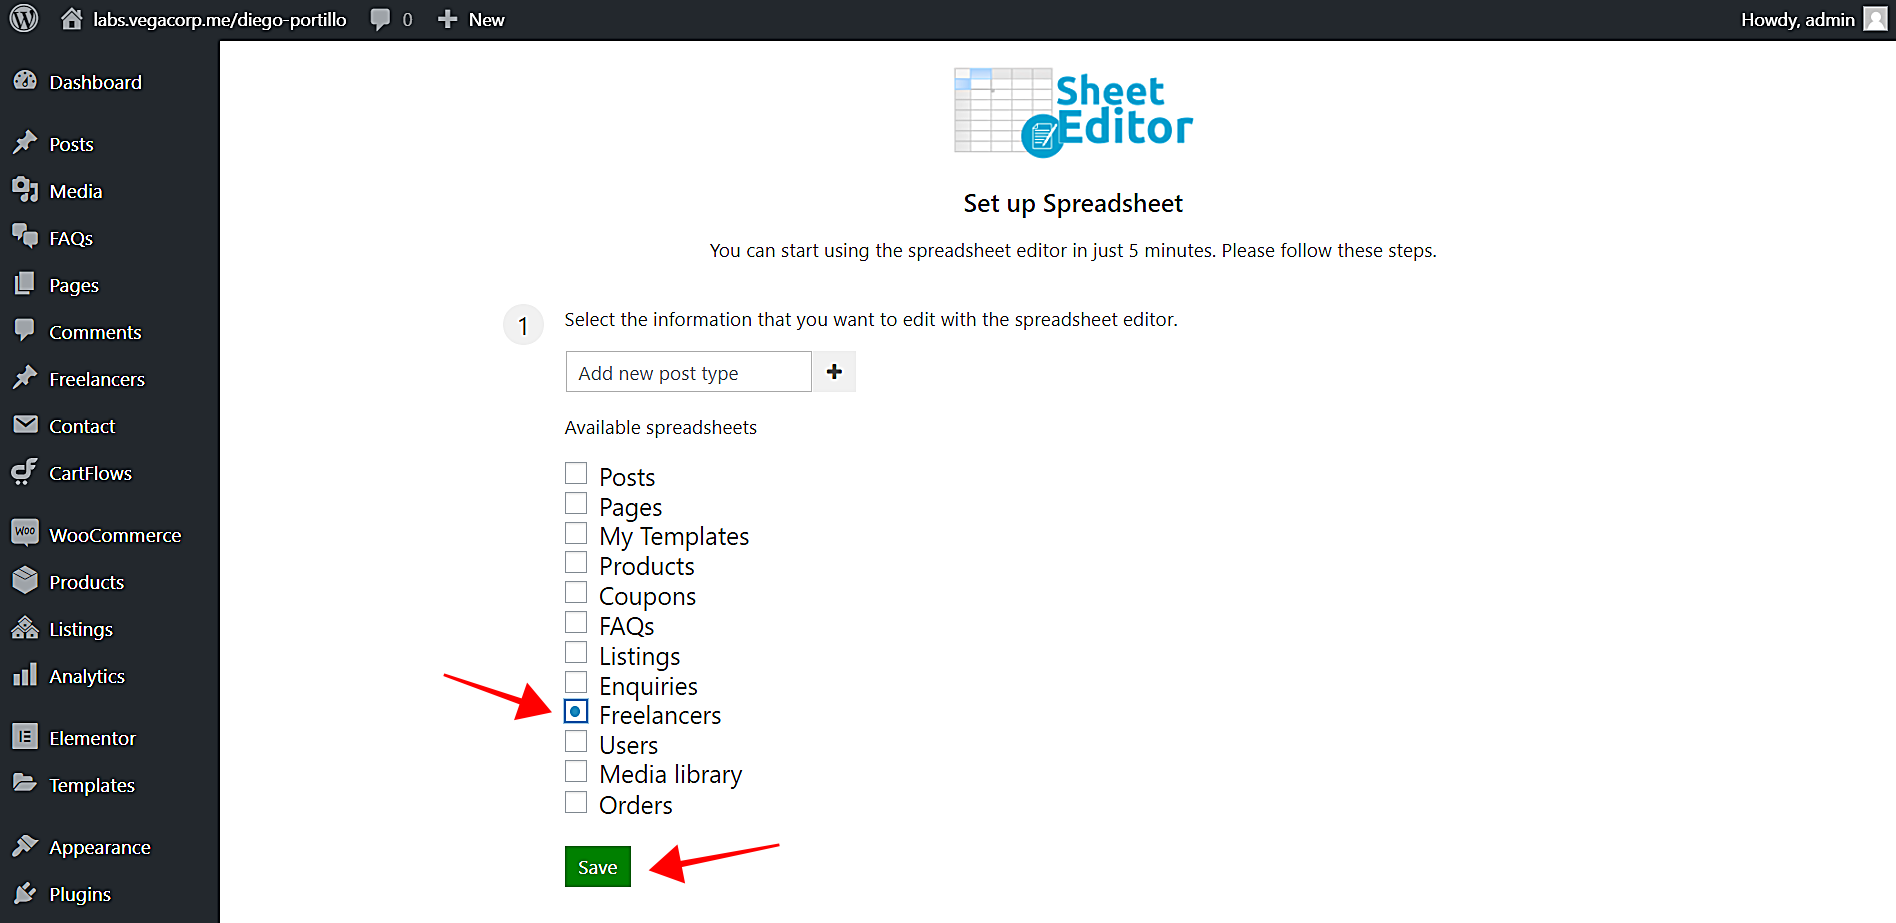
Step 1. Generate the post type spreadsheet
To view and edit the custom post type in a spreadsheet, you need to first generate the spreadsheet.
First, go to WP Sheet Editor > Setup Spreadsheet.
Second, select the post type you’ll edit in the spreadsheet. In this example, we’ll select the Freelancers post type.
Third, click Save to continue.
Then, select the columns you want to display in the spreadsheet. This is really useful if you have any metadata that you don’t want to include in the spreadsheet.
Note. The spreadsheet will automatically detect all the custom fields created with Pods and you can edit the column format to display as date selector, select dropdown, tinymce editor, file upload, etc.
After selecting all the columns, click Save and the spreadsheet will be generated.

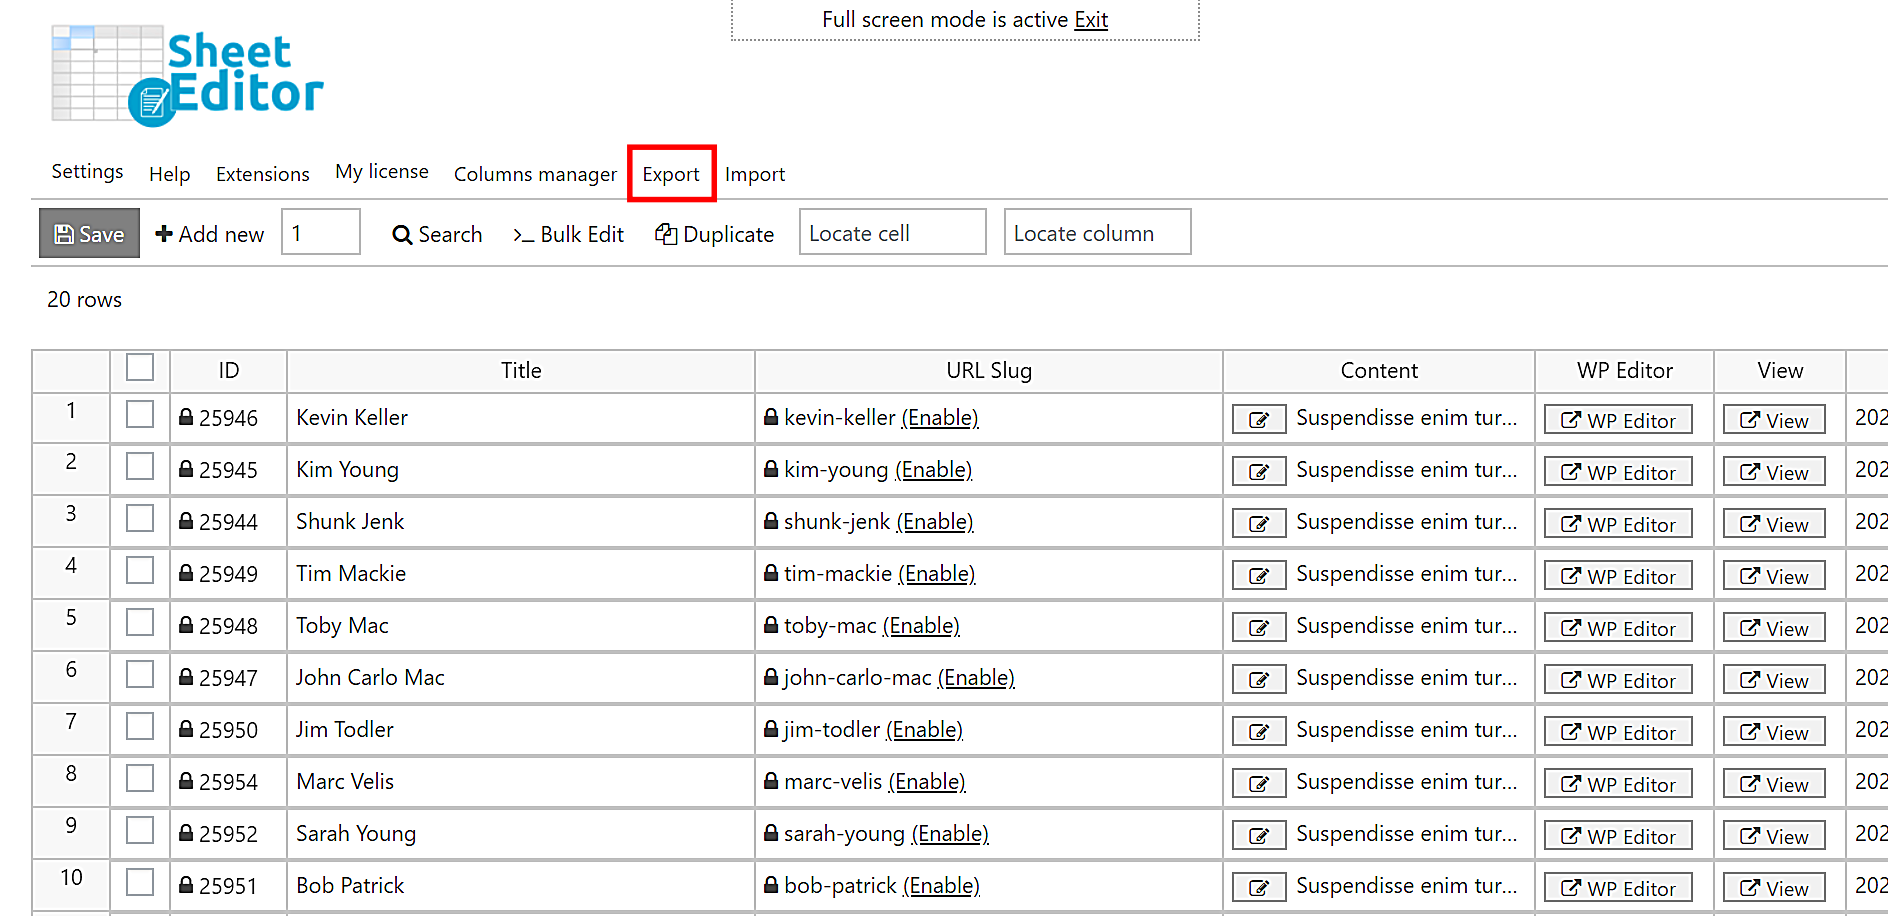
We can see all the freelancers in the spreadsheet as rows and their fields as columns.

Step 2. Export the post types to a CSV file
If you want to edit your custom post types in a CSV file offline, you can export them quickly.
First, open the Export tool with one click in the top toolbar.
Second, select these values to complete the export process.
- Click which columns to export, you can use the Select Active Columns option for a quick selection
- Tick the I understand it will export all the rows from my current search checkbox.
- Enter a name for future exports in Name of this export (optional).
- Click Start Export to download the CSV file to your computer.

This is how the freelancer profiles look in the CSV file:

Step 3. Import the post types from Excel or Google Sheets
After applying changes to our freelancer profiles and creating new profiles in the CSV, we’ll import them back to WordPress. Remember the post type you’re editing depends on what you’ve created with Pods, in this case the “freelancer” post type is just an example.
First, open the Import tool with one click on the top toolbar.

Second, select these values to upload the file from your computer.
- Source: CSV file from my computer
- CSV File: Click Choose file and select the CSV from your computer.
- Click Next.

Third, click Import all the columns.

Fourth, select how you’ll import the CSV file.
- Do you want to update or create items: Create new items and update existing items
- CSV Field: record_id
- WordPress Field: ID
- Click Next.

Finally, you’ll see a preview of how the info will look once it’s imported. If everything’s OK, click The preview is fine, start import. With these simple steps, the post types will be imported to WordPress and the spreadsheet will be updated.

How simple it is to export and import post types created with Pods!
Now you can save a lot of time with WP Sheet Editor because it’s really simple to export and import custom post types created with the Pods plugin. You have no limits now when it comes to creating and managing custom content for your website.
You can download the plugin here:
Download Posts, Pages, and Custom Post Types Spreadsheet Plugin – or – Check the features