In this tutorial, we will show you how to easily convert WooCommerce custom attributes into global attributes (and vice-versa) in bulk, without manual data entry.
Understanding the difference between the two attribute types is crucial for your WooCommerce store:
- Global Attributes: Created centrally via Products > Attributes. These are shared across your entire store (e.g., Size, Color) and allow customers to use layered navigation to filter products on your shop pages.
- Custom Attributes: Created directly on the individual product edit screen. These are unique to that specific product and cannot be used in storewide sidebar filters.
Imagine this scenario: When you first built your store, you manually added a custom attribute called “Ingredient” to dozens of individual pizza products. Now that your catalog has grown, you realize you want customers to be able to filter pizzas by their ingredients on the main shop page.
To enable filtering, “Ingredient” must be a Global Attribute.
The problem? Default WooCommerce forces you to manually recreate the global attribute, open every single product, delete the custom attribute, and re-assign the new global attribute terms. That is hours of tedious work.
Fortunately, you can completely automate this process. We will show you how to securely bulk copy and convert your custom attributes into global attributes using the WP Sheet Editor – WooCommerce Products plugin.
Video Guide
Text Guide: Automating Your WooCommerce Attributes
To safely modify our database and migrate these product attributes, follow the steps below.
1. Install the WP Sheet Editor Plugin
The WP Sheet Editor plugin replaces the slow default WooCommerce editor with an intuitive spreadsheet interface. It allows you to view, filter, and edit any field—including hidden custom attributes—as you would in Excel or Google Sheets. Most importantly, it includes a powerful bulk editing tool for massive data updates.
You can skip this step if you already have the plugin installed and activated on your WordPress site.
You can download the plugin here:
Download WooCommerce Products Spreadsheet Plugin - or - Check the features
2. Open the WooCommerce Products Spreadsheet
Once installed and activated, open the spreadsheet interface by navigating to WP Sheet Editor > Edit Products.
You will see all your WooCommerce products displayed as rows, with all their meta fields displayed as columns.
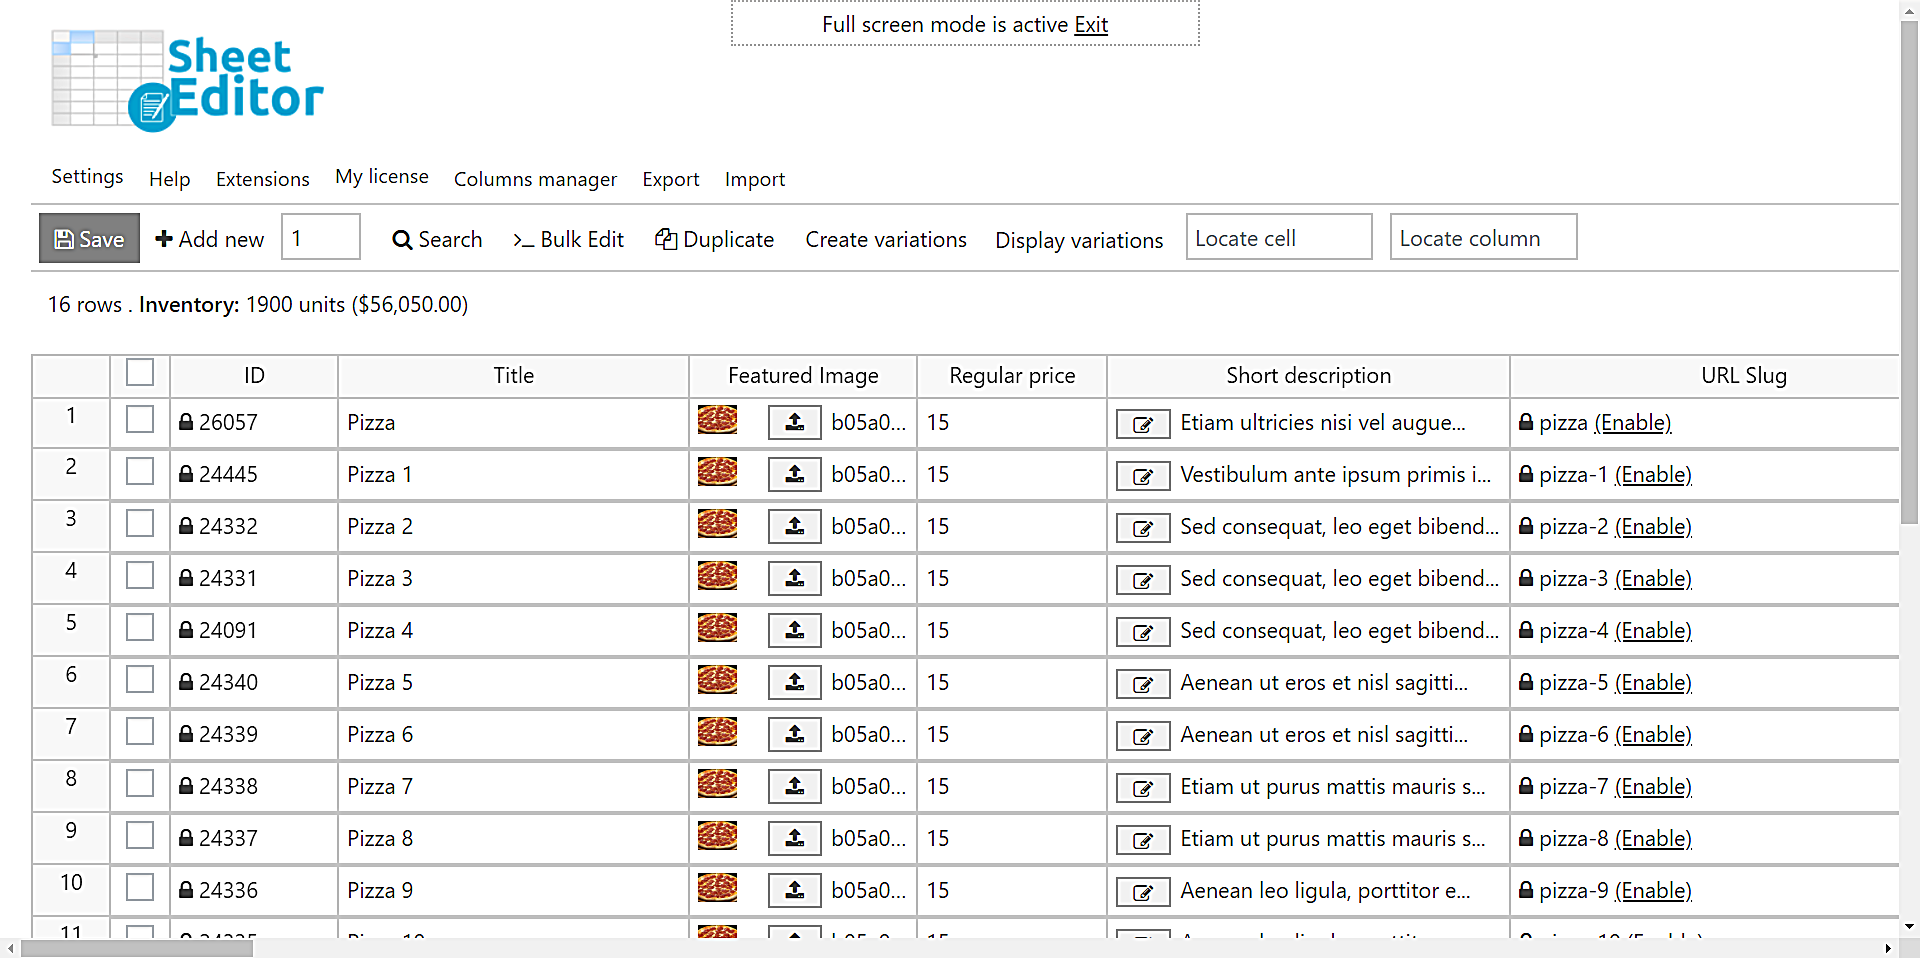
If you scroll to the right side of the spreadsheet, you will notice that the plugin automatically detects your custom attributes and displays them as their own columns. For example, we have the Custom attribute: Ingredient column visible. This dynamic column mapping is what makes the conversion process possible.

3. How to Convert Custom Attributes into Global Attributes
In this example, we will convert the custom attribute “Ingredient” into a global attribute of the exact same name so that customers can filter the shop page by ingredients.
Note: One of the best parts of this method is that if your products are Variable Products, the variations will be automatically moved and synced with the new global attribute!
Step 1: Create the empty Global Attribute
First, we need to create the “container” for the data to move into. Go to Products > Attributes in your WordPress dashboard.
Enter the exact name of your new global attribute (e.g., “Ingredient”) and click Add Attribute. You do not need to manually add the terms; the bulk edit tool will handle that.

Step 2: Open the Bulk Edit tool
Go back to the products spreadsheet (WP Sheet Editor > Edit Products) and click on the Bulk Edit tool located on the toolbar.

Step 3: Configure the bulk attribute conversion
In the Bulk Edit popup, we will instruct the plugin to pull the data from the custom attribute column and paste it perfectly into the newly created global attribute column. Select these exact values:

- Select the rows that you want to update: Edit all the rows from my current search (including non-visible rows).
- What field do you want to edit: Product Ingredient. (Note: This is the destination field; the global attribute you just created in Step 1).
- Select type of edit: Copy from other columns.
- Copy from this column: Custom attribute: Ingredient. (This is the source data).
- Decide if you want to edit only parent products or only variations.
- Click Execute Now.
Once the loading bar finishes, your migration is complete! You have successfully copied all the unique custom attribute terms directly into the global attribute taxonomy across your entire store.
4. How to Convert Global Attributes into Custom Attributes
Sometimes you need to do the exact opposite. Perhaps your WooCommerce Attributes menu is hopelessly cluttered with highly specific attributes (like “Laptop Serial Number”) that are only used on a single product. To clean up your global taxonomies, you can downgrade them into custom attributes.
To perform this reverse migration, follow these steps:
Step 1: Make the custom attribute column exists
Before the spreadsheet can copy data into a custom attribute, the column must exist. Go to the normal WooCommerce product editor for just one product and manually add the new custom attribute name (e.g., “Serial Number”) and save. Once doing this, the WP Sheet Editor will detect it and generate a dedicated column for that custom attribute across the entire spreadsheet.
You may need to refresh the database to find the new column.
Click on Settings > Scan DB to find fields.
Step 2: Open the Bulk Edit tool
Open the Bulk Edit tool with one click on the spreadsheet’s top toolbar.
Step 3: Configure the bulk copy
Select these values to copy the data from your cluttered global attribute directly into the isolated custom attribute field:

- Select the rows that you want to update: Edit all the rows from my current search (including non-visible rows).
- What field do you want to edit: Custom attribute: Ingredient. (This is your destination field).
- Select type of edit: Copy from other columns.
- Copy from this column: Product Ingredient. (Note: Here you select the global attribute from which you are pulling the existing values).
- Click Execute Now.
You have successfully converted your global attributes into custom attributes.
Simplify Your WooCommerce Taxonomy Management
Restructuring your WooCommerce database doesn’t have to be painful. Converting custom attributes to global attributes (and vice-versa) is incredibly fast and simple because you no longer have to open, edit, and save products one by one.
With the WP Sheet Editor plugin, you can drastically improve your store’s layered navigation, boost your SEO, clean up your attribute menus, and save yourself hours of tedious manual data entry.
You can download the plugin here:
Download WooCommerce Products Spreadsheet Plugin - or - Check the features