Selling globally introduces a variety of logistical and legal challenges. Whether due to exclusive distribution agreements, customs regulations, shipping limitations, or licensing laws, store owners often need to restrict certain products from being purchased in specific countries.
The Advanced Country Restrictions plugin is an excellent tool for handling this on a per-product basis. However, as your catalog grows, managing these restrictions manually becomes a massive bottleneck. If you need to restrict an entire category of electronics from shipping to Europe, or block 500 specific products from being purchased in the United States, updating them one by one through the default WooCommerce editor is highly inefficient.
In this guide, we will show you how to bulk edit WooCommerce country restrictions. We will filter products by keyword, category, attribute, or tag, and apply the geographical restrictions to hundreds of items at once using a frontend spreadsheet interface.
Prerequisites
To follow this tutorial, you need the following two plugins installed and activated on your WooCommerce site:
- Advanced Country Restrictions: This handles the actual restriction logic on your front end.
- WP Sheet Editor – WooCommerce Products: This replaces the default WooCommerce product list with a bulk-editable grid.
You can download the plugin here:
Download How to Bulk Edit WooCommerce Product Country Restrictions Plugin - or - Check the features
Video Tutorial
How Country Restriction Data is Stored
Before editing, it is important to understand how the Advanced Country Restrictions plugin saves your data. It generates a custom field (meta key) for each product called wcacr_disallowed_countries.
Instead of typing the full country name, this field requires standard two-letter ISO 3166-1 alpha-2 country codes. For example:
- United States = US
- El Salvador = SV
- Mexico = MX
- United Kingdom = UK
- Canada = CA
WP Sheet Editor automatically detects this custom field and displays it as a dedicated column in your spreadsheet, allowing you to edit the geographical rules easily.
Method 1: Edit Country Restrictions Individually in the Spreadsheet
If you only need to restrict a few specific products and do not want to navigate through multiple WooCommerce product pages, you can edit the values directly in the grid.
Navigate to WP Sheet Editor > Edit Products to open your catalog.
Scroll to the right side of the spreadsheet until you locate the Meta: wcacr_disallowed_countries column.
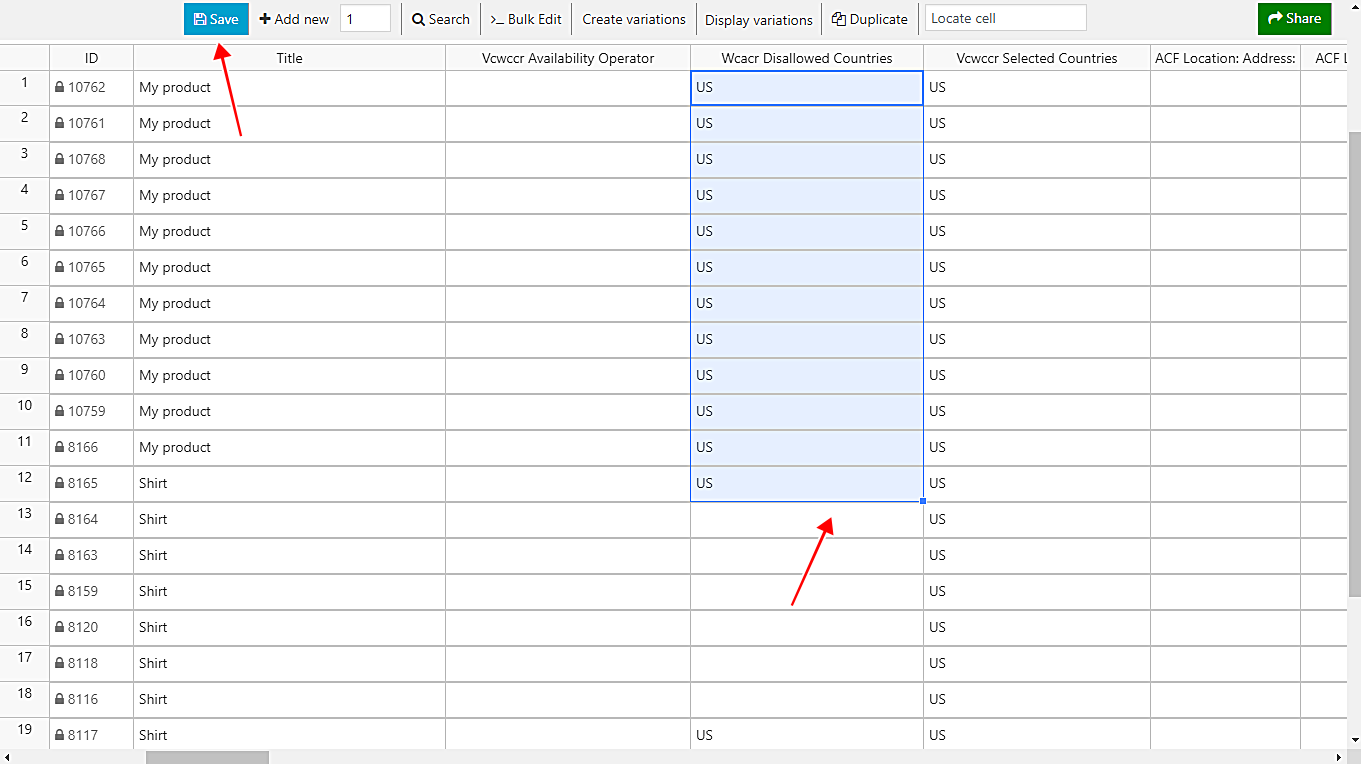
Click directly inside the cell for any product and enter the appropriate two-letter country code (e.g., US, MX). If you need to restrict multiple countries for a single product, separate the codes with a comma (e.g., US, CA, MX).
Once you have entered the codes for your specific products, click the Save button on the top toolbar to apply the changes to your database.
Method 2: Bulk Edit Country Restrictions by Category, Attribute, or Keyword
If you need to restrict hundreds of products simultaneously based on specific criteria (like an entire product category or brand attribute), you will use the Bulk Edit tool.
Step 1: Open the Bulk Edit Tool
On the top toolbar of the spreadsheet, click to open the Bulk Edit tool.

Step 2: Filter the Specific Products
You must isolate the products you want to restrict before applying the changes. In the Bulk Edit window, select I want to search rows to update from the first dropdown menu.

This will open the search panel, allowing you to define exactly which items should receive the restriction.

You can use any combination of the following parameters to find your products:
- Contains keyword: Find products containing specific text in their title (e.g., “”Lithium Battery”” for shipping restrictions).
- Status: Target only Published products or Drafts.
- Enter Tags: This field acts as a universal taxonomy filter. You can enter product categories, tags, attributes, or shipping classes here to group your items.
Once you have defined your parameters, click Run search. The plugin will filter your catalog and return you to the Bulk Edit configuration screen.
Step 3: Apply the Disallowed Countries
Now that your target products are filtered, you will apply the country codes to the correct custom field.
Configure the Bulk Edit tool with the following values:
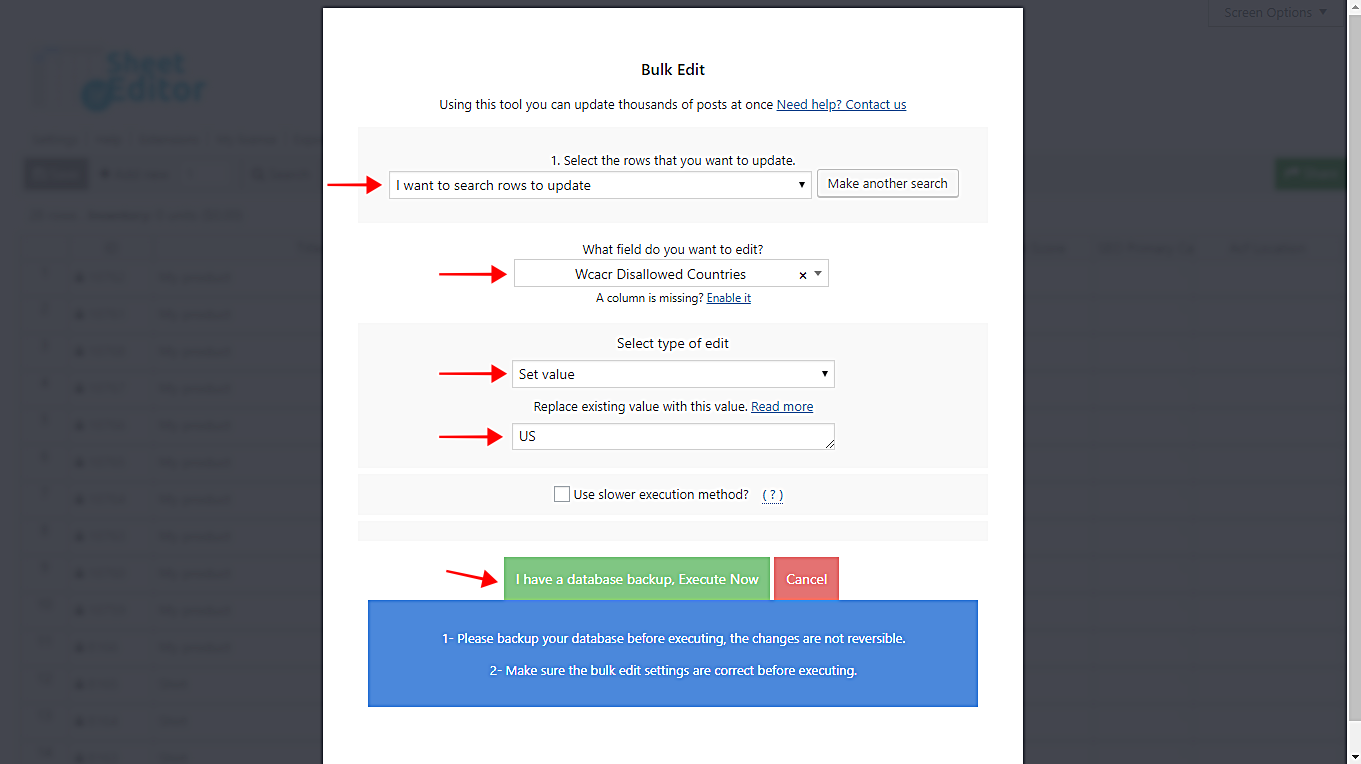
- Select the rows that you want to update: Edit all the rows from my current search
- What field do you want to edit: Wcacr Disallowed Countries
- Select type of edit: Set value
- Replace existing value with this value: Enter your target ISO country codes (e.g., US). Remember to use a comma if applying multiple countries (e.g., US, CA).
Click on Execute Now.
The plugin will process the updates in the background. Once complete, your filtered products will be restricted from purchase in your designated regions, ensuring compliance with your logistical or legal requirements.
Managing complex geographical sales rules requires efficient data handling. By connecting the Advanced Country Restrictions plugin with a spreadsheet environment, you bypass the slow, paginated WooCommerce interface and maintain complete control over your international catalog.
You can download the plugin here:
Download WooCommerce Products Spreadsheet Plugin - or - Check the features