WooCommerce allows you to add a Purchase Note to any product. This is a custom message sent to the customer via email after they buy the product. It is an excellent feature for sending special instructions, links to private community groups, license keys, or warranty details.
By default, adding a purchase note involves opening a product, scrolling down to the Product Data section, clicking the Advanced tab, pasting your note, and saving the changes. If you have to add or update purchase notes for 500 digital downloads or special items, doing this manually is not a viable strategy.
In this tutorial, we will show you how to import WooCommerce purchase notes directly from Google Sheets. This workflow allows you to bulk add or update your purchase notes for thousands of products in minutes, making it easy to manage post-purchase instructions from a single spreadsheet.
Why import WooCommerce purchase notes from Google Sheets?
Managing your product data through Google Sheets offers several strategic advantages:
- Bulk updates: Paste identical instructions, links, or thank-you messages across hundreds of products at once using drag-and-fill.
- Fast auditing: Filter your spreadsheet to instantly see which products have purchase notes and which ones are missing them.
- Offline preparation: Have your team draft the purchase notes in a shared Google Sheet before importing them to the live site.
What you need to import purchase notes
To follow this guide, we will use these WP Sheet Editor tools besides the WooCommerce plugin:
WP Sheet Editor – WooCommerce Products: This plugin generates a spreadsheet inside your WordPress dashboard where you can view and edit all your WooCommerce products.
You can purchase the plugin here:
Get the WooCommerce Products spreadsheet - or - Check the features
Google Sheets Sync: This service connects your WP Sheet Editor spreadsheets to your Google Sheets account for seamless two-way exports and imports.
You can sign up to the service here:
Sign up to the Google Sheets Sync Service - or - Check the features
Step 1. Connect WordPress to Google Sheets
When you subscribe to the Google Sheets Sync service, you will receive a helper plugin that connects your WordPress site with your Google account.
Follow our installation guide to complete the setup and authorize the Google API connection.
Step 2. Export WooCommerce Products to Google Sheets
The safest and fastest way to import data is to first export your existing products to Google Sheets. This gives you a pre-formatted spreadsheet with the correct product IDs and SKUs, ensuring your purchase notes are assigned to the right items.
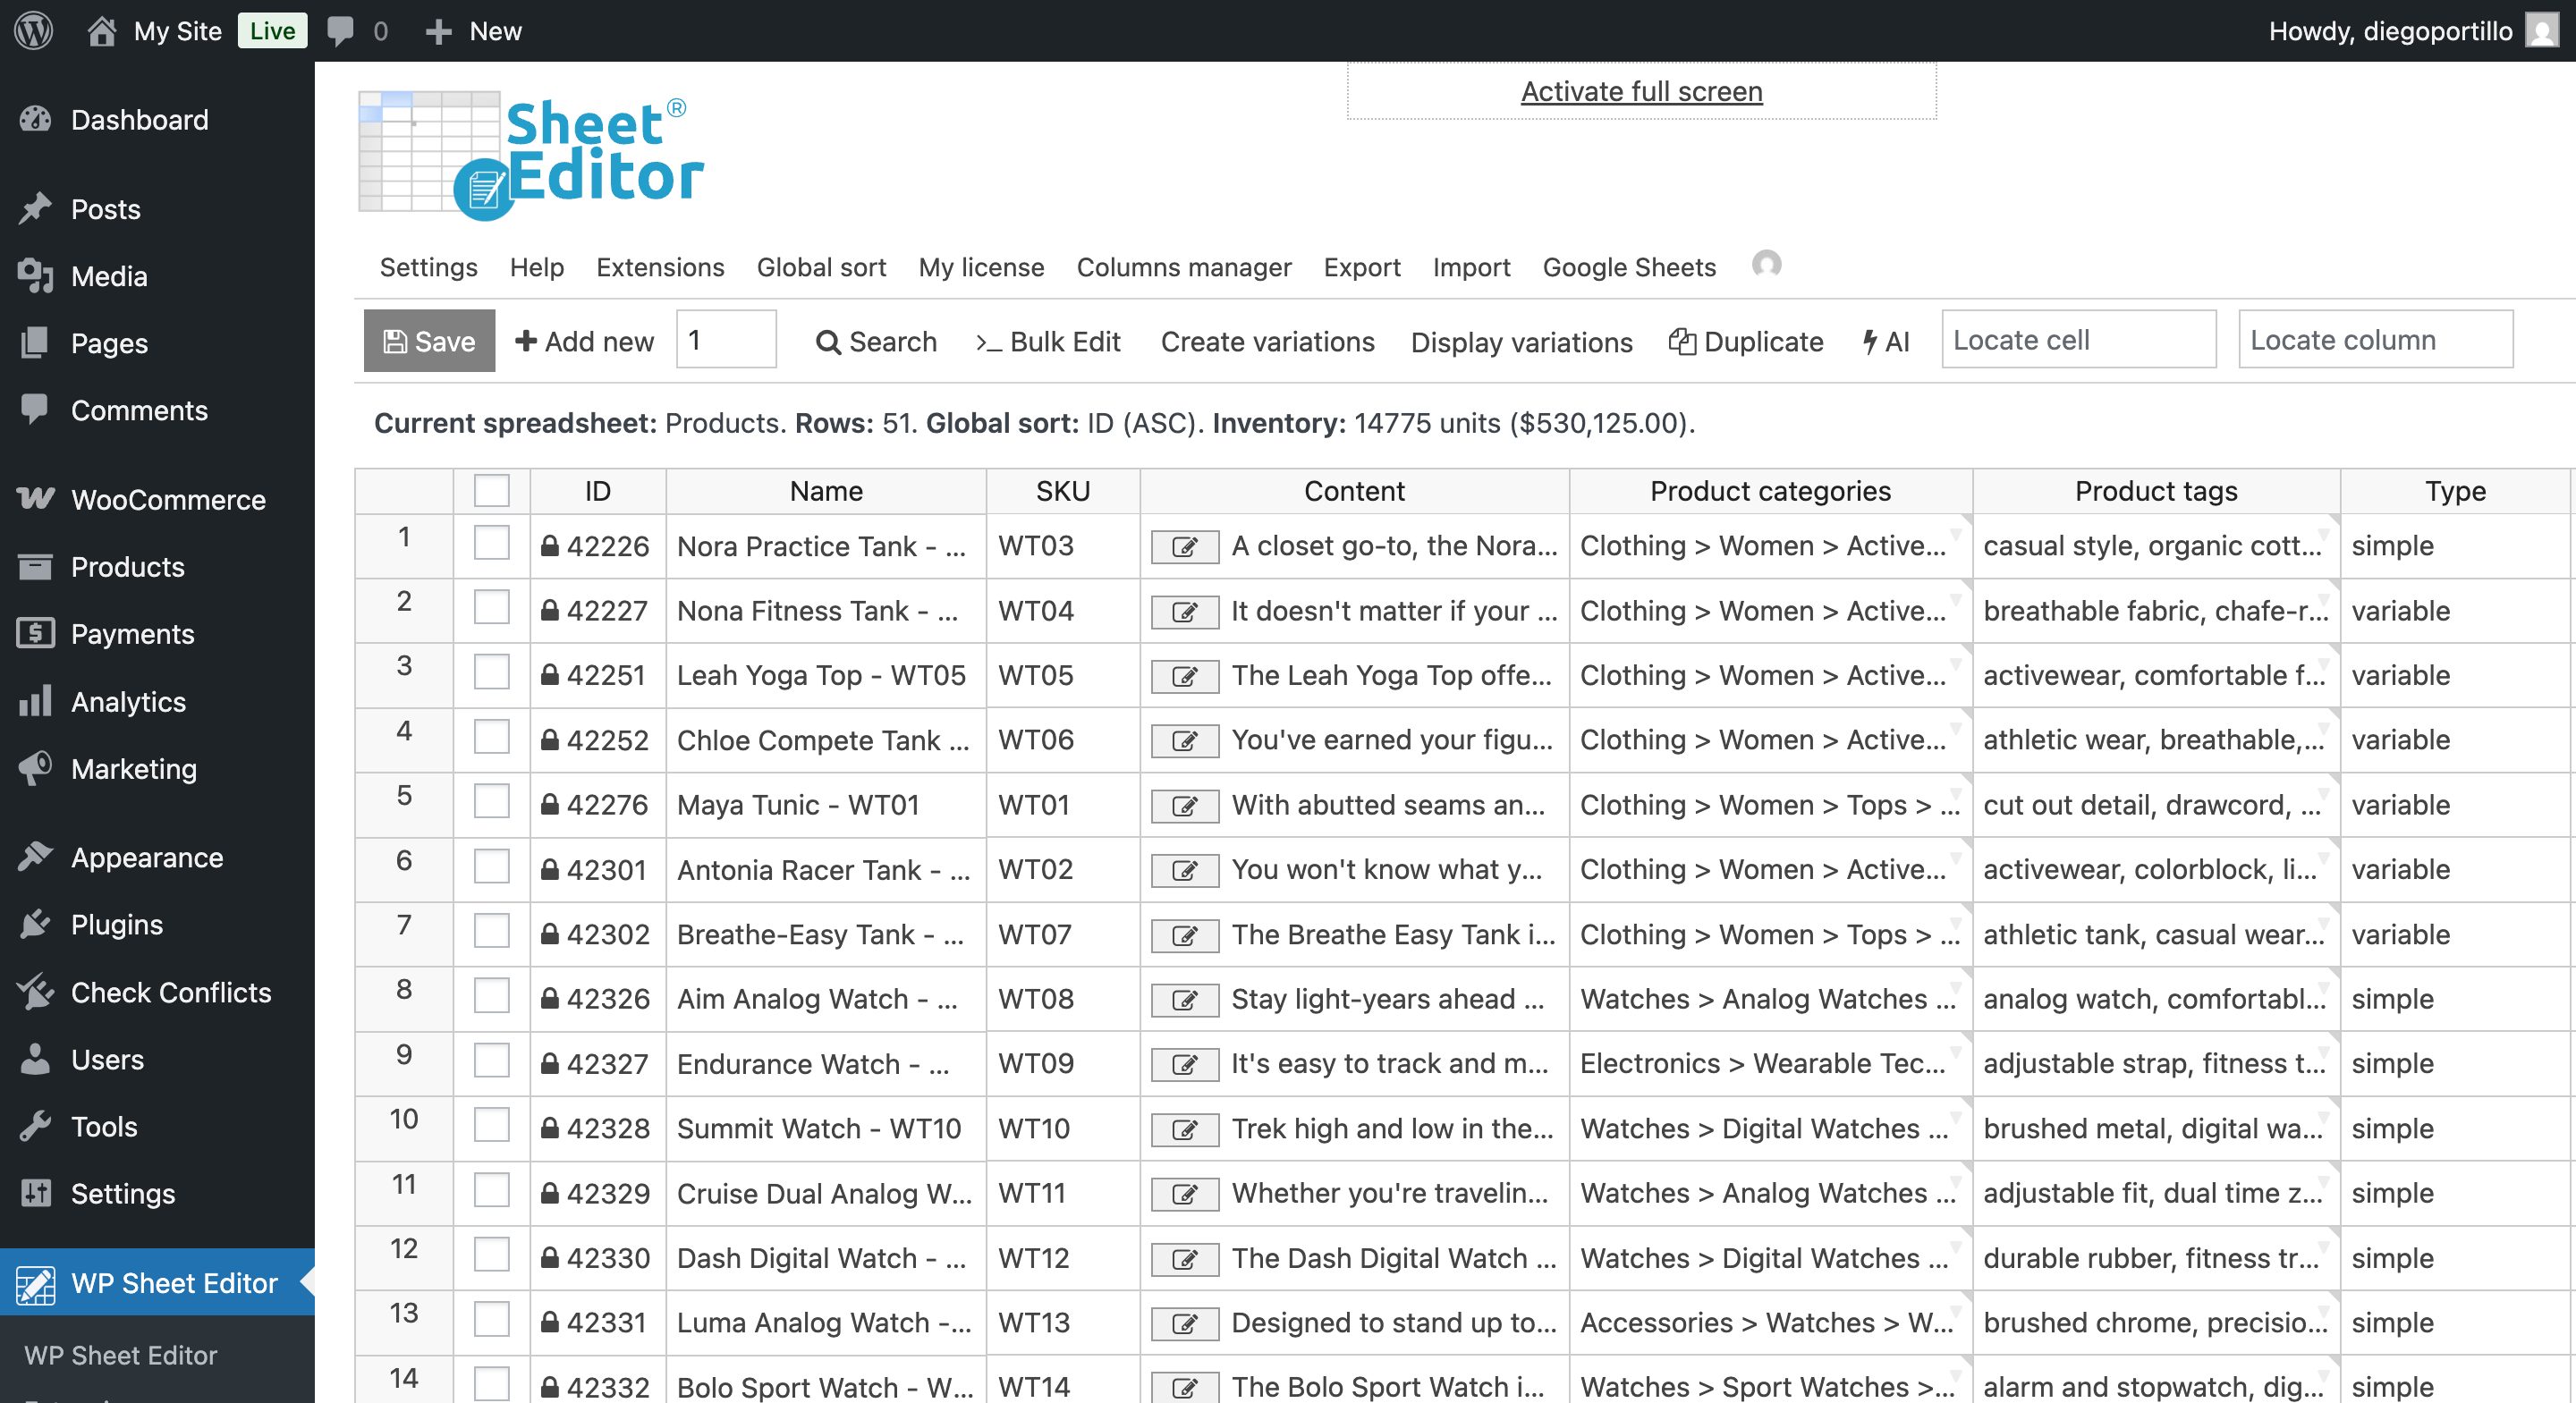
Open the WooCommerce products spreadsheet by going to WP Sheet Editor > Edit Products.
Our Google Sheets Sync service cannot access existing Google Sheets files that were not created through the service. To get started, you must first create a new empty Google Sheet (Google Sheets → Create new file) or export your product data into a new file generated by the service.
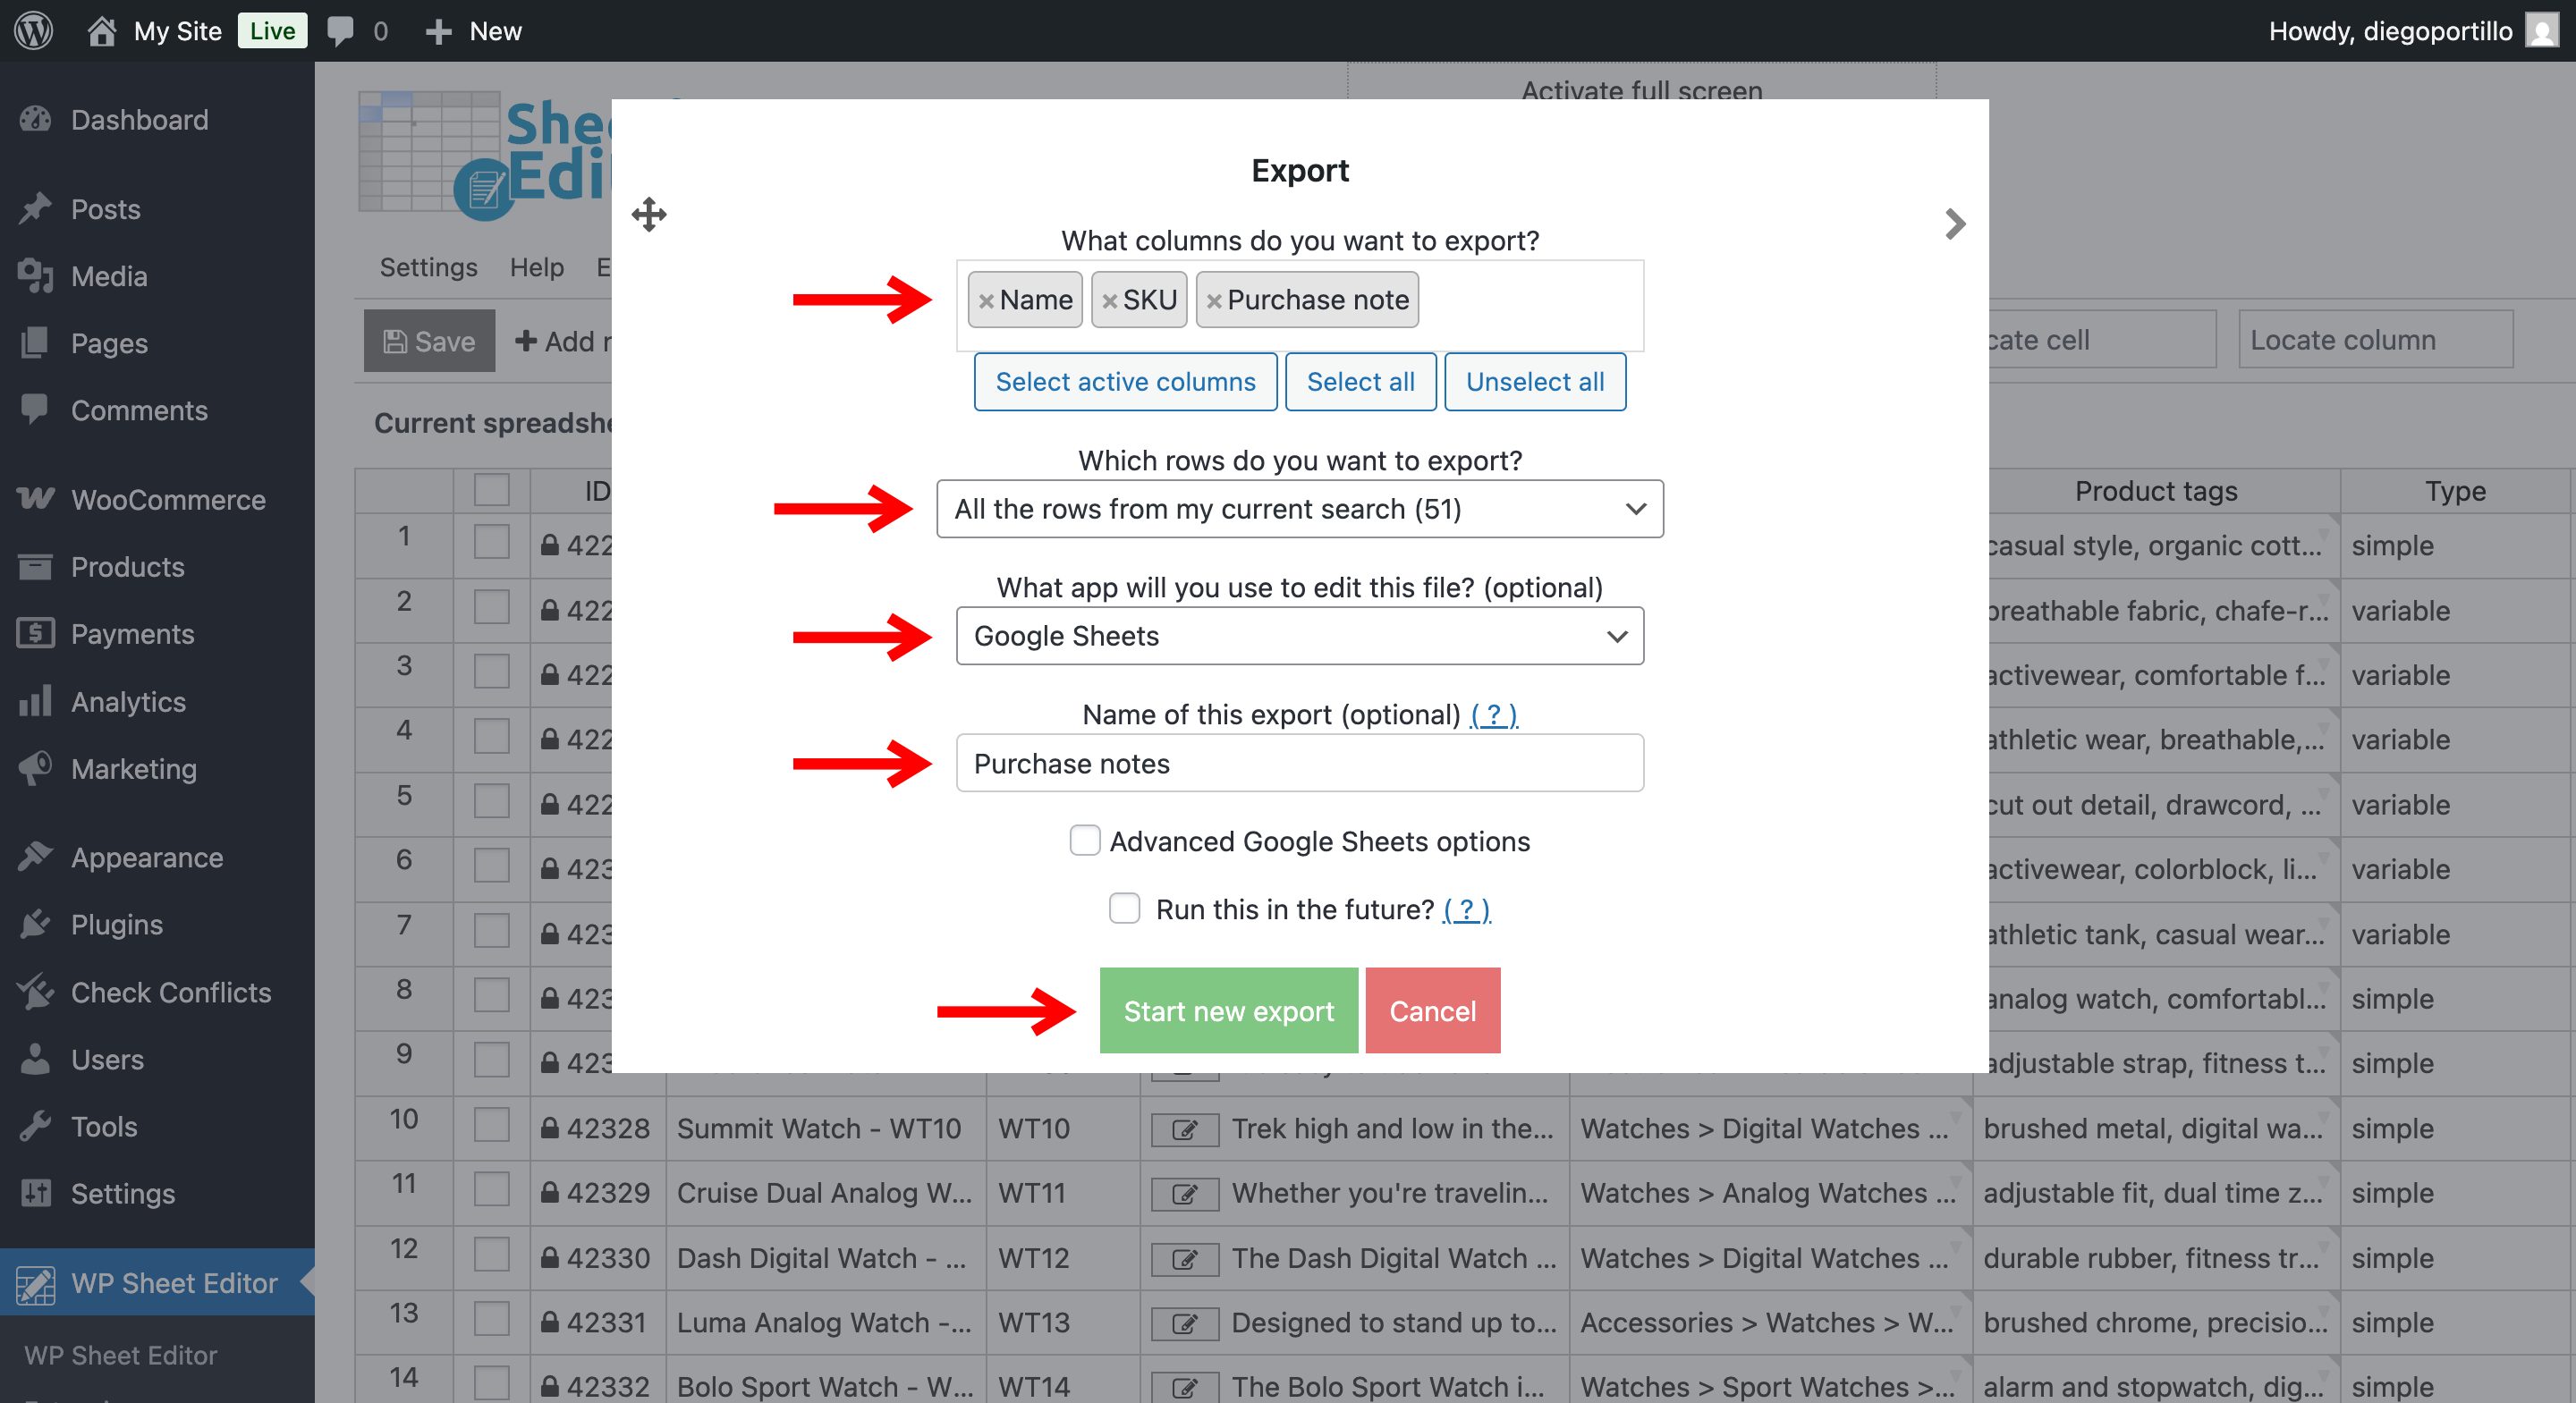
Click on the Export tool on the top toolbar.

Select the following settings in the export popup:
- What columns do you want to export: You can select the specific columns you need. For example:
- Name
- SKU
- Purchase note
- Which rows do you want to export?: We will export all the products, so let’s select “All rows from my current search”.
- What app will you use to edit this file?: Select Google Sheets.
- Name of this export: Type a name for your Google Sheet (e.g., “WooCommerce Purchase Notes”).
- Click on Start new export.
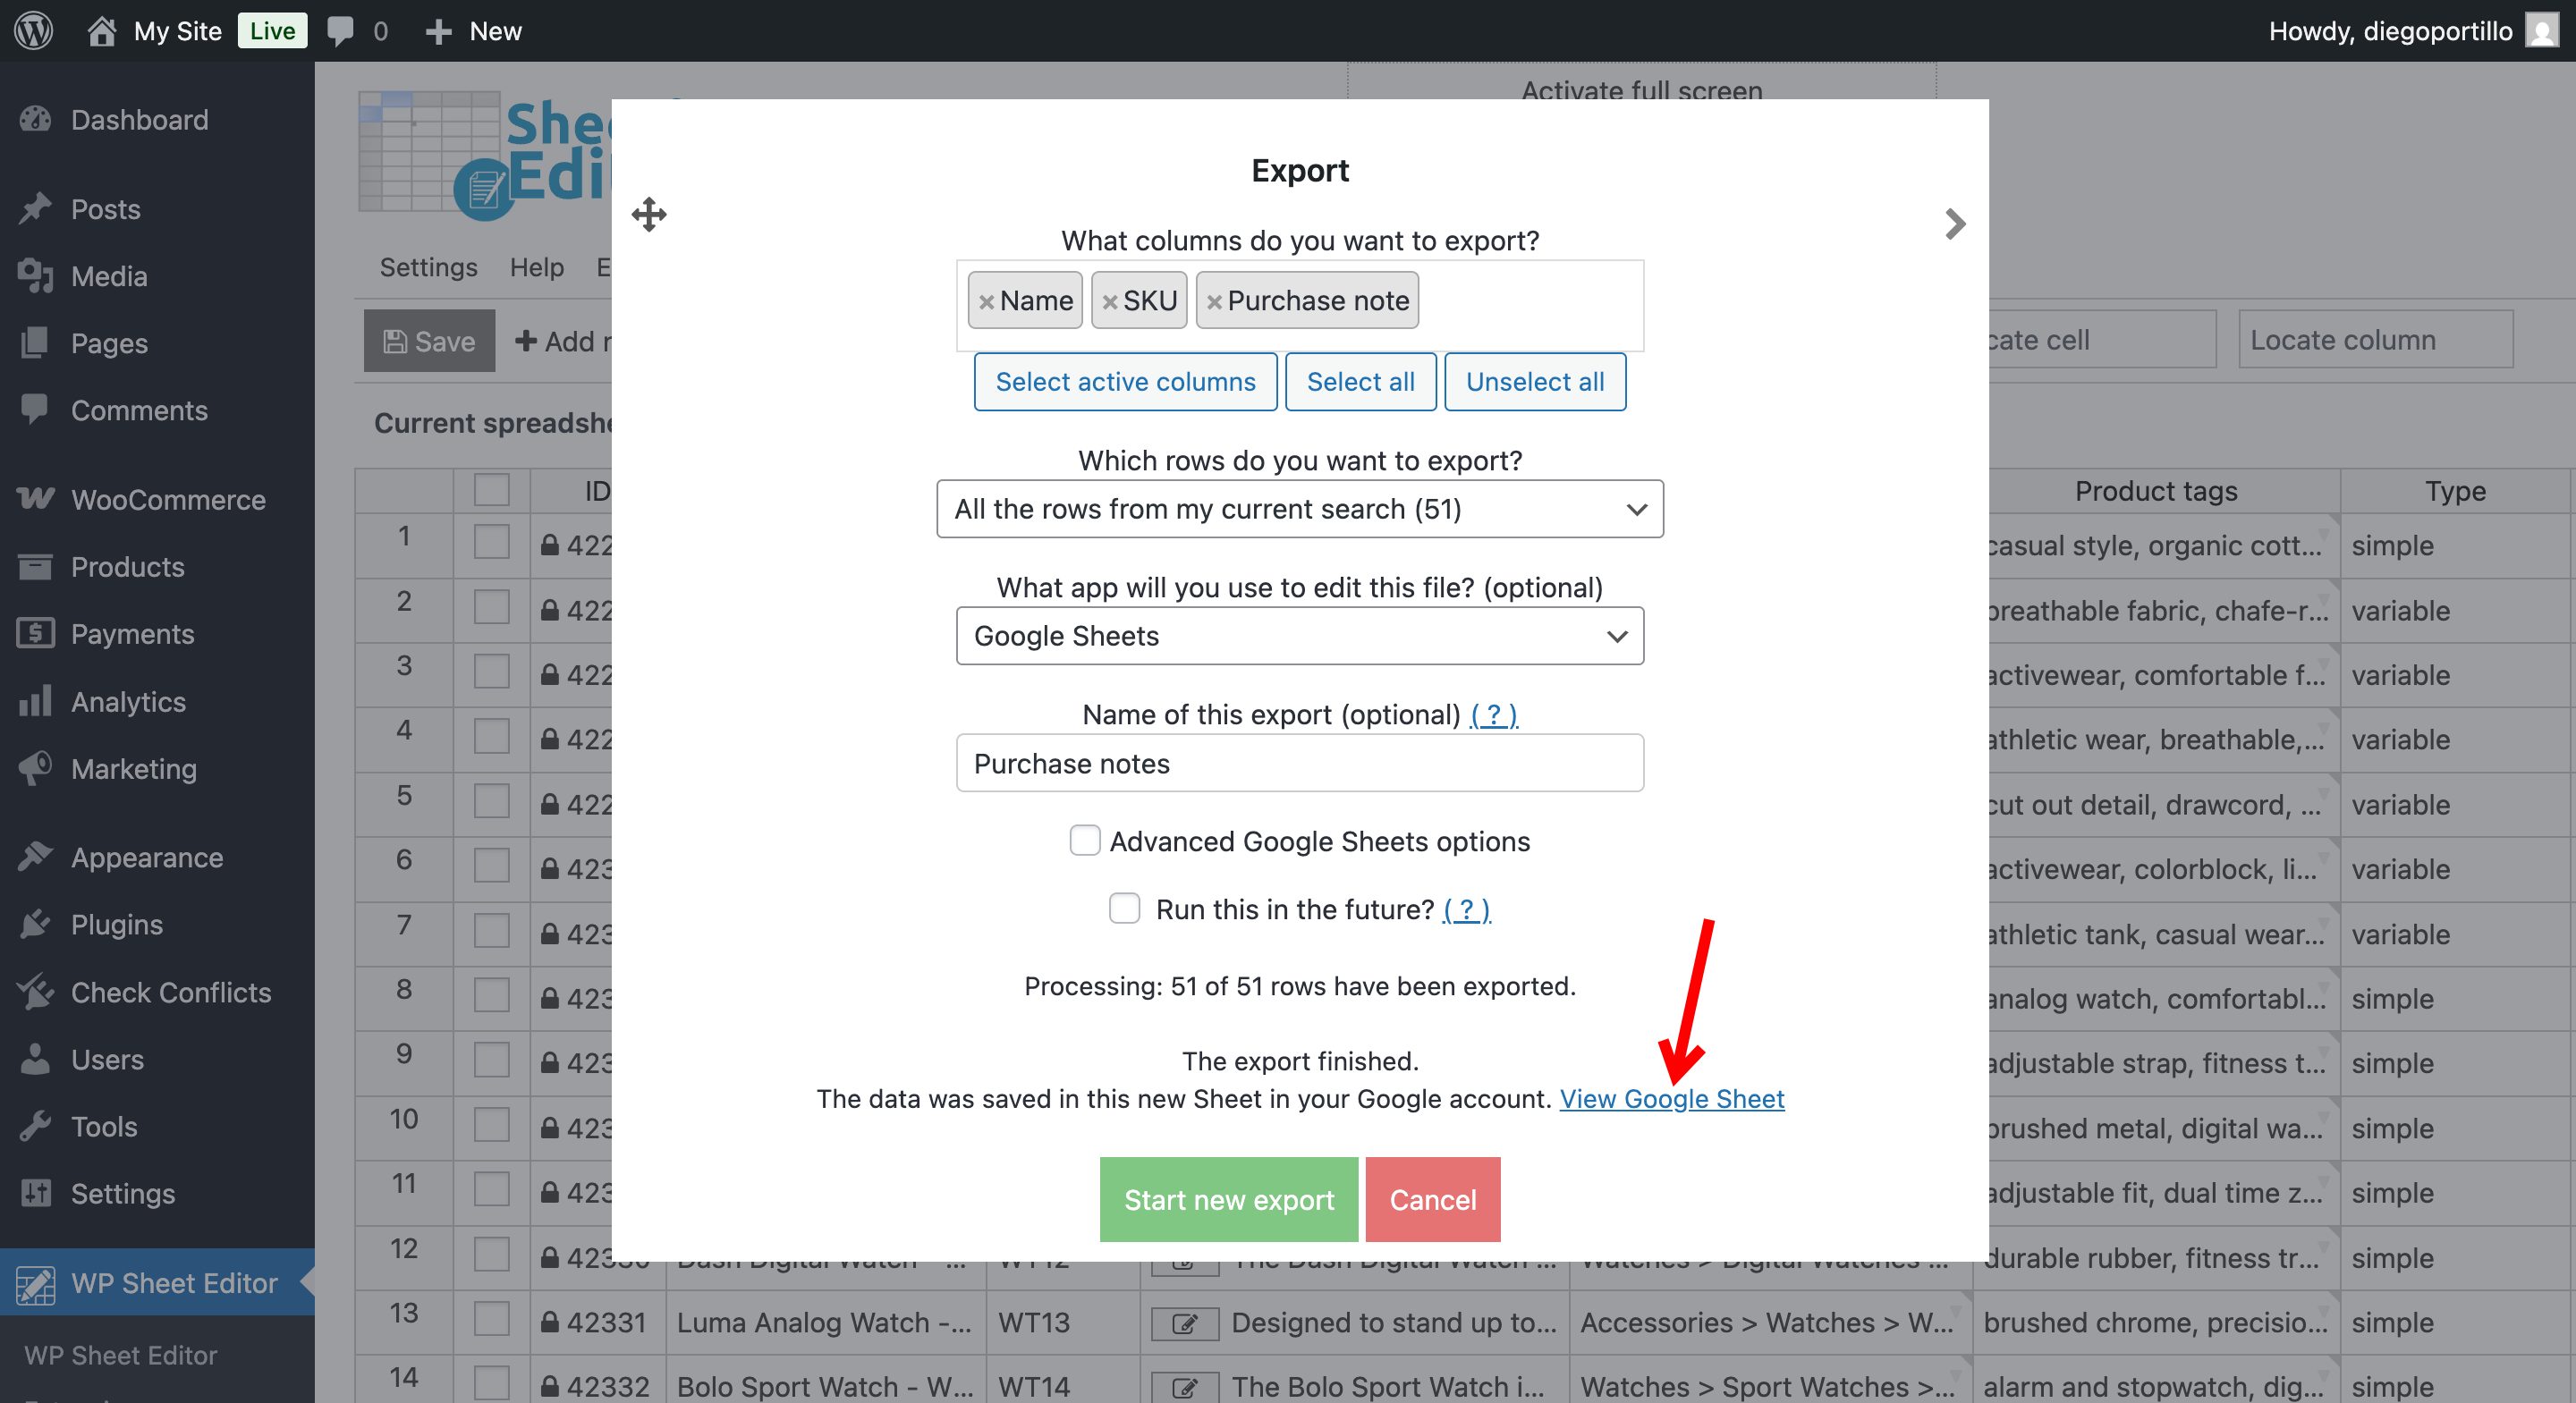
Once the process is complete, you’ll be able to open the new Google Sheet by clicking on the View Google Sheet link provided.
Step 3. Add or edit purchase notes in Google Sheets
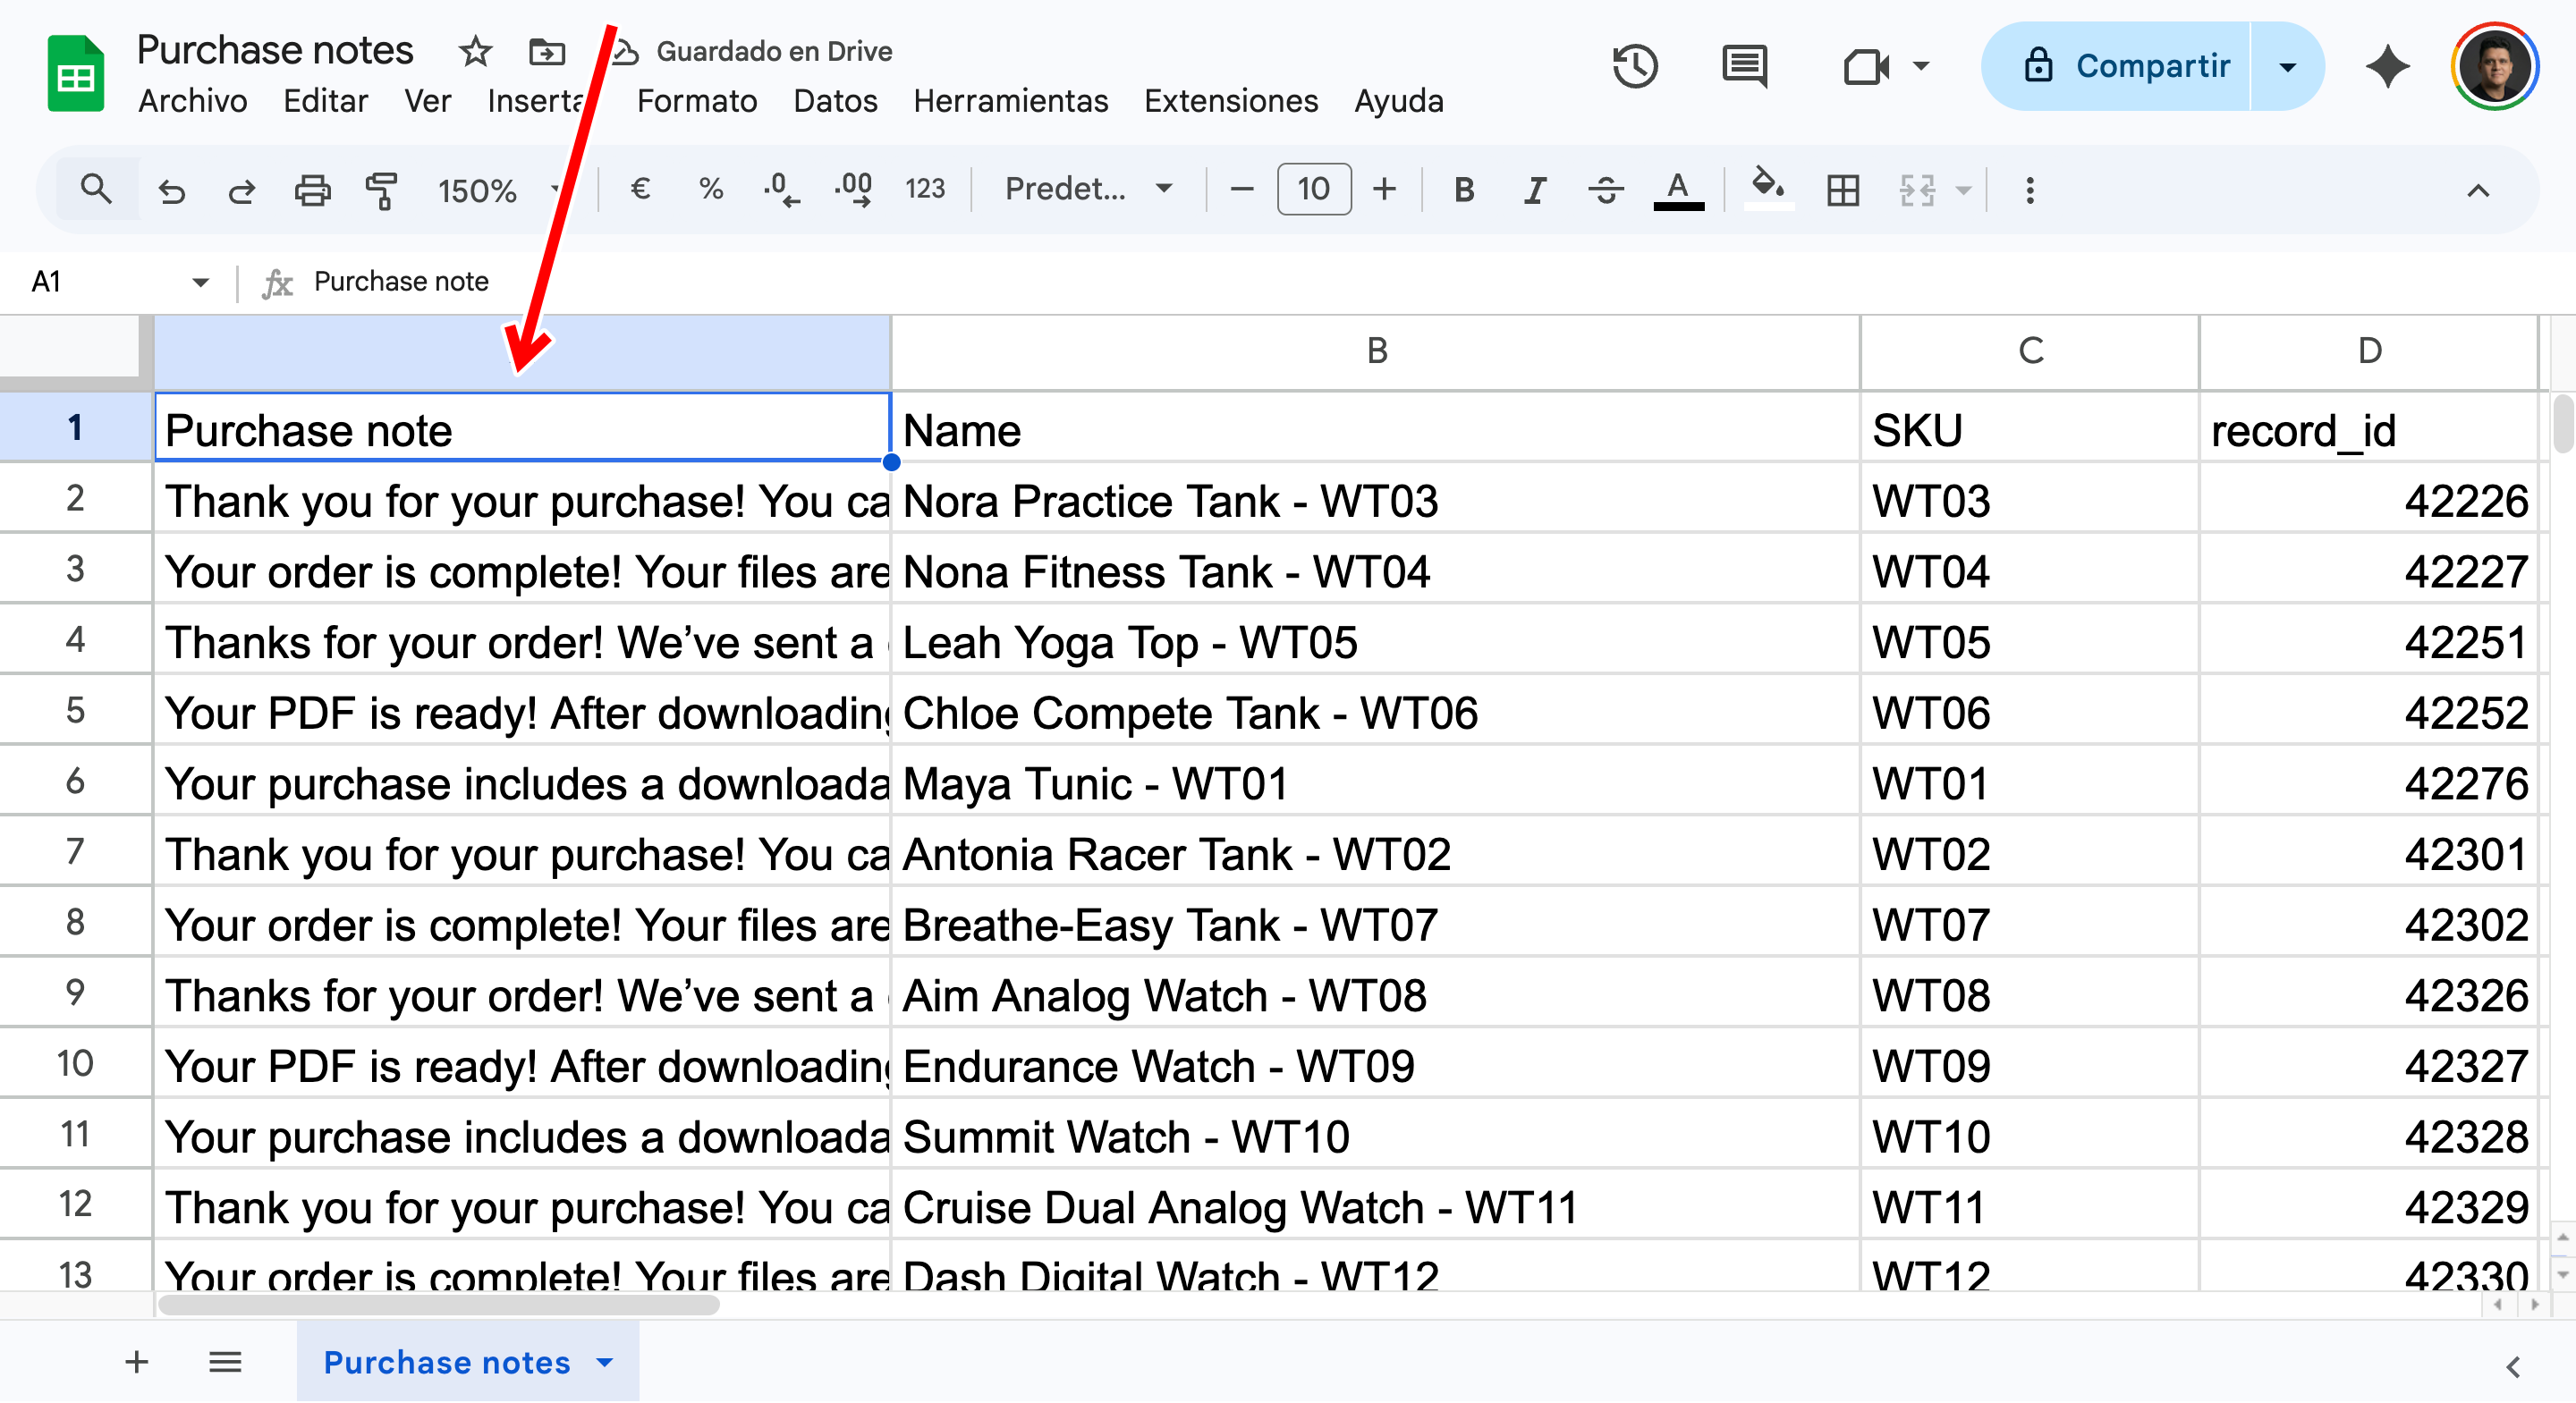
Now that your data is in Google Sheets, you can easily manage your WooCommerce purchase notes. As you can see, we currently do not have purchase notes, so we will add them before importing the data back to WordPress.
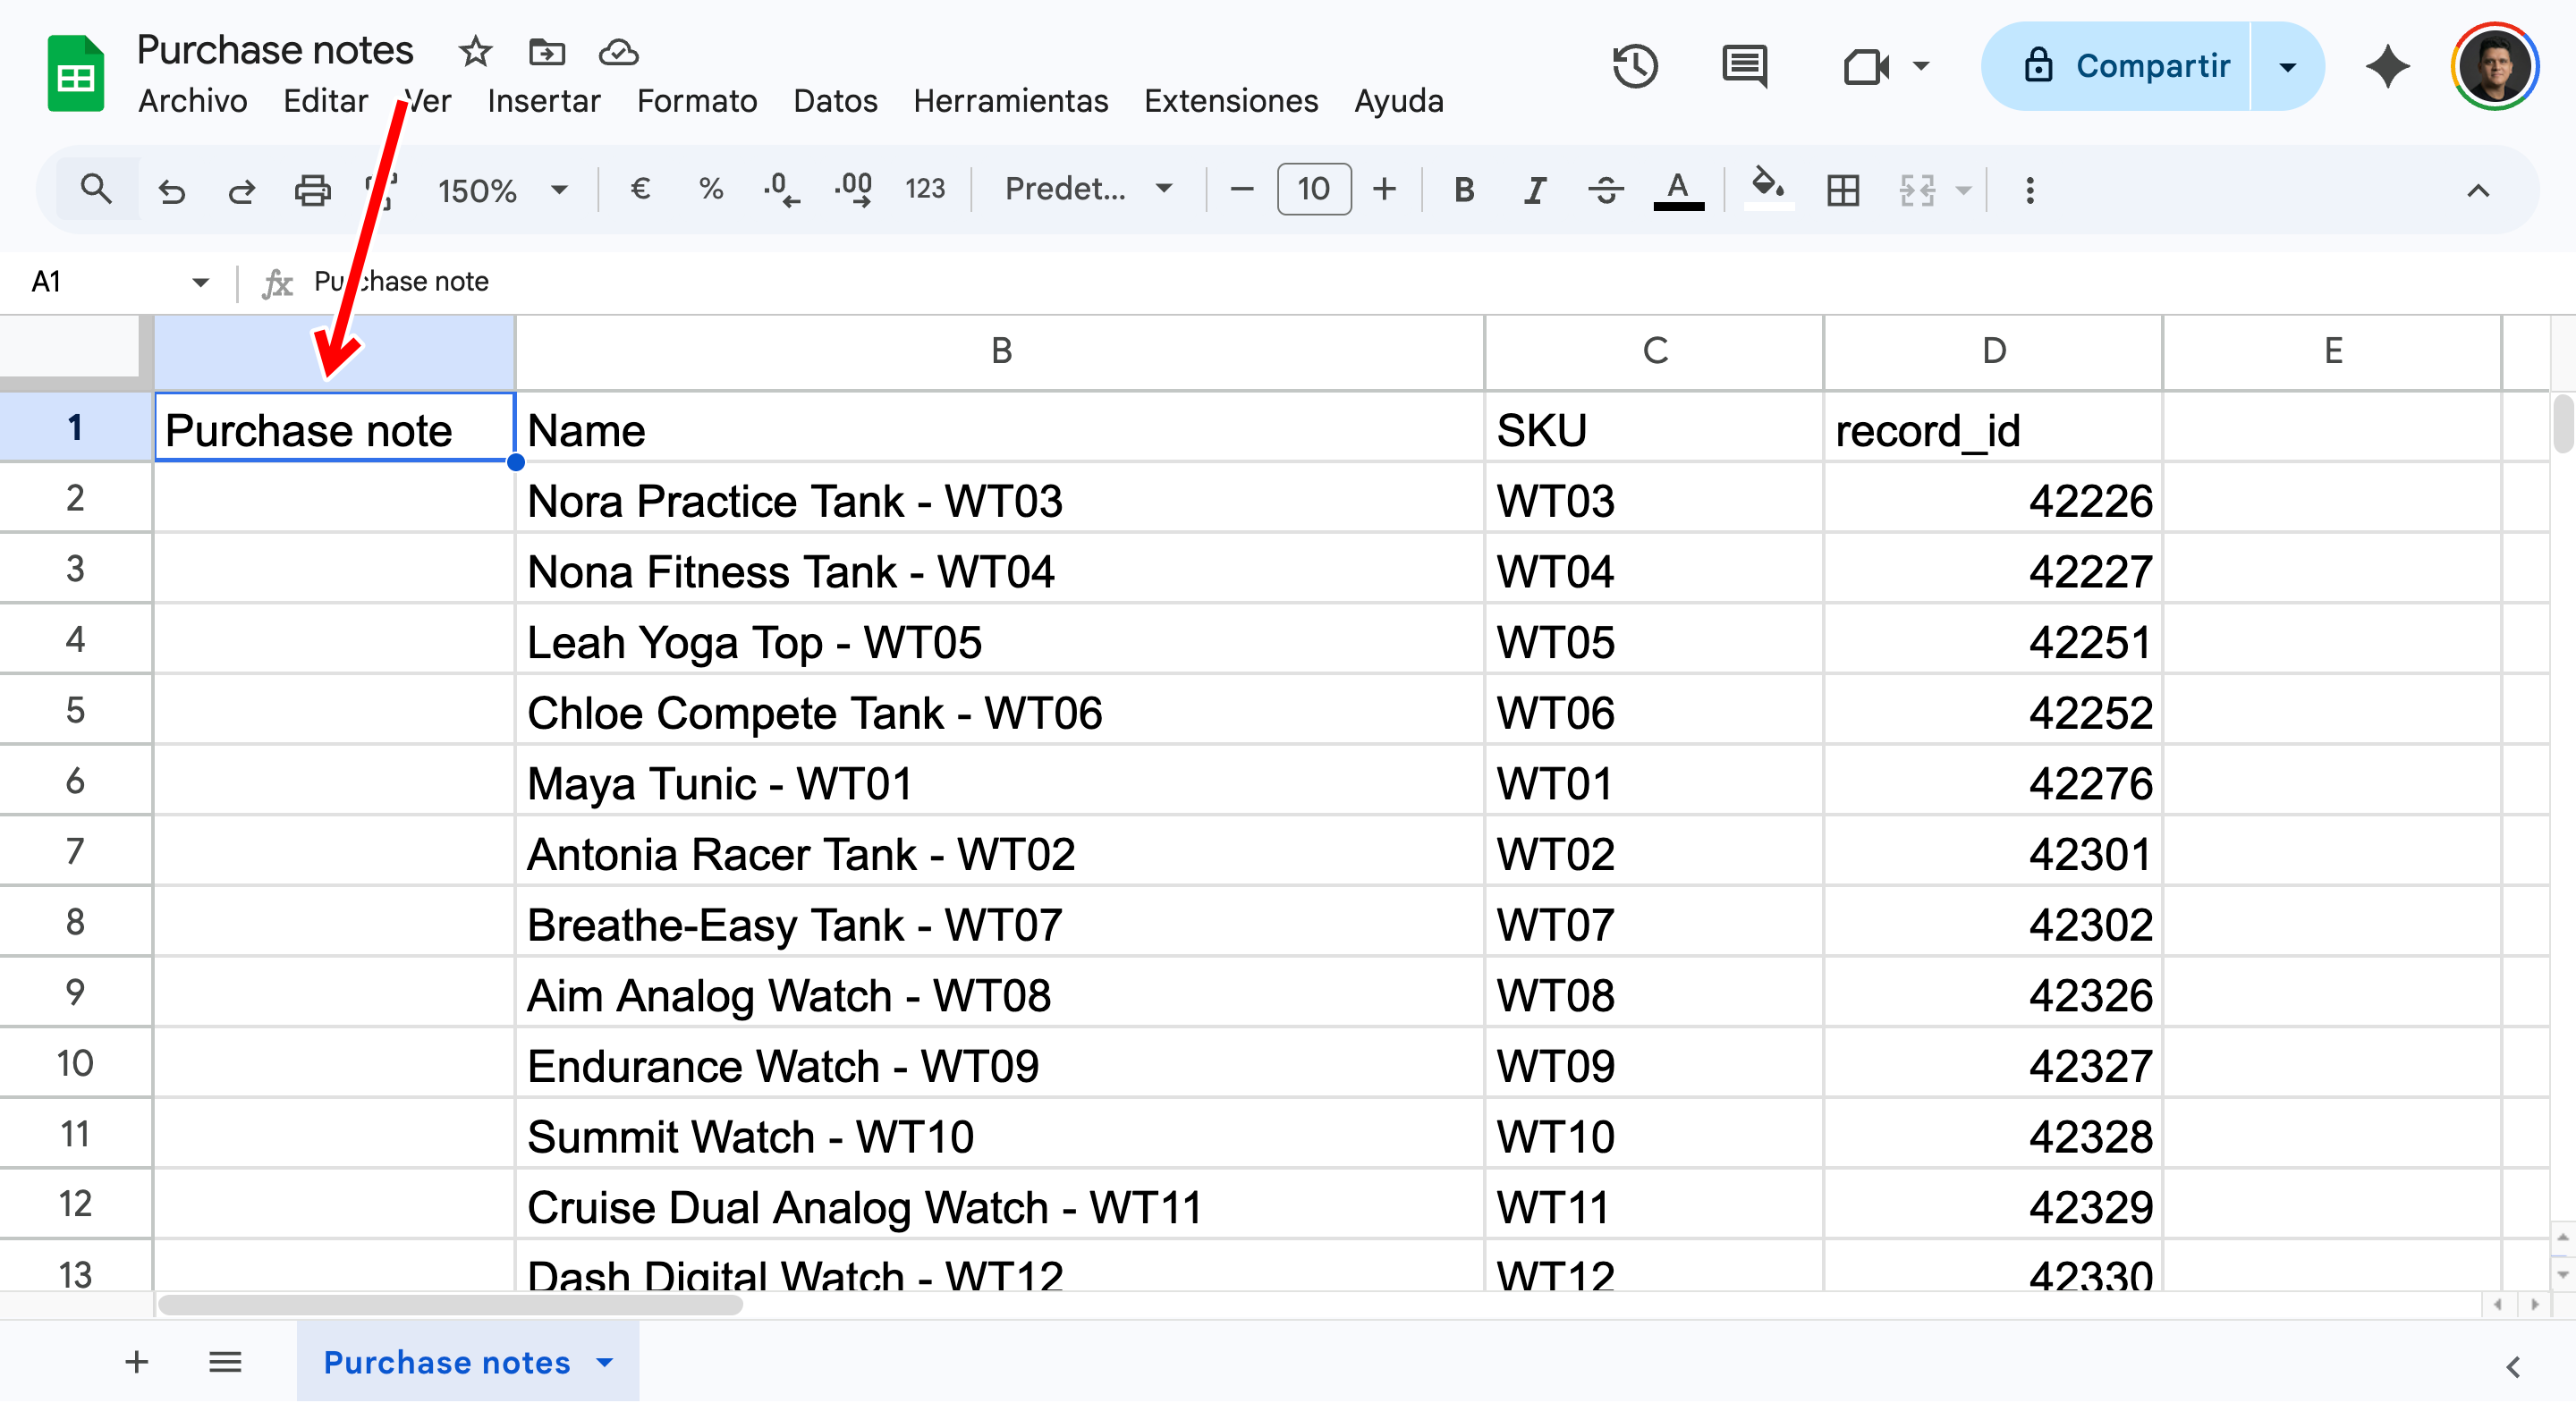
Locate the Purchase note column. Here, you can type or paste the exact message you want your customers to receive. You can include plain text, links, or basic formatting. Because you are in a spreadsheet, you can quickly copy a single note and drag it down to apply it to an entire category of products.
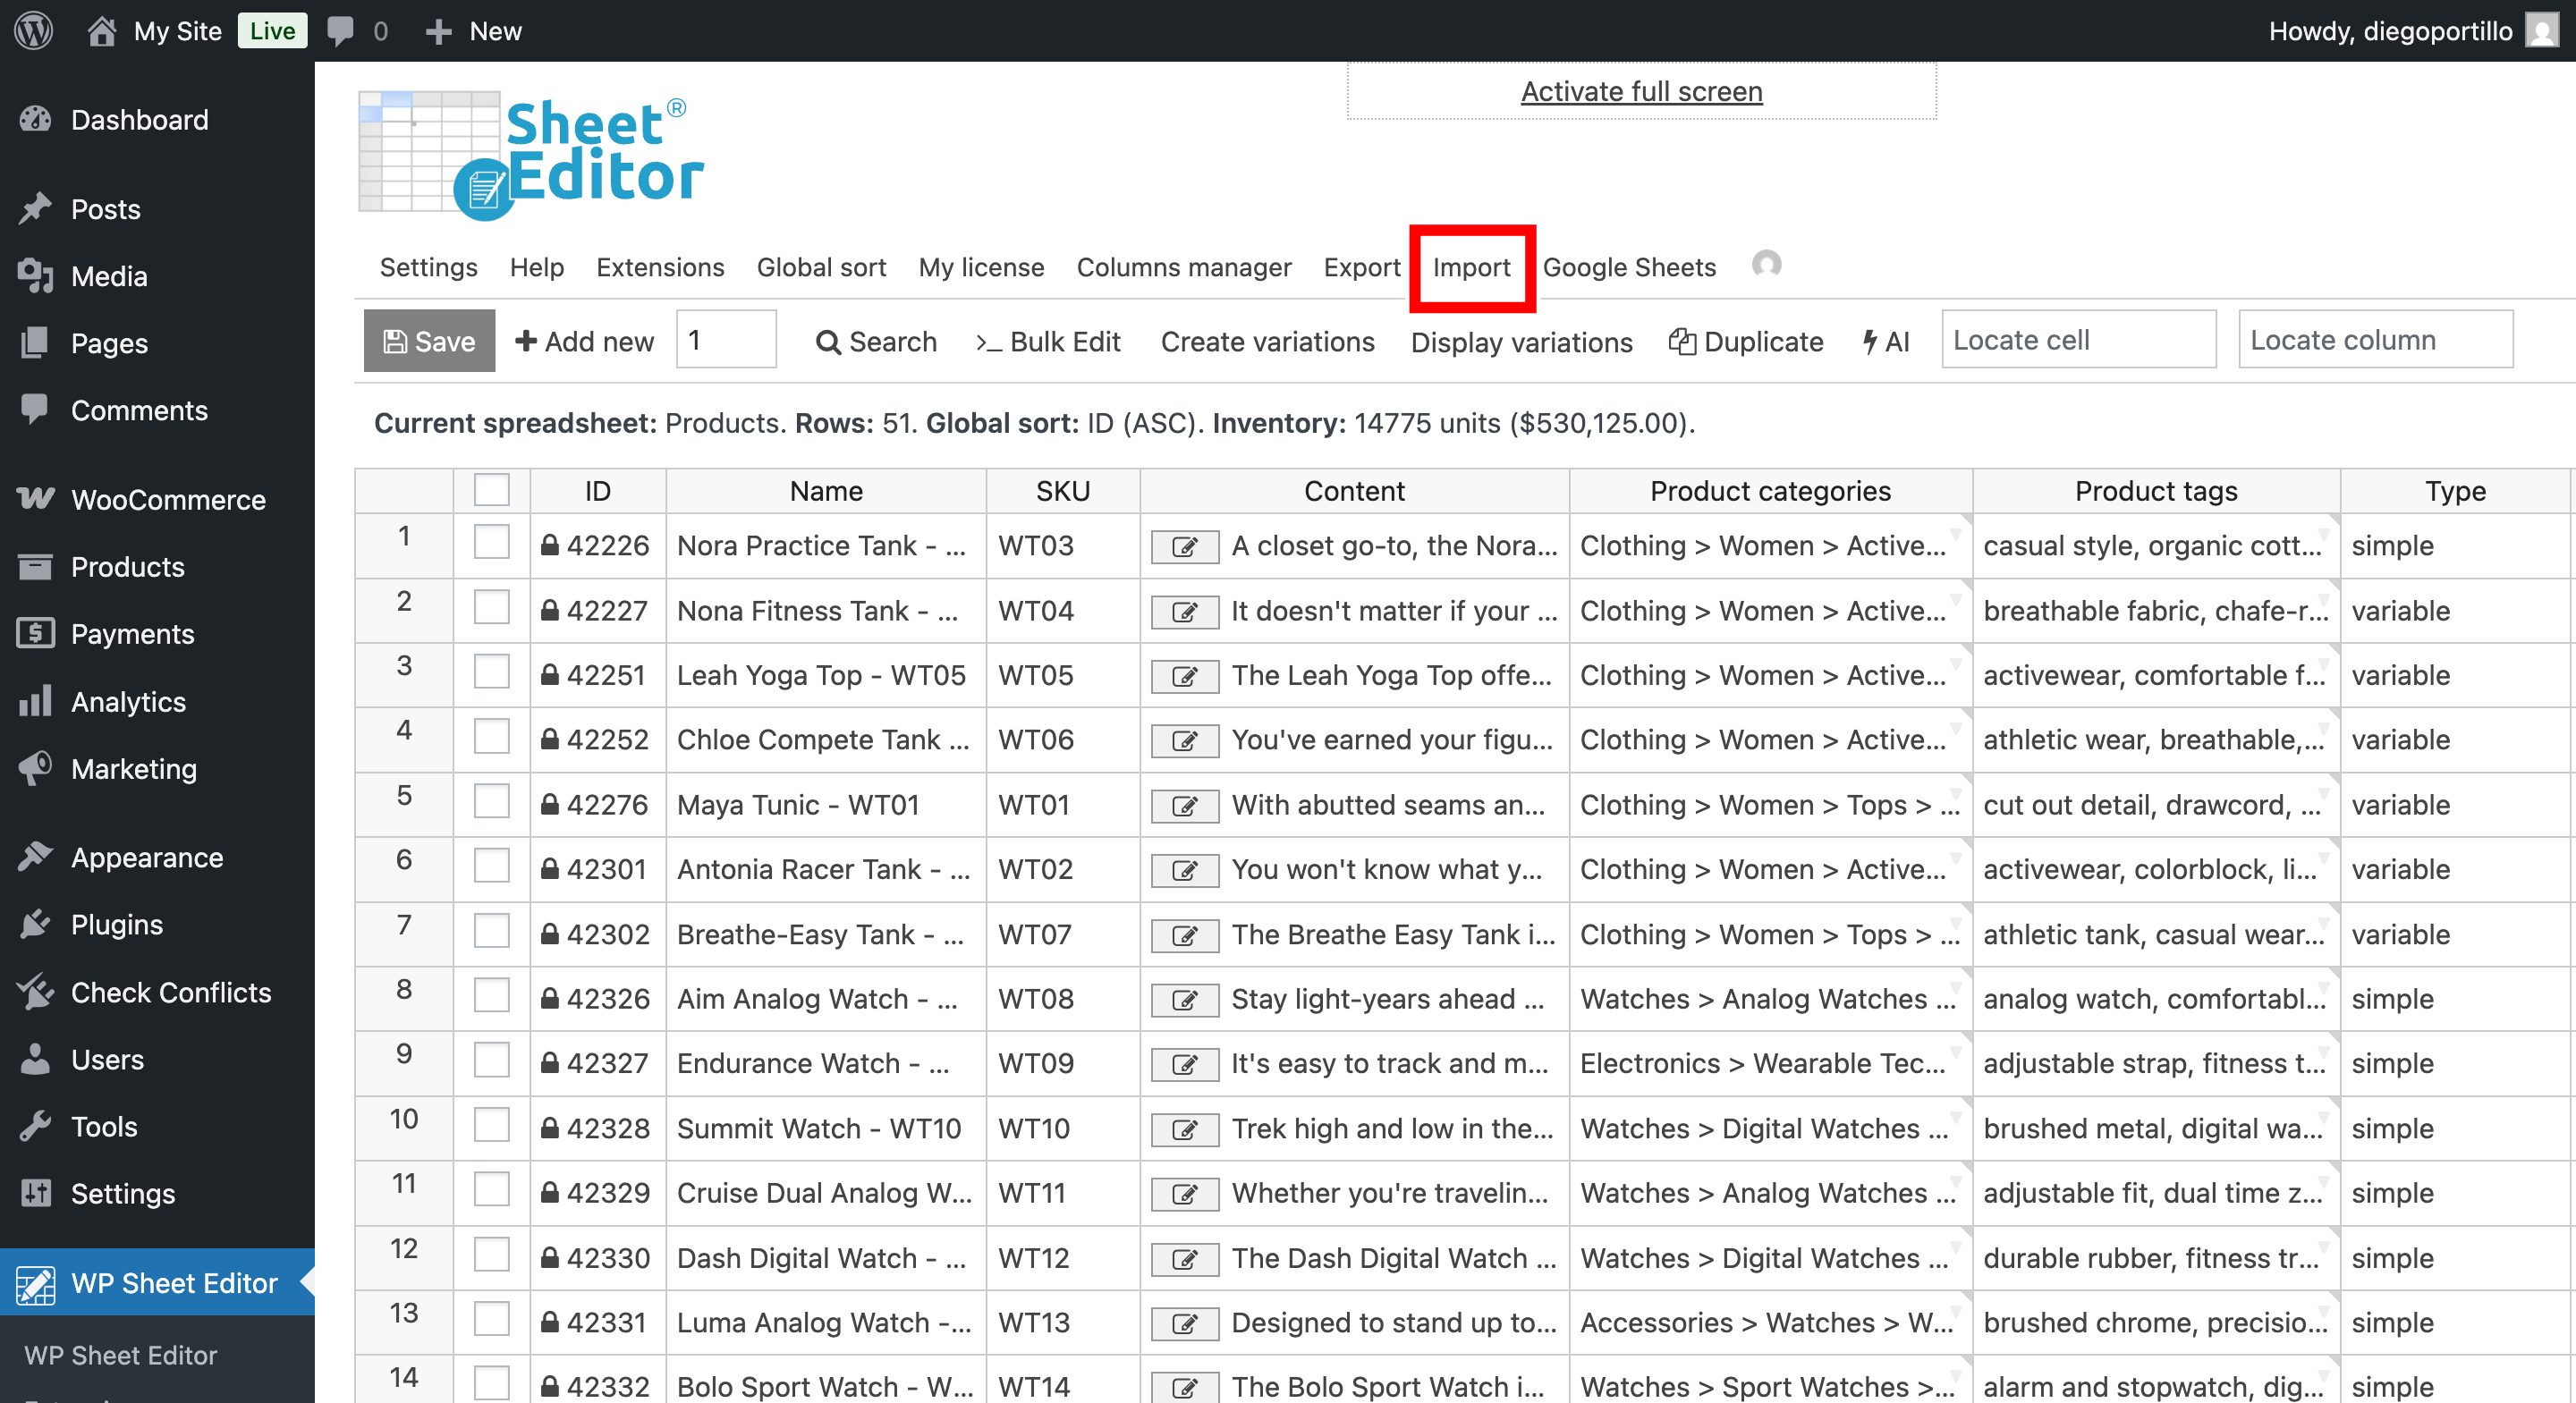
Step 4. Import purchase notes back to WooCommerce
After you have populated your Google Sheet with the new purchase notes, it is time to import that data back into your WooCommerce store.
Go back to WP Sheet Editor in WordPress and click on the Import tool on the top toolbar.
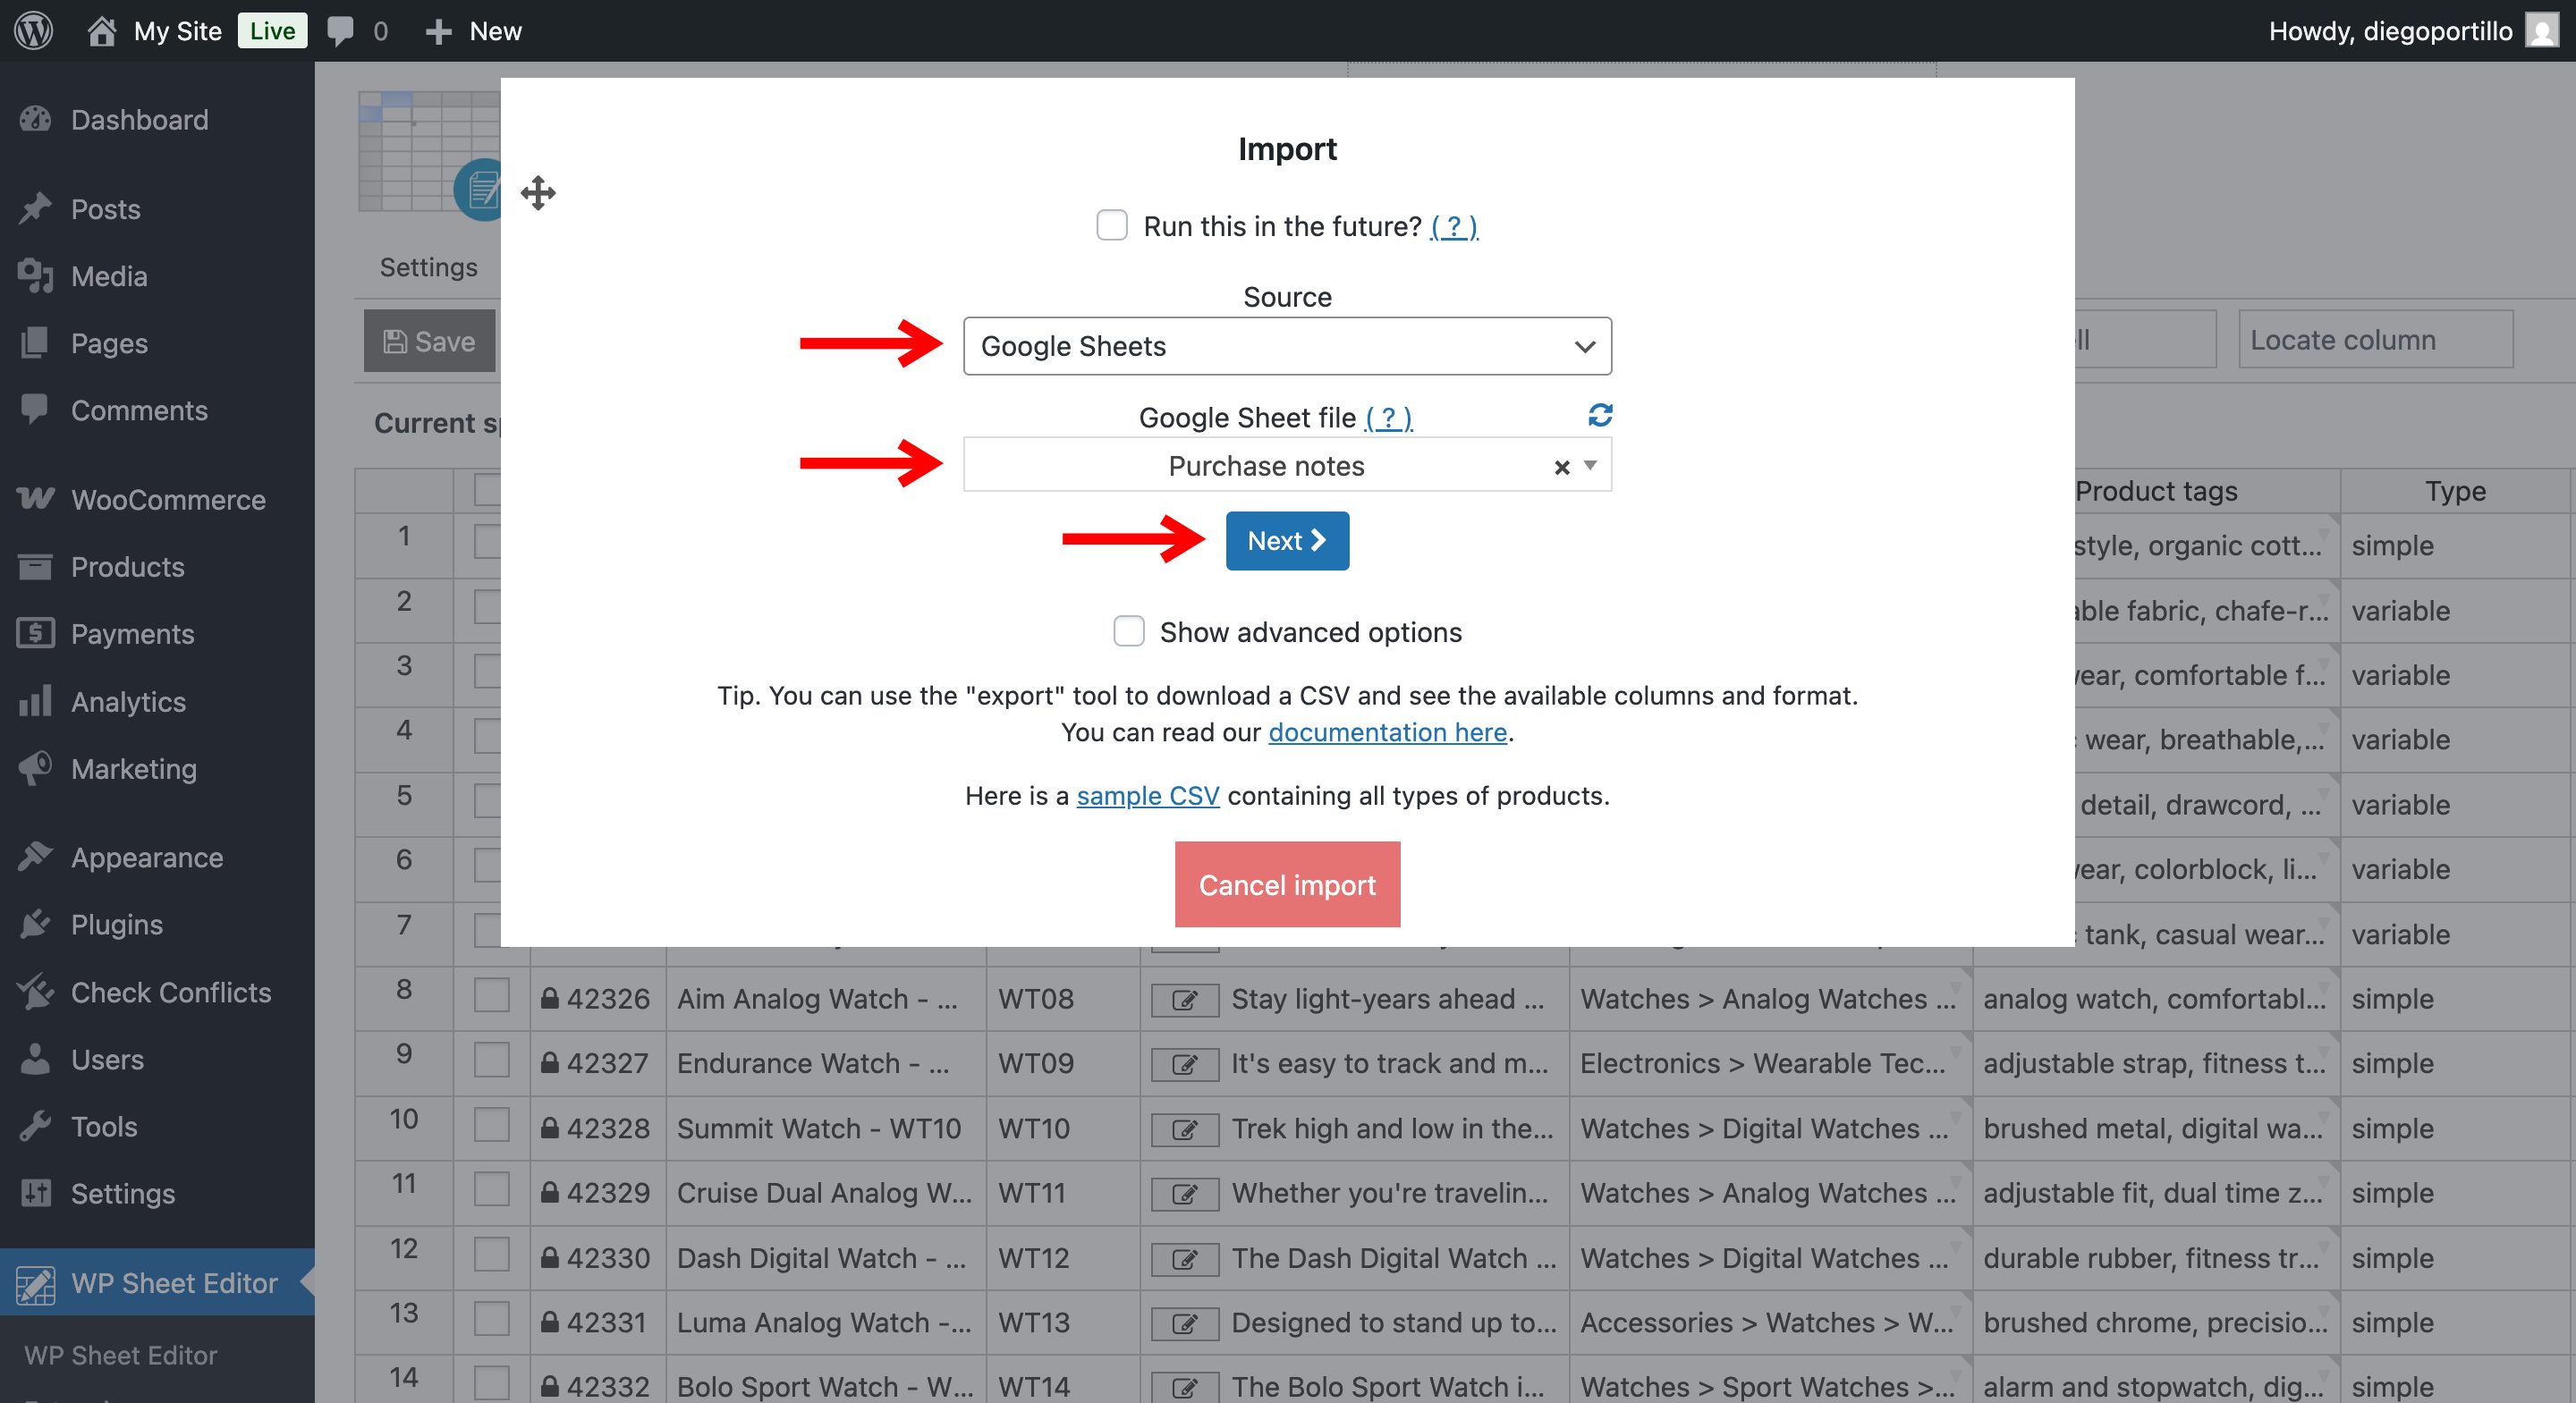
Follow these steps in the import wizard:
- Source: Select Google Sheets.
- Google Sheet file: Select the spreadsheet you just edited from the dropdown list.
- Click on Next.
Import all the columns: You can choose to import all columns, or manually map the columns.
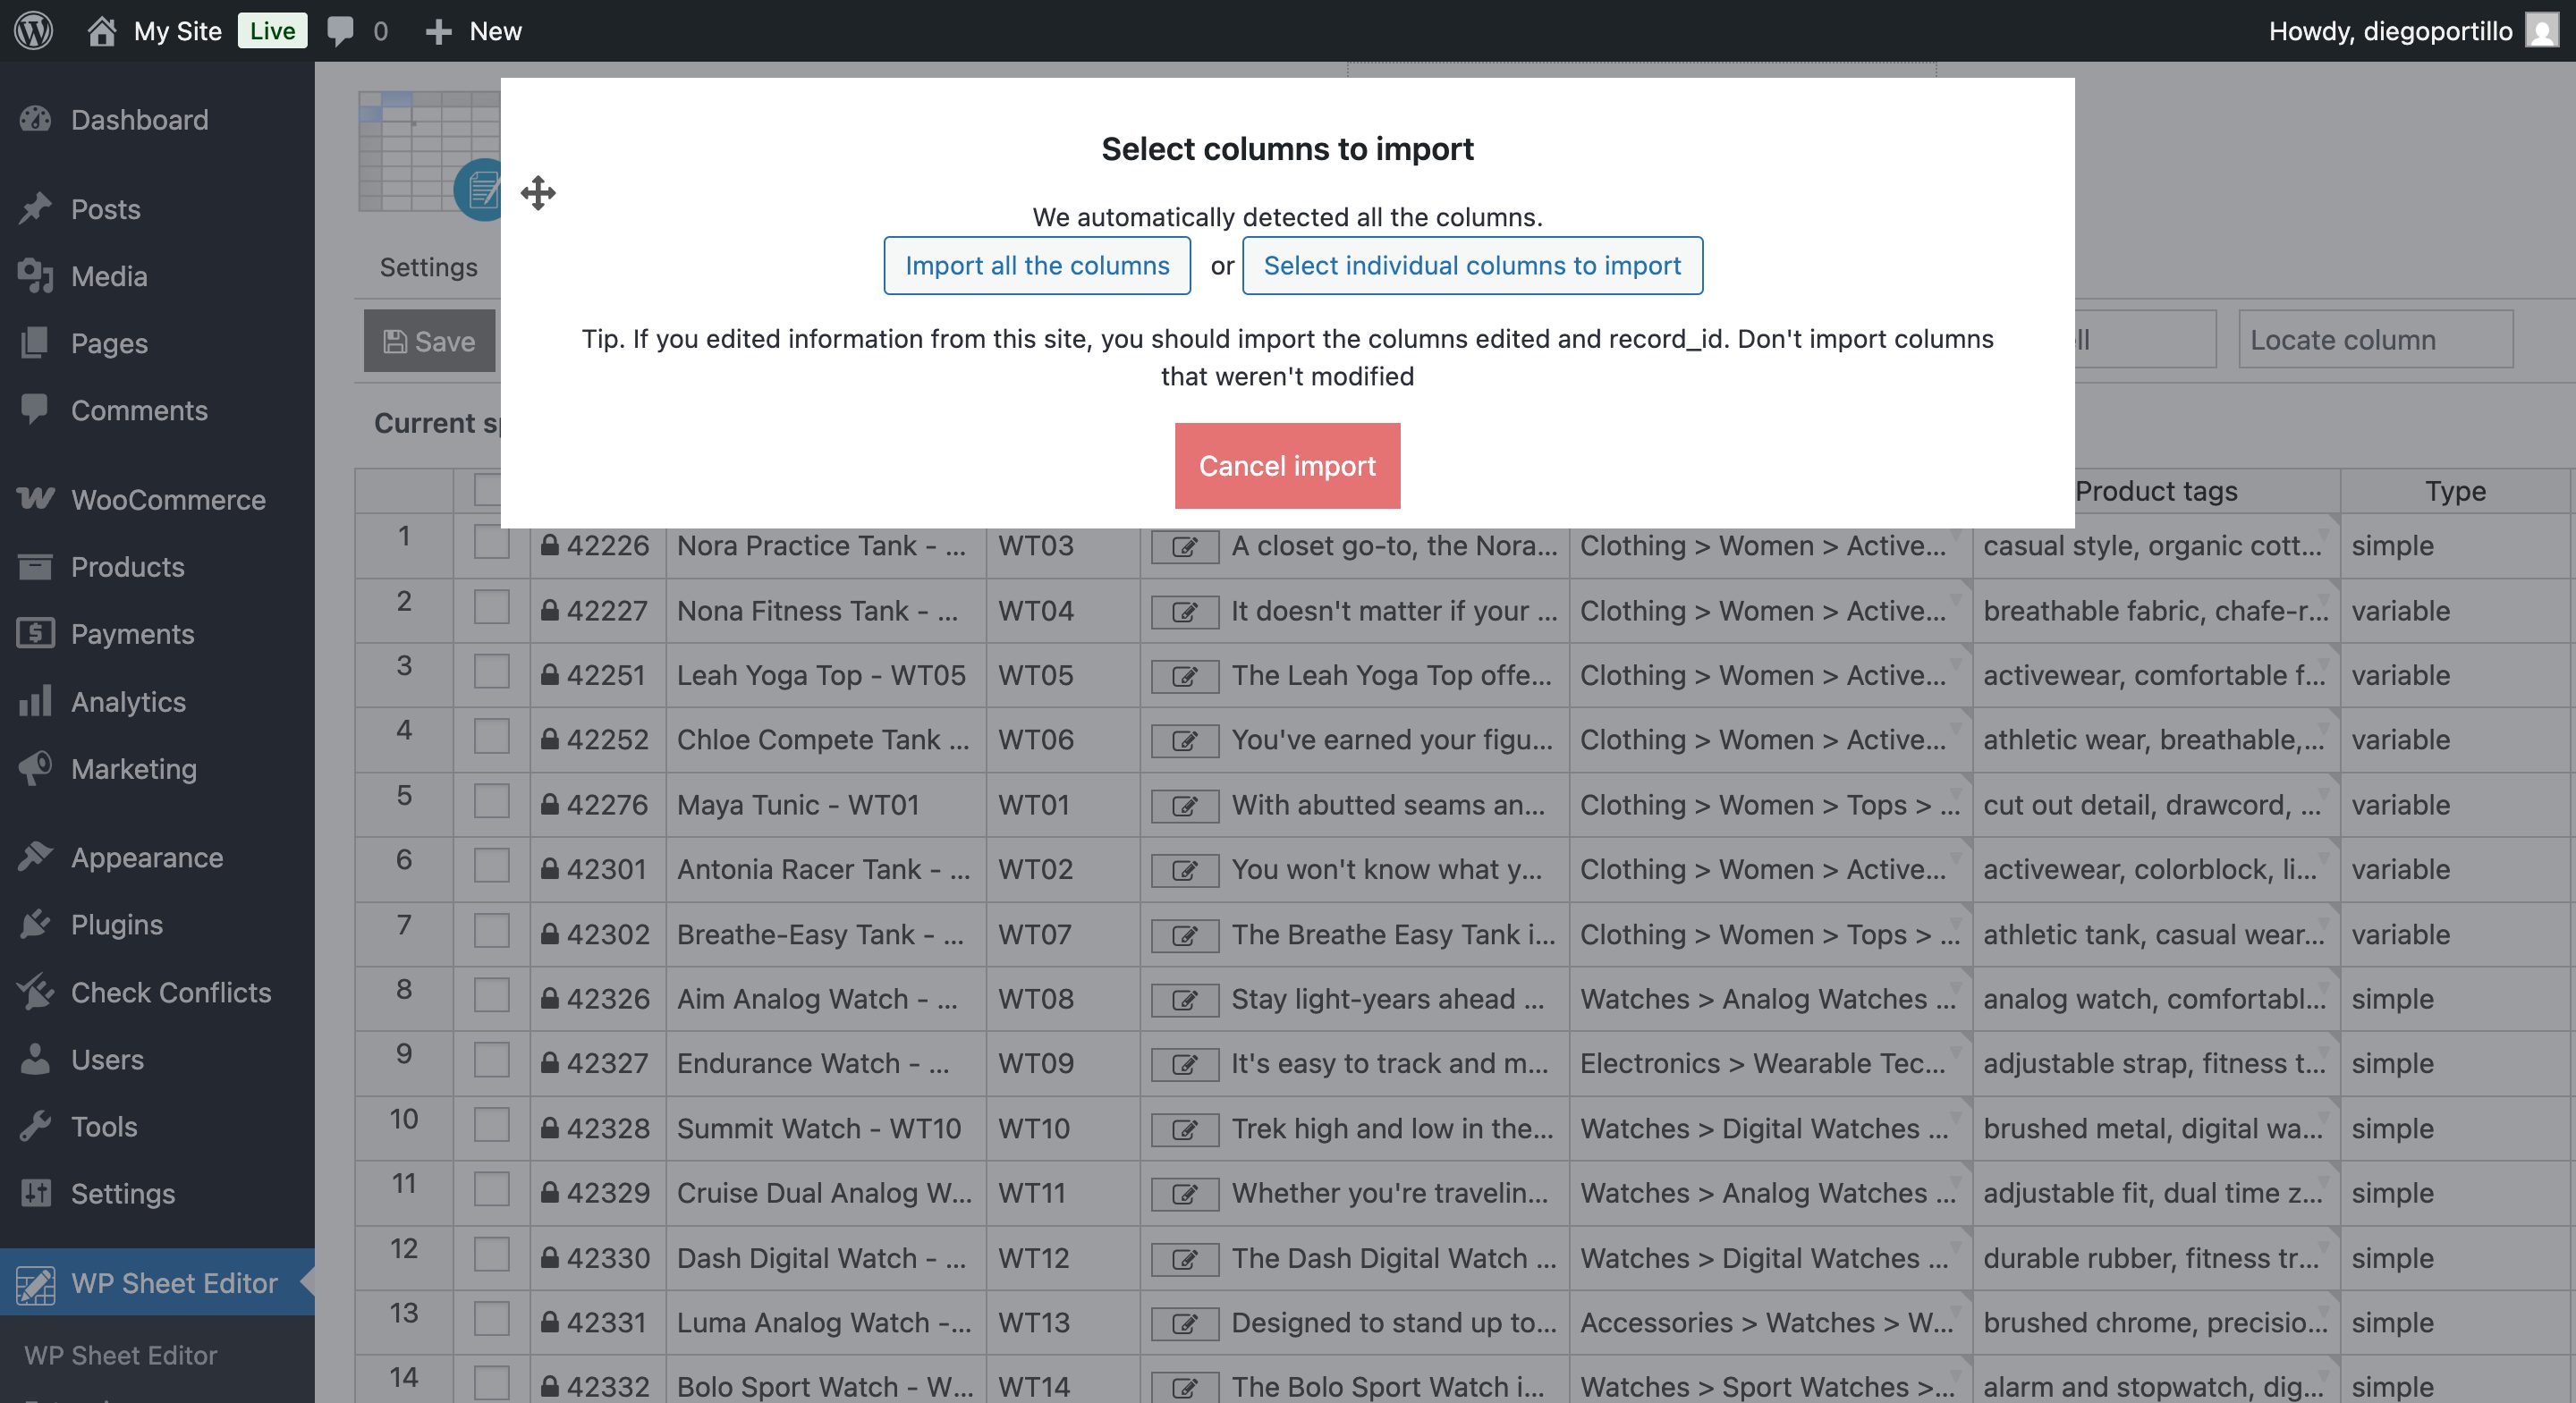
Do you want to update or create items: Choose to update existing items, matching them by SKU or ID.
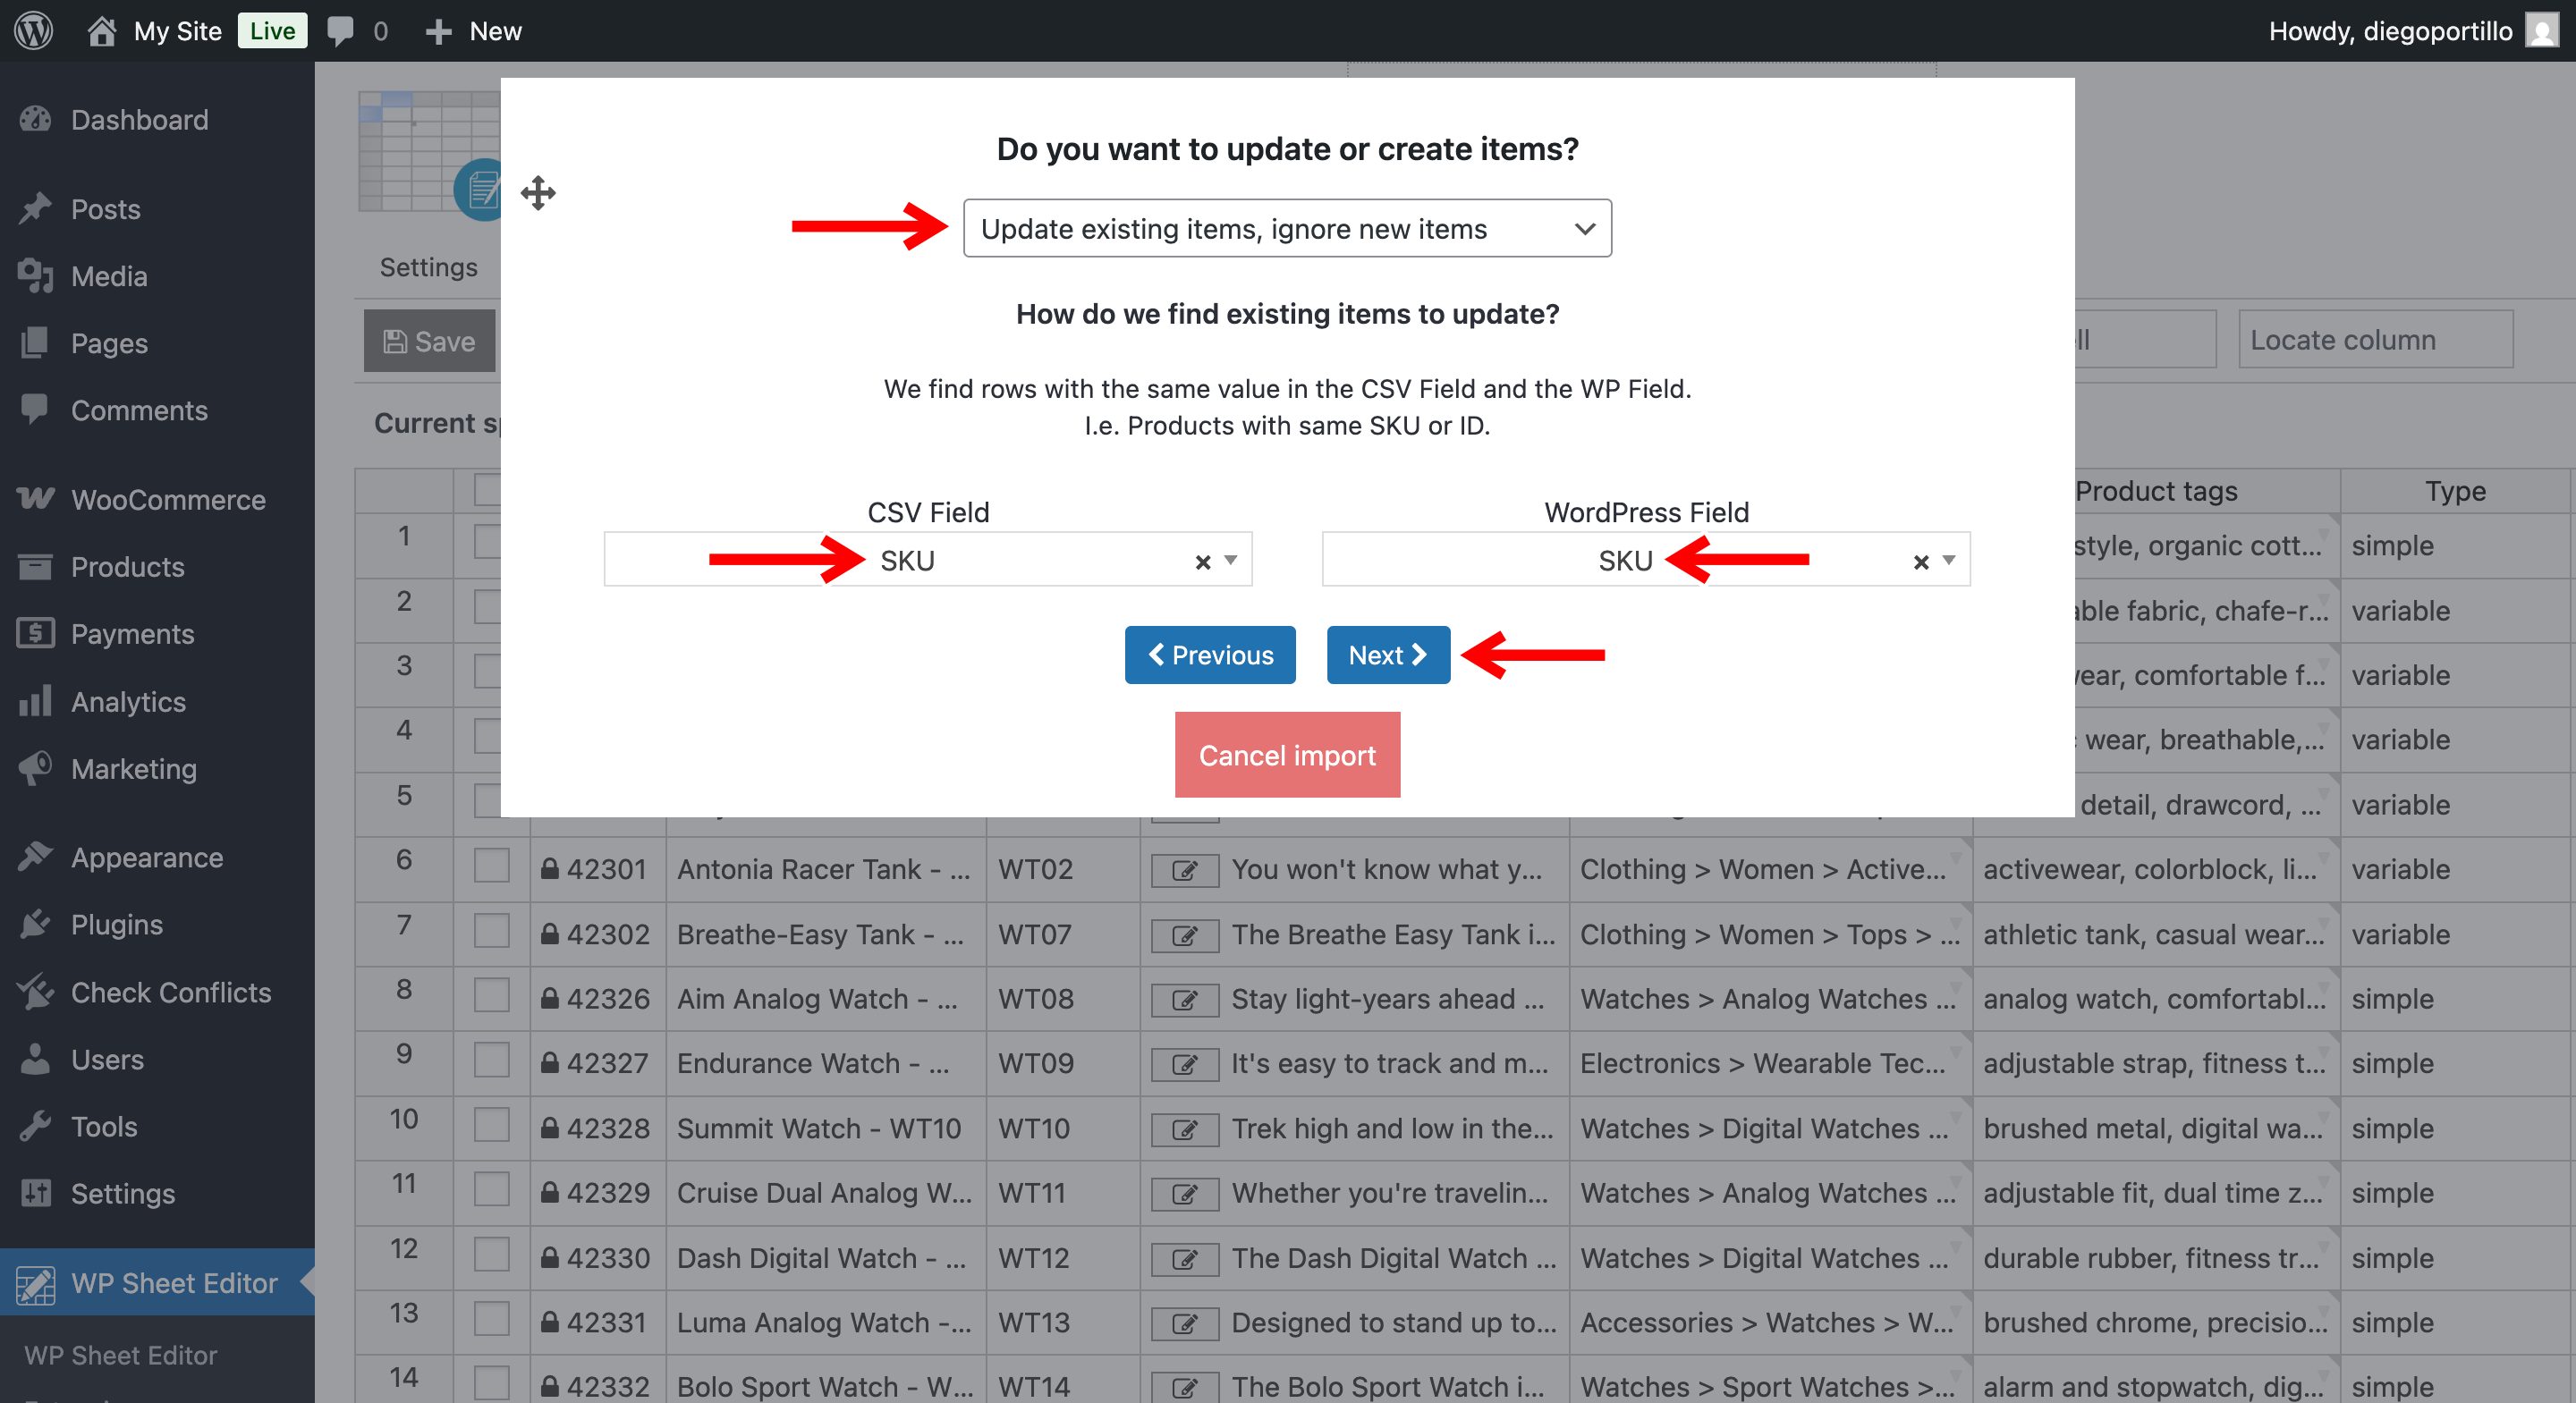
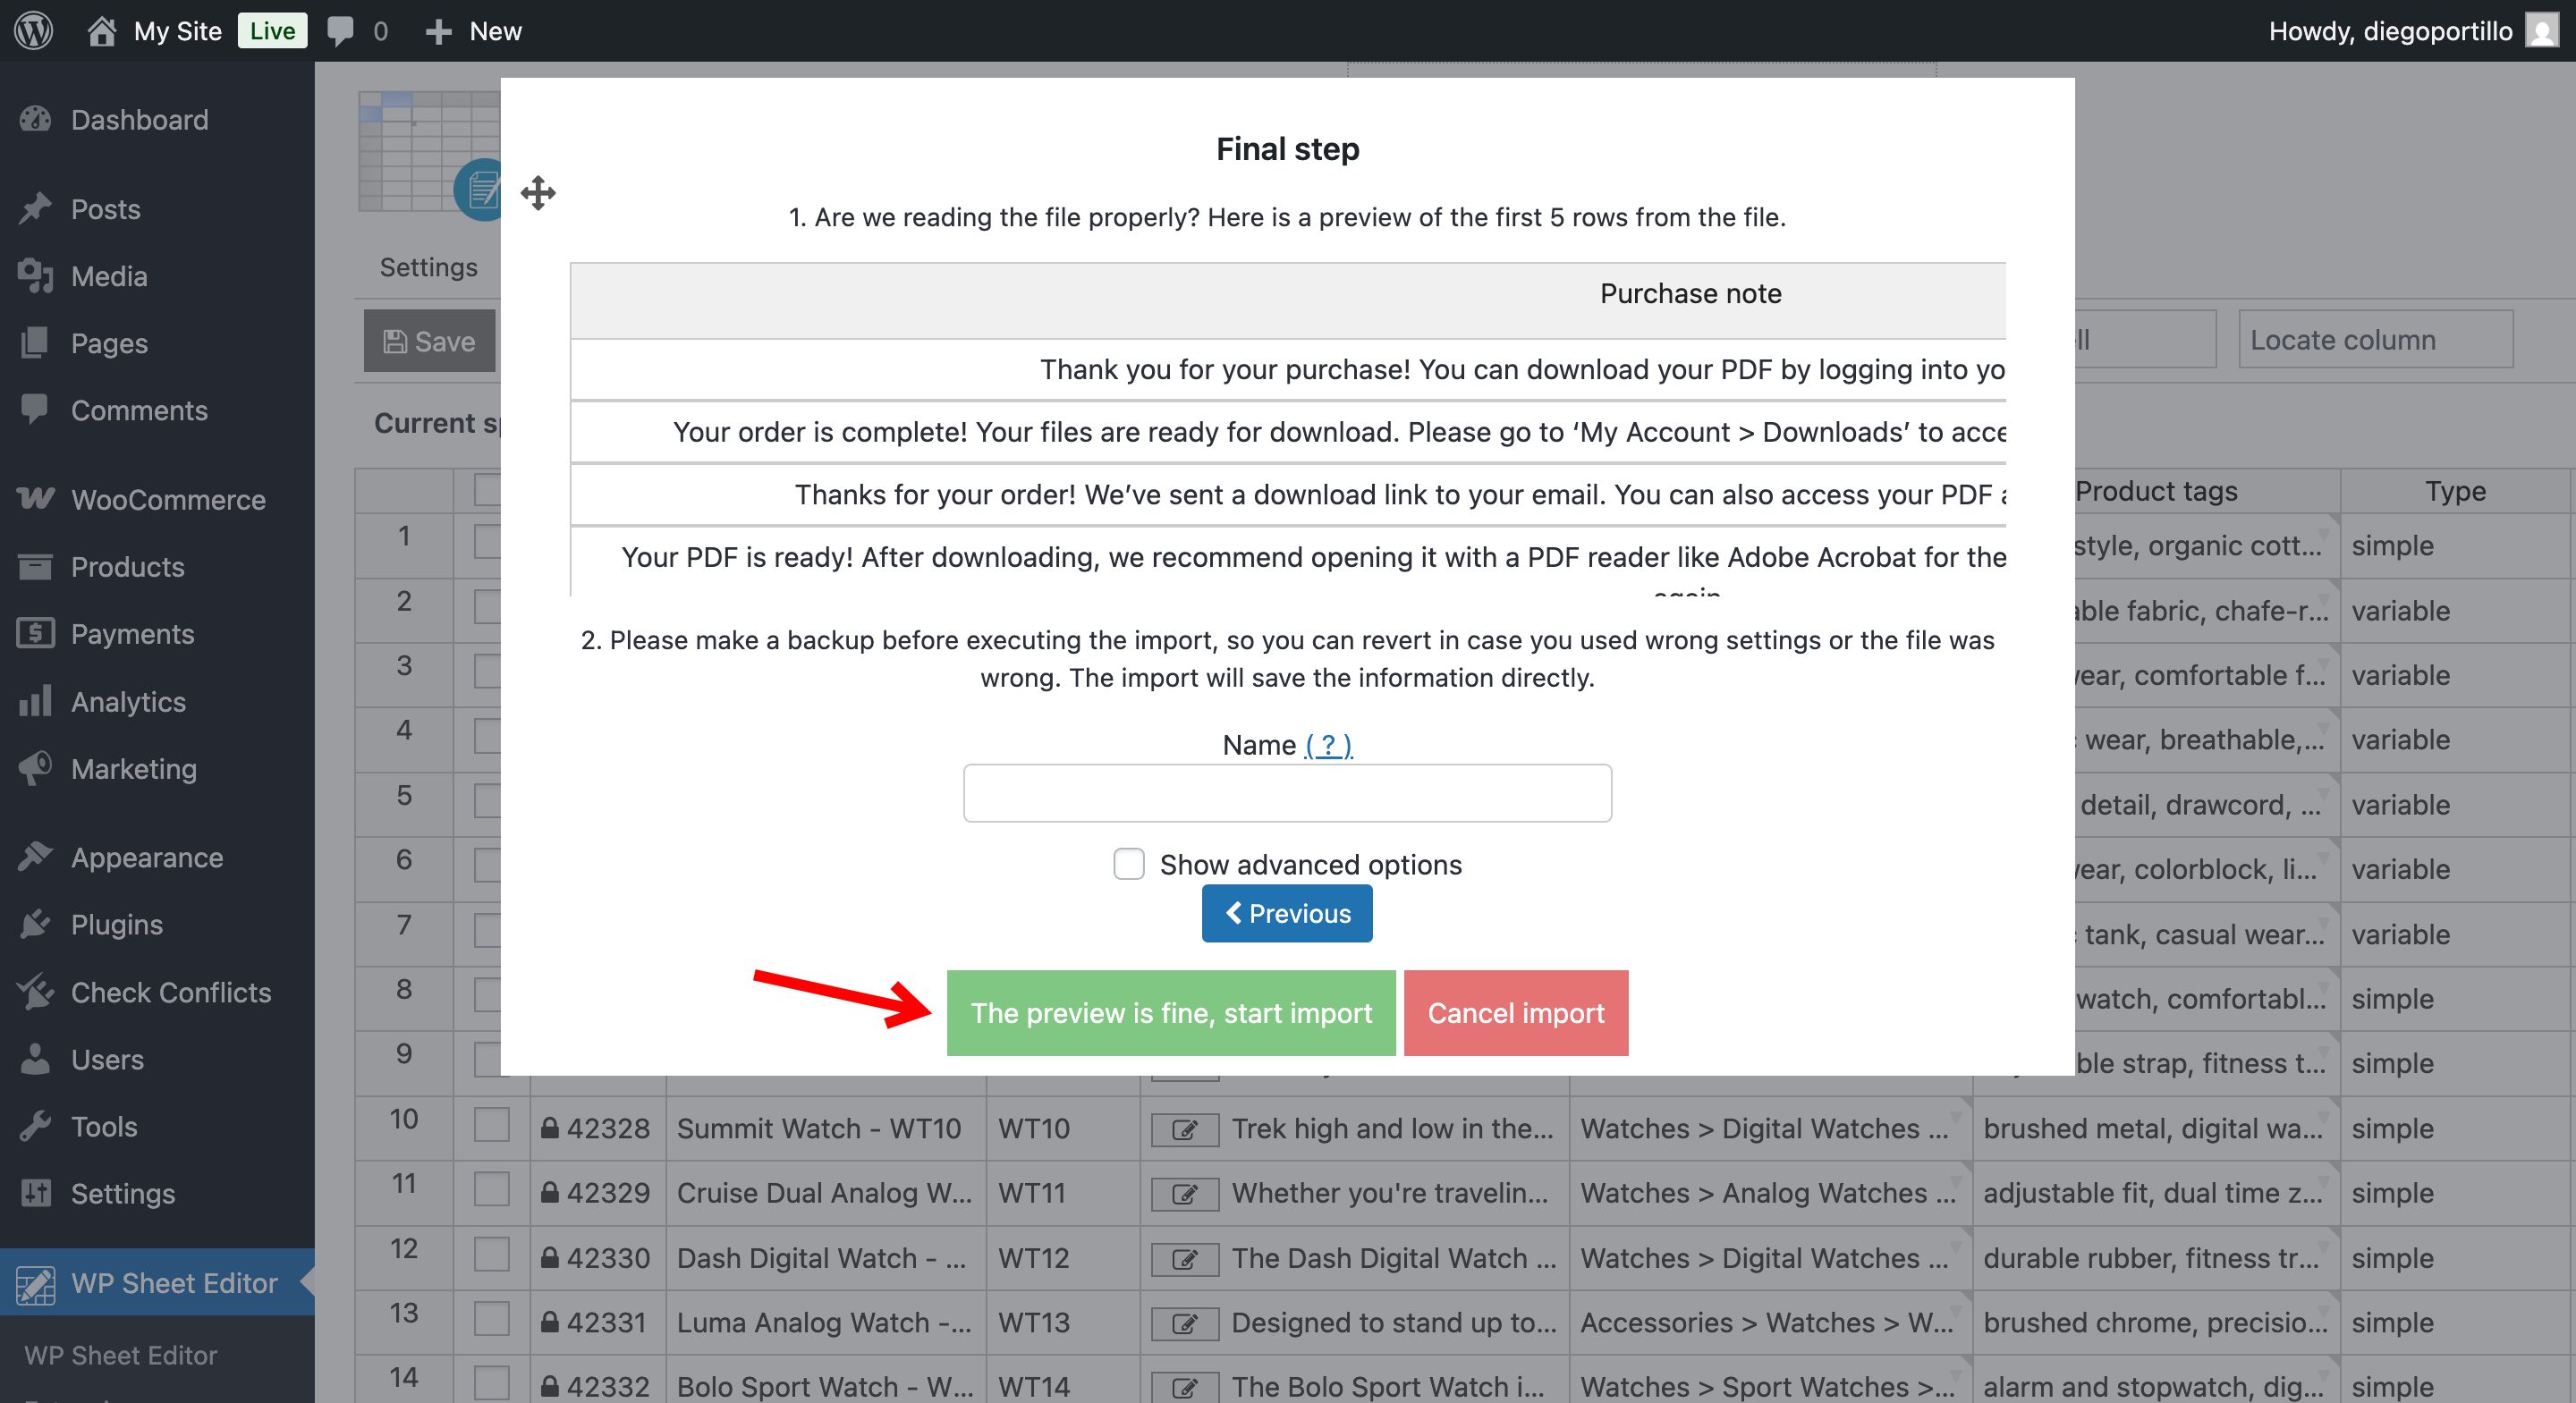
Click on The preview is fine, start import.
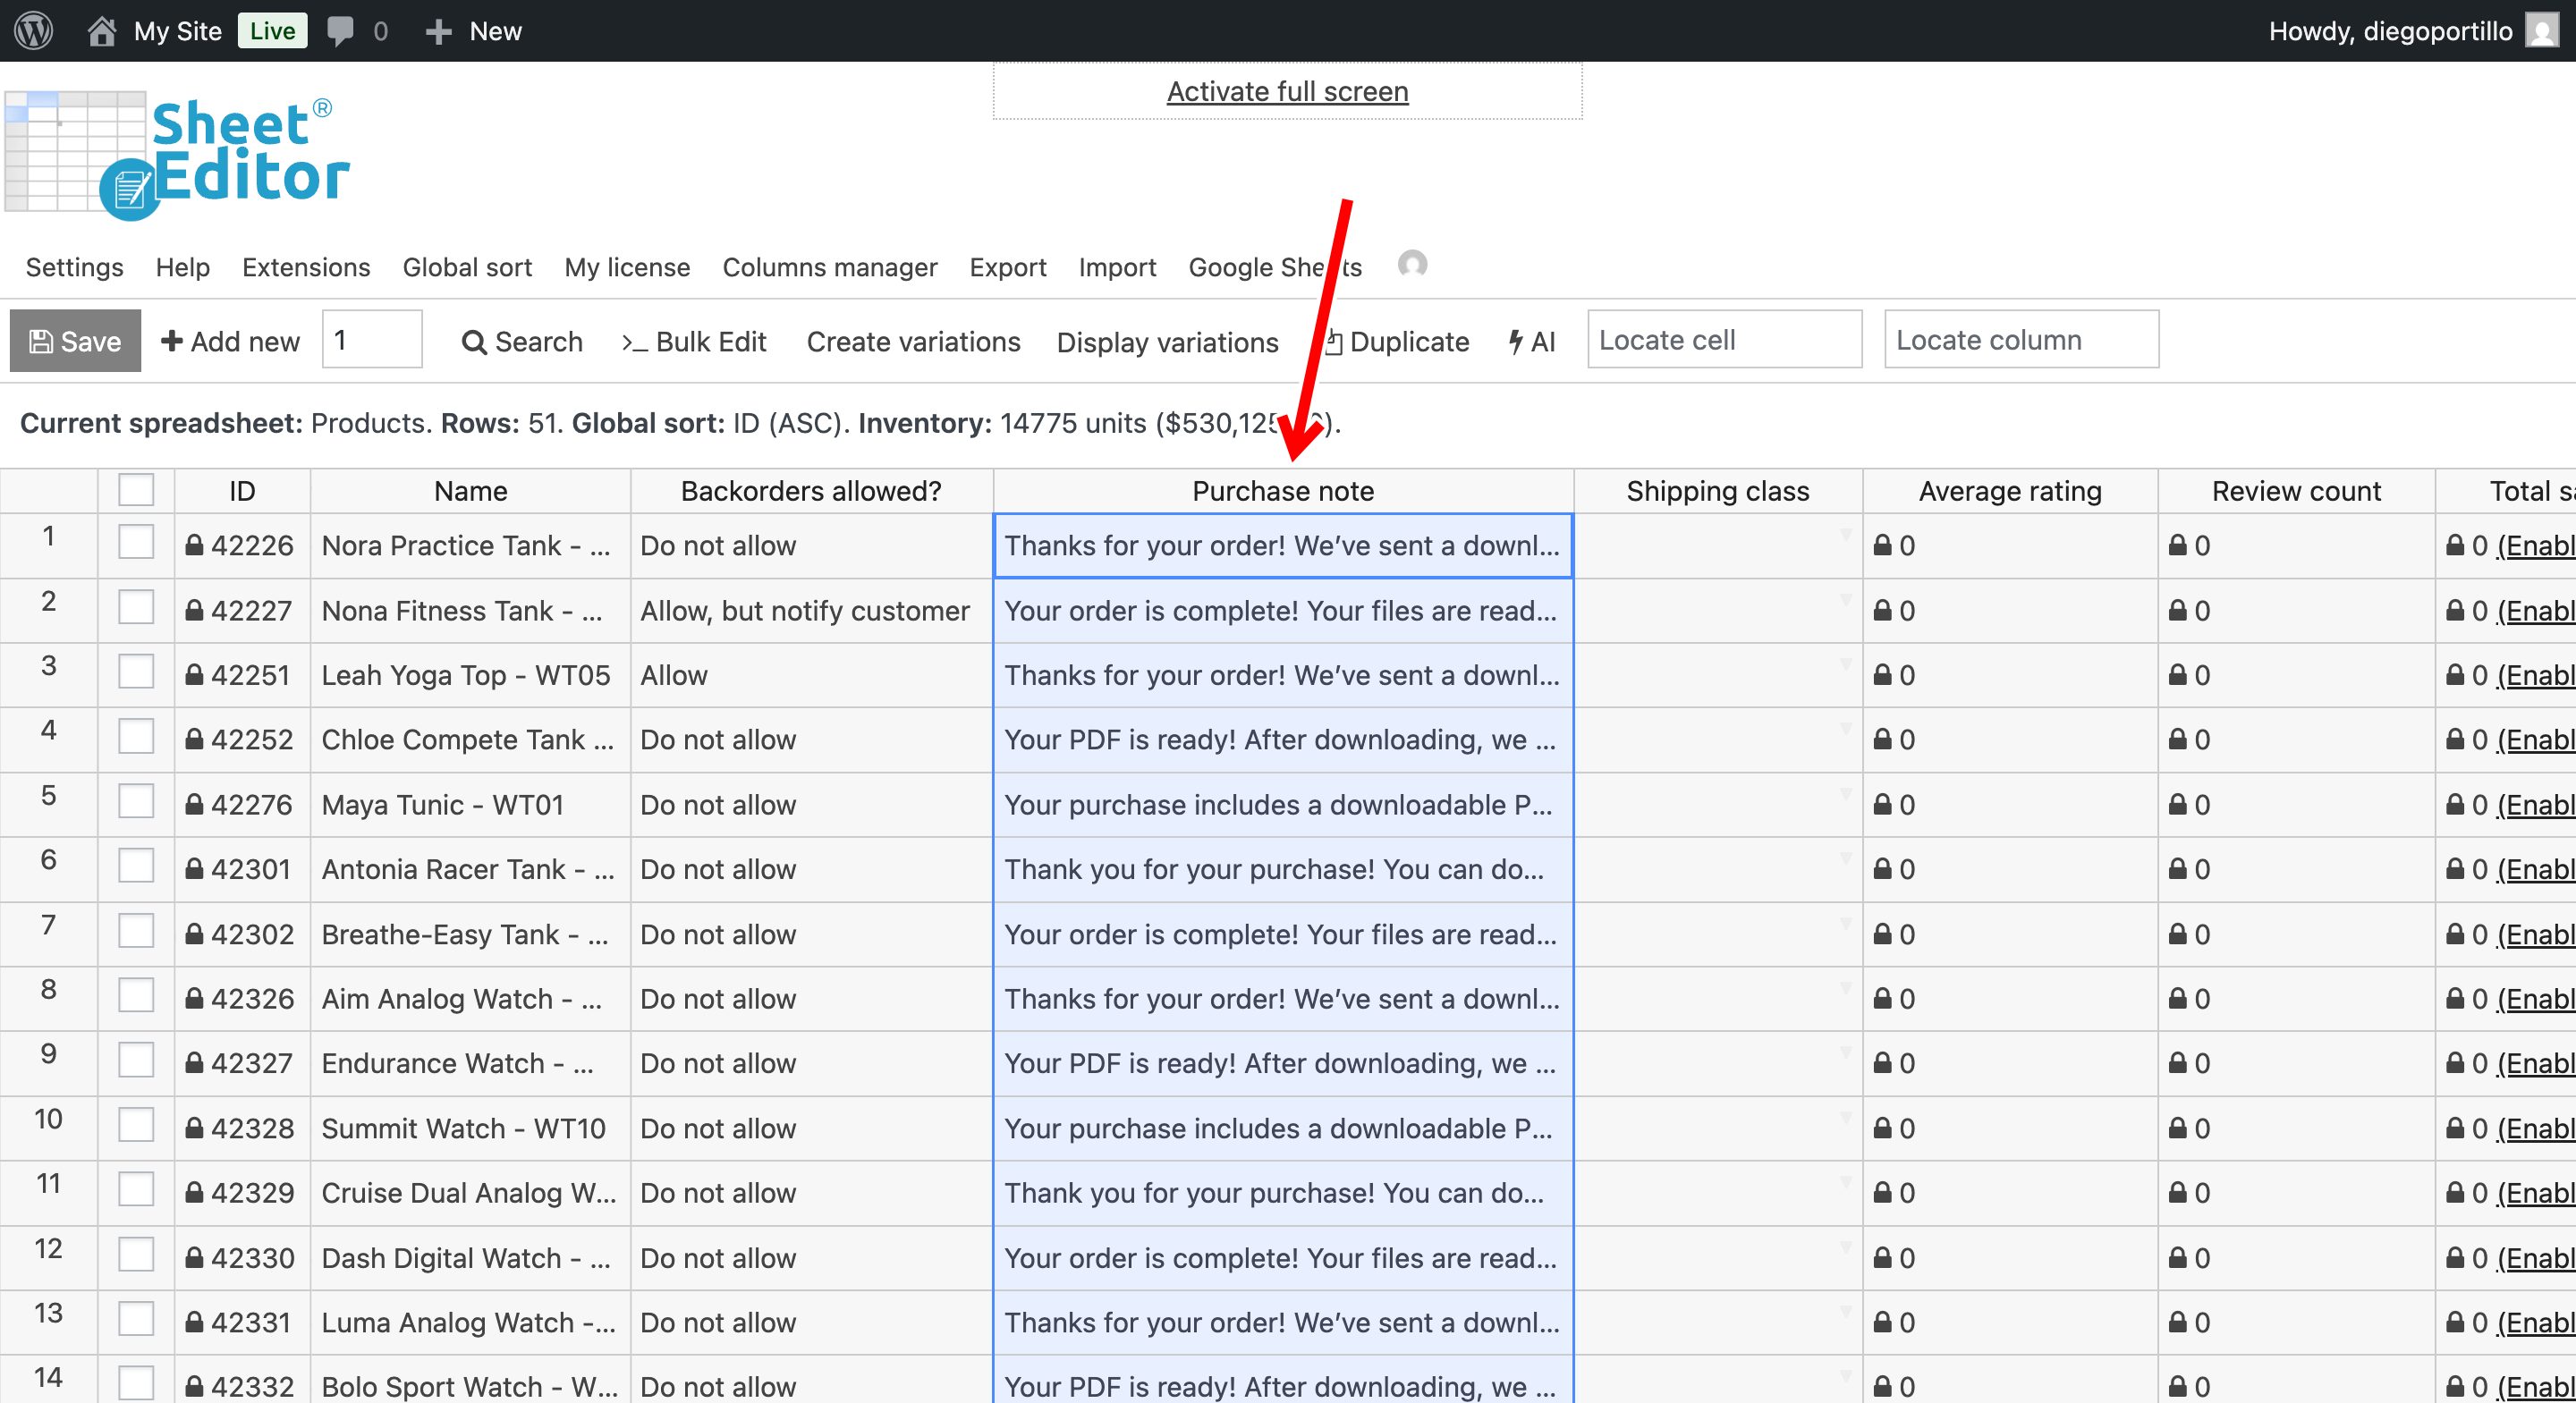
As you can see now, we have imported purchase notes from Google Sheets and they appear in the spreadsheet.
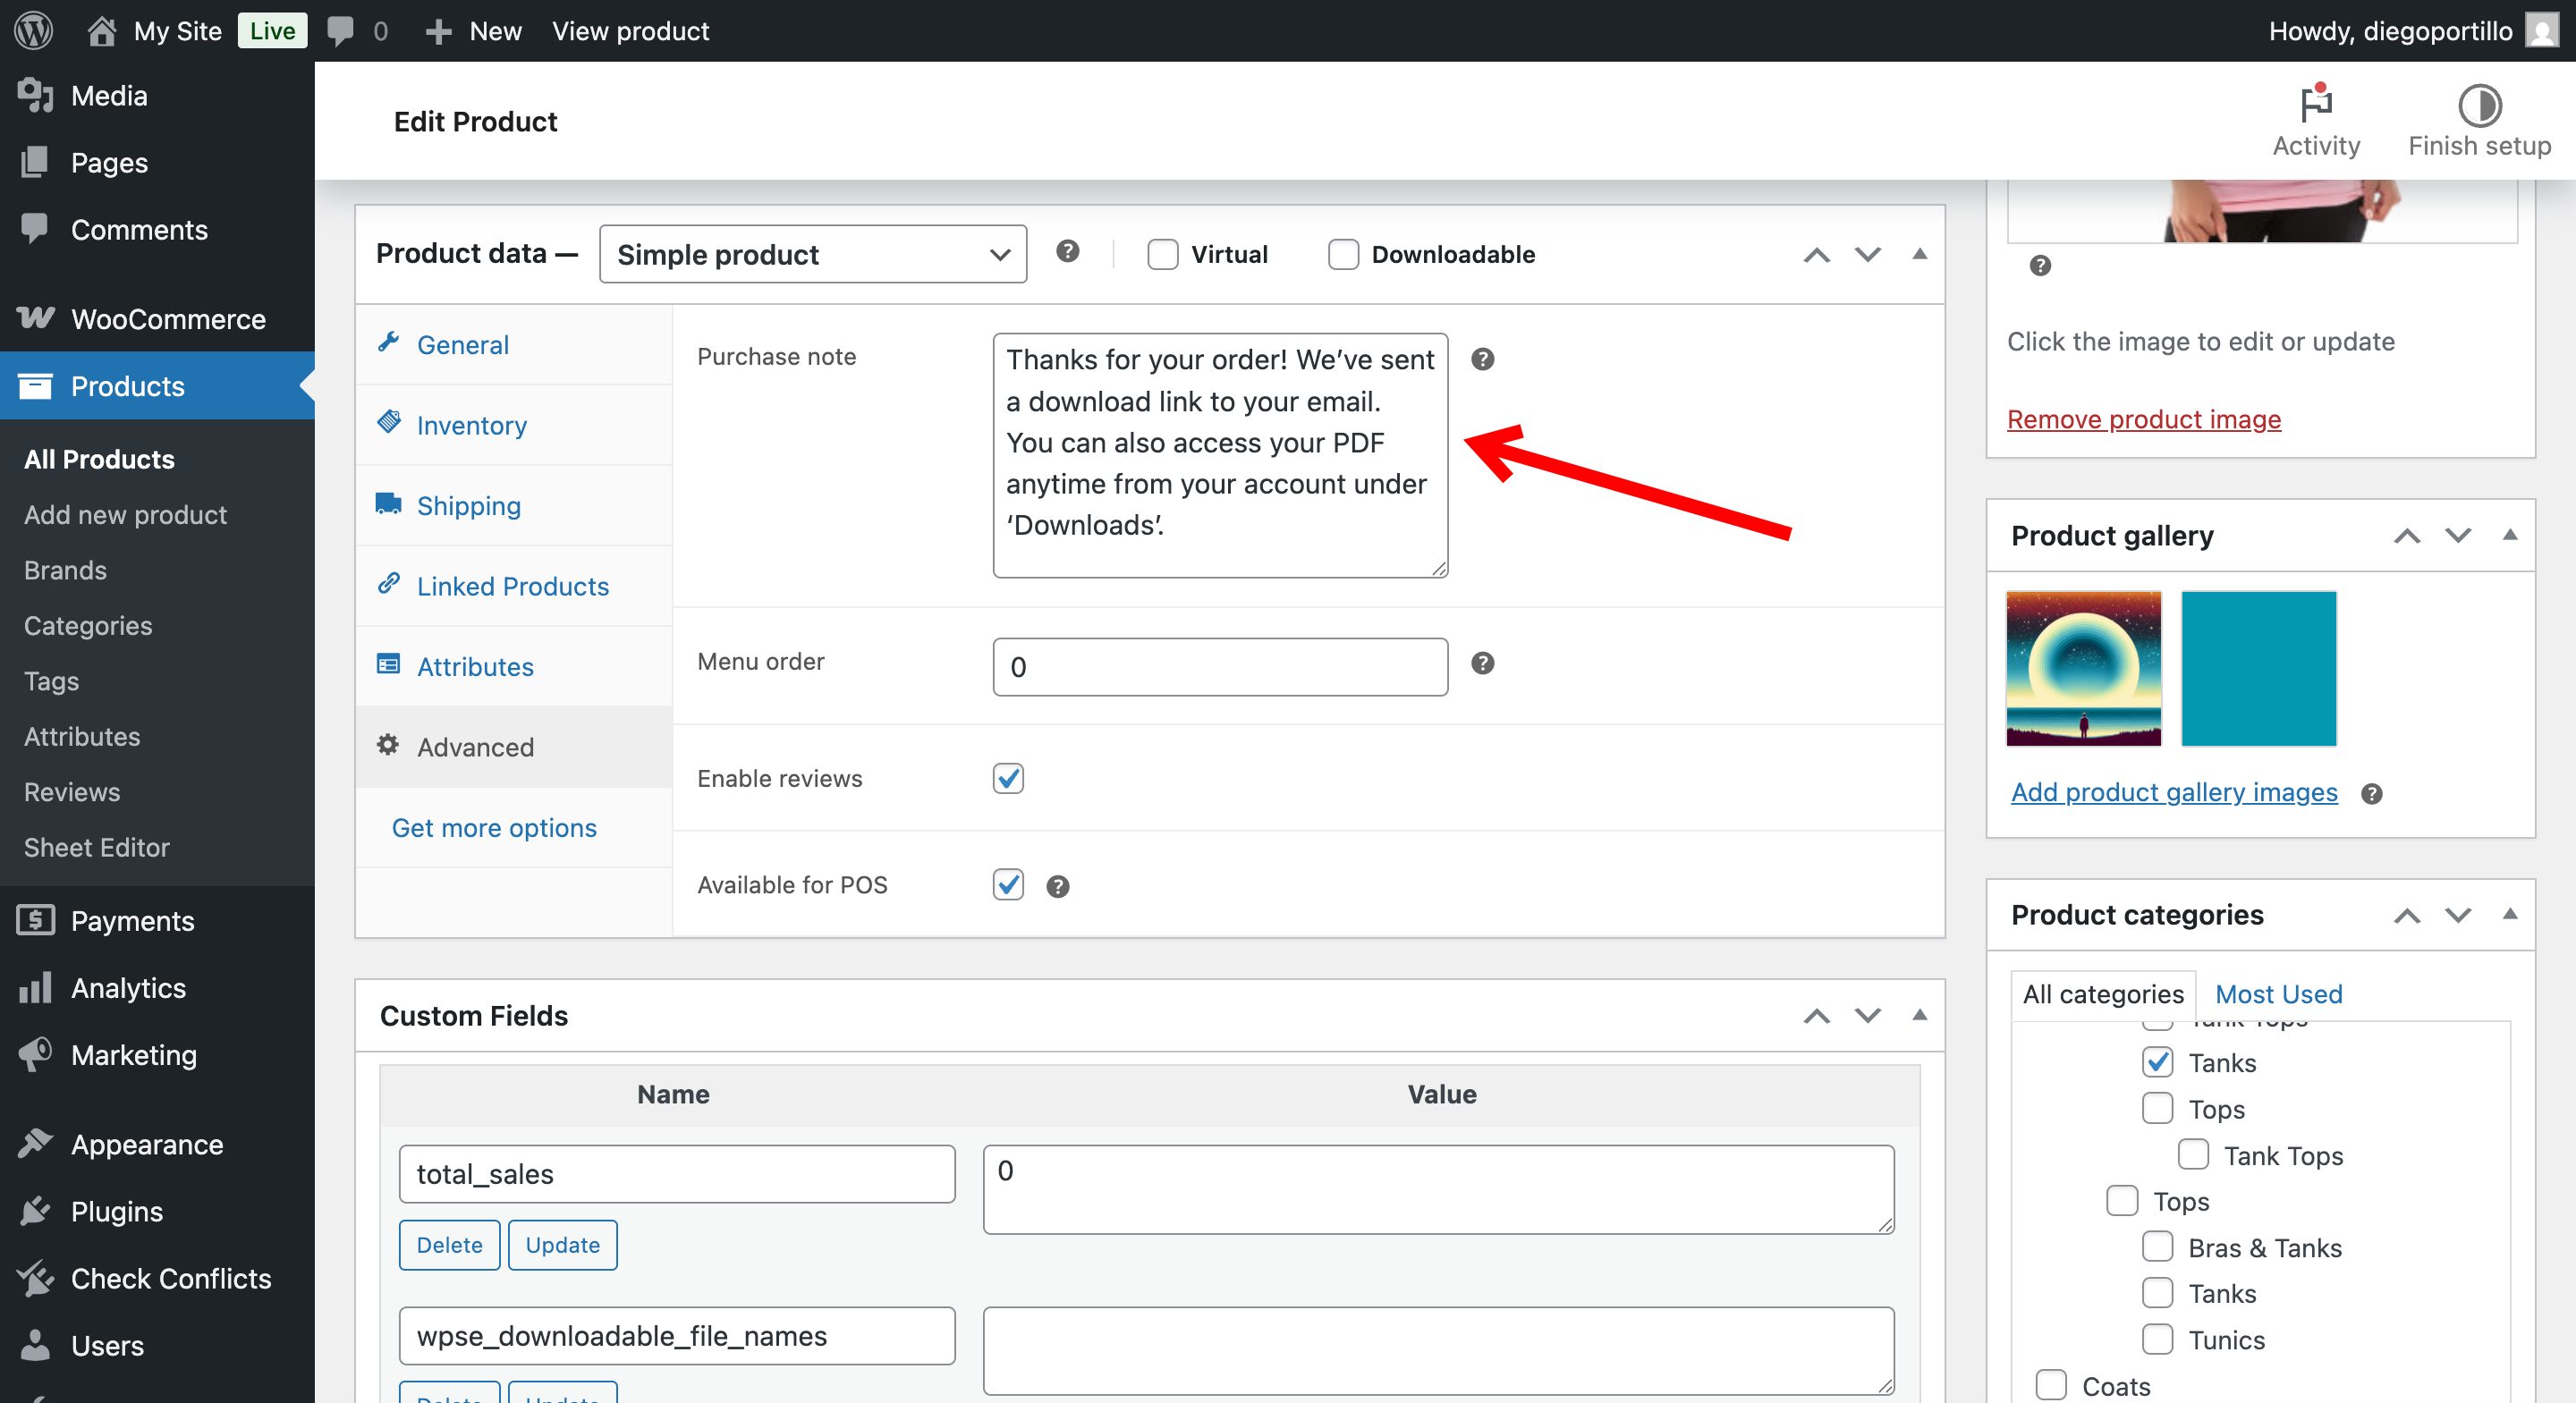
If you open products in the classic editor, you can see the products have purchase note already.
Manage your WooCommerce purchase notes in Google Sheets
Adding custom purchase instructions doesn’t have to be a slow, manual process. By integrating your store with Google Sheets, you can audit your automated messages, add links to digital assets, and update instructions for hundreds of products with complete efficiency. Using WP Sheet Editor and the Google Sheets Sync service eliminates manual data entry, making large-scale store management simple.