Are you looking for a fast way to combine simple WooCommerce products into a variable product without losing your existing sales data or breaking your store’s URLs?
When many store owners first start their e-commerce journey, they often create variations of a product as entirely separate simple products. For example, you might have created “Small Nike Shirt,” “Medium Nike Shirt,” and “Large Nike Shirt” as three individual listings.
As your store grows, this approach heavily clutters your shop page, hurts user experience, and damages your SEO due to keyword cannibalization. Customers have to open several different product pages just to find the size or color they want.
The best solution is to merge these simple products into one variable product. By grouping them into a single “Nike Shirts” parent product, customers can simply select their preferred variation from a dropdown menu on a single product page.
The Challenge: Converting Simple to Variable in Default WooCommerce
In default WooCommerce, there is no easy way to merge simple products. You usually have to delete your existing simple products, create a brand new variable product, and generate new variations from scratch. This process is disastrous because it destroys your existing Product IDs, wipes out past order history connections, and breaks existing URLs (causing 404 errors).
To safely convert simple products into variations and combine them under a single variable product, we will use the WP Sheet Editor – WooCommerce Products plugin.
This powerful tool displays your entire catalog in an intuitive spreadsheet, allowing you to quickly change product post types, reassign parent products, and update attributes in bulk—all while preserving your original Product IDs and order history!
You can download the plugin here:
Download WooCommerce Products Spreadsheet Plugin - or - Check the features
Once you have the plugin installed and activated, follow these simple steps to merge your products:
Step 1: Create Global Attributes for the Products
Before you can group simple products together, WooCommerce needs to know how they are related. You need to create global product attributes (like Color, Size, Material, etc.).
Simply navigate to Products > Attributes in your WordPress dashboard and create them. For our example, we are merging t-shirts, so we have created a “Color” attribute with three terms: Black, White, and Red.

Step 2: Open the WooCommerce Products Spreadsheet
Next, open the bulk editing interface by going to WP Sheet Editor > Edit Products.
You will see all your WooCommerce products and their complete underlying data (price, stock, post type, categories) displayed in a fast, easy-to-read spreadsheet.

Step 3: Create a New Parent Variable Product
In this example, we want to merge these three separate simple products into one cohesive variable product:
- Black Shirt – Nike
- White Shirt – Nike
- Red Shirt – Nike

First, we need to create the main “container” for these items. On the spreadsheet toolbar, select the number of rows you want to create (1) and click on Add New. This will generate a blank row that we will configure as our new parent variable product.
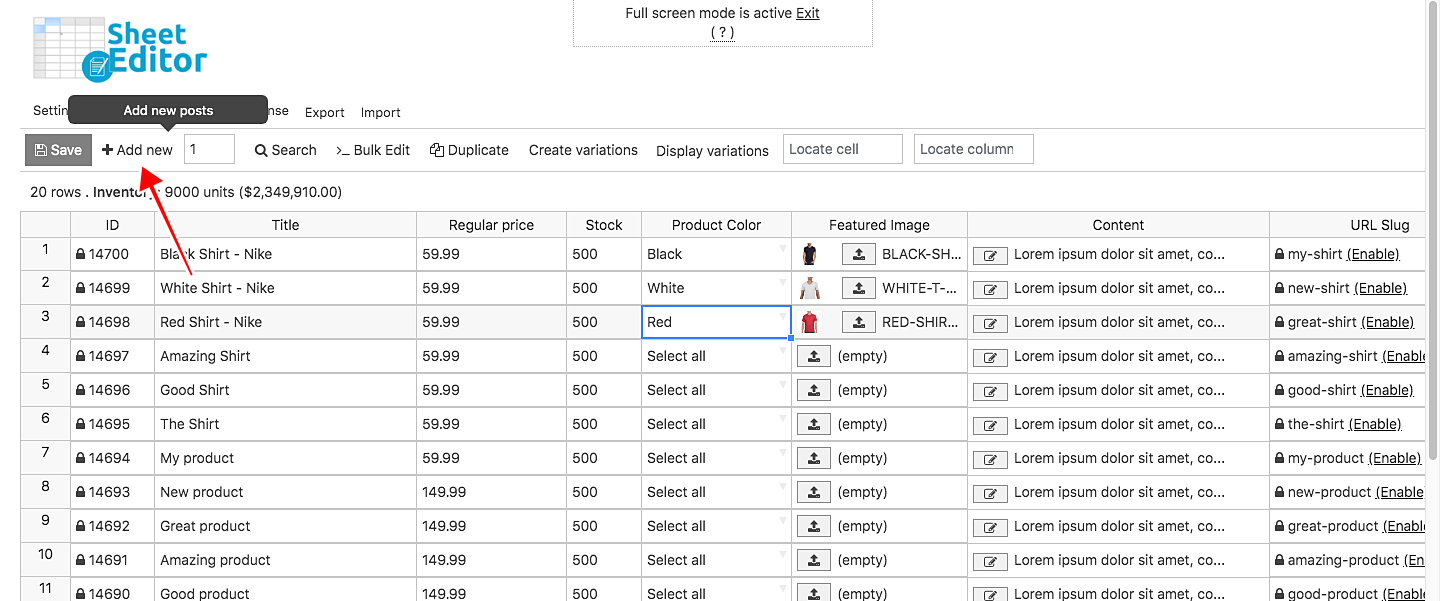
We’ll name this new parent product Nike Shirts.
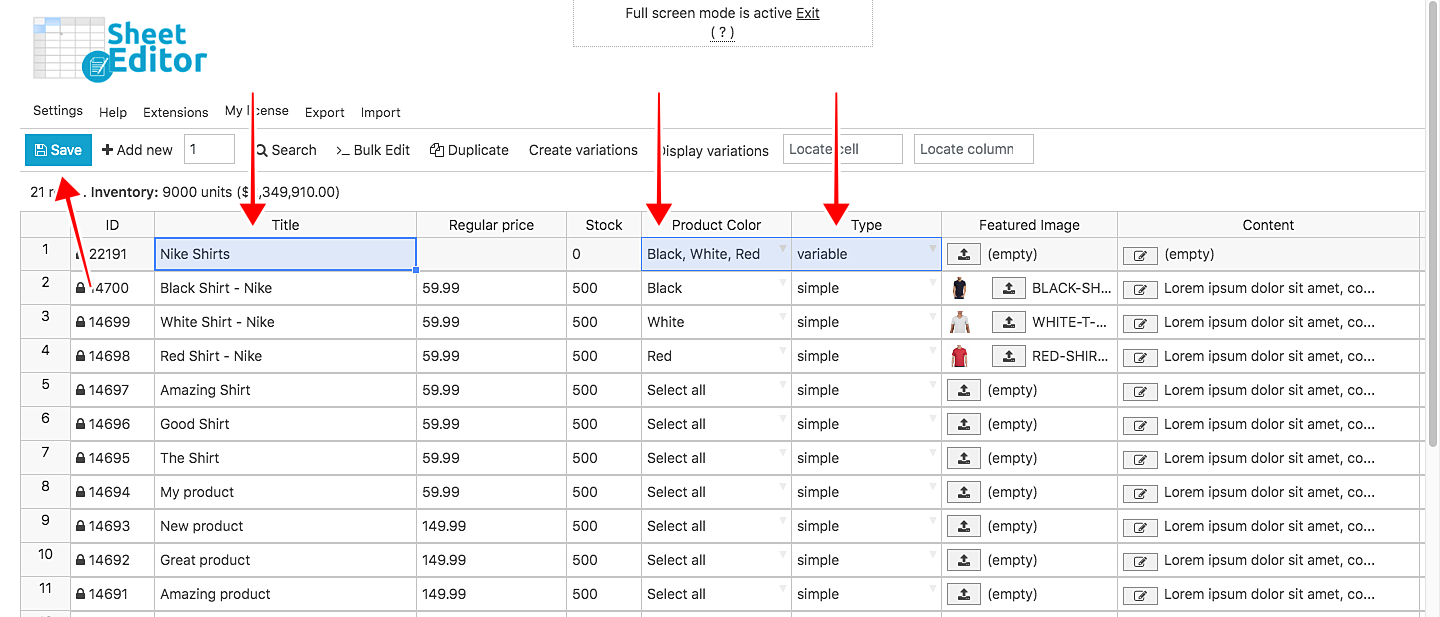
Now, fill in the following columns for this new row:
- Type: Type
variable - Product Color: Enter the attributes it will contain (e.g.,
Black, White, Red) - Click on Save on the top toolbar to register this new parent product in your database.
Step 4: Convert and Merge Simple Products into Variations
Now comes the magic. To convert your original simple products into child variations, you simply need to change their WordPress “Post Type,” assign them to your new parent product, and specify their respective attributes.
NOTE: Keep in mind that once converted, these specific items will no longer appear as standalone simple products on your shop page. Instead, they will act as selectable options inside the parent product. Because we are changing their post type rather than duplicating them, they keep their original IDs, stock history, and order data!

Find your three original simple products in the spreadsheet and update the following columns for each:
- Post Type: Change this from
producttoproduct_variation - Page Parent: Paste the exact title of your new parent product. In this case, type Nike Shirts.
- Product Color: Enter the specific color for each individual variation (e.g., Black for the black shirt, White for the white shirt).
- Click on Save to apply the changes and merge the products.
Bonus: How to Transfer Variations From One Parent Product to Another
Sometimes you don’t need to convert simple products; you just need to move existing variations from an old parent product to a new one. WP Sheet Editor makes it incredibly easy to migrate variations individually or in bulk.
Before moving any variations, go to the Product attributes column in the spreadsheet and double-check that your destination parent product actually possesses the attributes of the variations you are transferring.

Check if the “Used for variation?” option is enabled. If it isn’t, simply add the attributes and enable them for variations.

You can also find and edit the attribute columns directly in the spreadsheet, such as the “Product color” or “Product size” columns.

Method A: Move variations individually using the spreadsheet
To individually move variations from one parent product to another, locate the target variations in the spreadsheet, scroll to the Page parent column, and type in the name of the new parent product. Finally, hit Save.

Method B: Move variations between parent products in bulk
If you want to migrate dozens of existing variations to a new parent product simultaneously, select the variations using the checkbox column on the left side of the spreadsheet, and then open the Bulk Edit tool.

Once the Bulk Edit popup is open, configure the following values to execute the transfer:

- Select the rows that you want to update: Edit the rows that I selected manually in the spreadsheet.
- What field do you want to edit: Page parent
- Select type of edit: Set value
- Replace existing value with this value: Enter the name of the new parent product.
- Select Edit only variations.
- Click on Execute now.
After running the bulk edit, the selected variations will be re-assigned and will now belong to their new parent product.

Optional: Set the Variation Price, SKU, and Manage Stock
When you combine simple products into variations using WP Sheet Editor, the new variations will seamlessly continue using their old stock quantities, prices, SKUs, and featured images from before the conversion.
However, if you wish to adjust this data, you can simply type directly into the spreadsheet cells to enable stock management, update SKUs, or change regular and sale prices. Once adjusted, click Save to apply the changes.

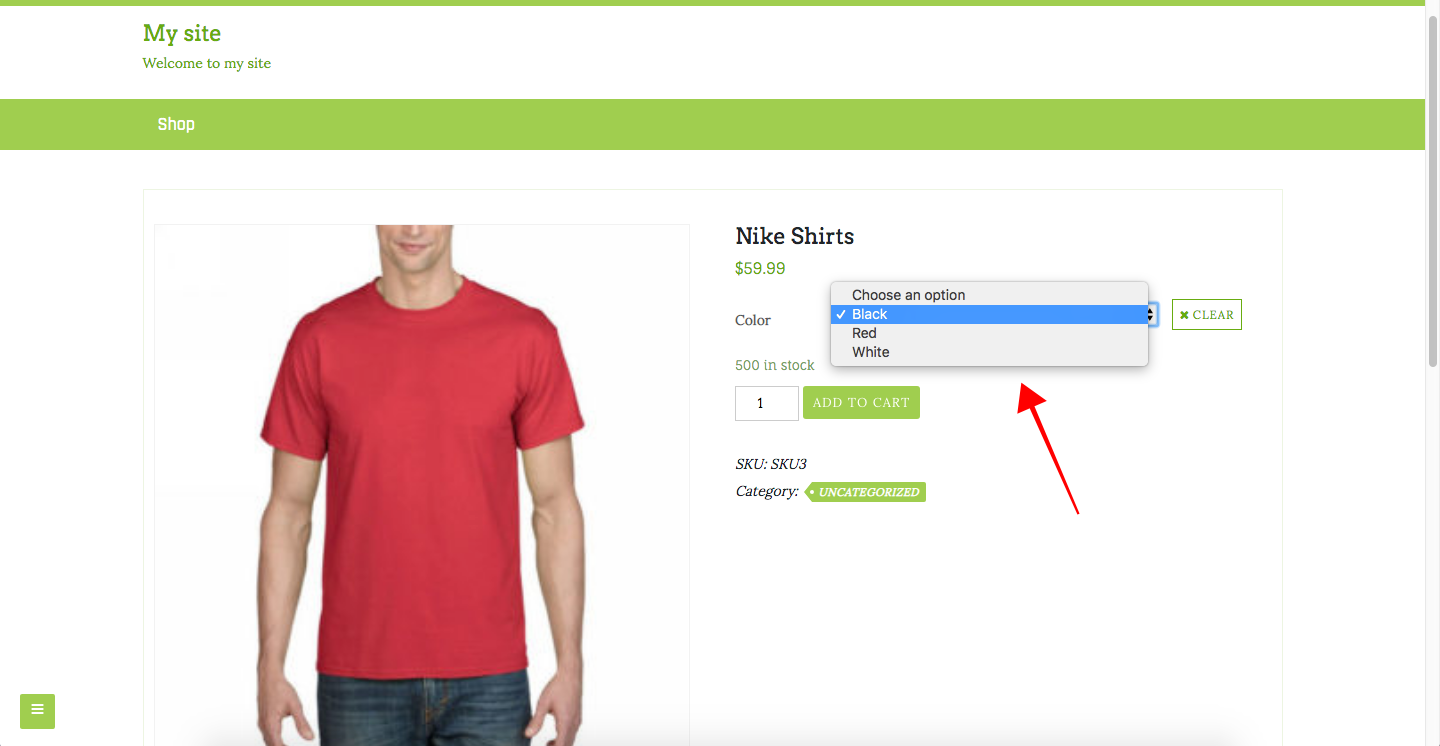
Once you save the changes, click the Display variations button on the top toolbar to reload the spreadsheet. You will now see your newly converted variations neatly grouped and nested directly beneath their new parent product.

And here is the final result! This is exactly how your customers will now see the unified Nike Shirts product on your WooCommerce storefront—clean, organized, and easy to shop.
Simplify Your Catalog with WP Sheet Editor
Thank you for taking the time to read our guide on how to combine simple WooCommerce products to create a variable product. By grouping simple items, you eliminate shop page clutter, prevent keyword cannibalization, and significantly improve your consumers’ purchasing experience.
Instead of manually deleting and recreating products—and losing your valuable sales data in the process—start optimizing your WooCommerce catalog seamlessly with WP Sheet Editor today.
You can download the plugin here:
Download WooCommerce Products Spreadsheet Plugin - or - Check the features